Table of Contents
Shopify access requirements
The cloud AI automatic translation to be used with Shopify requires some access to complete the setup:
- Shopify admin access
- Domain DNS modification access
The Shopify setup is composed of 3 simple steps that you can do directly from the native app:
- Register your domain to authorize the translation
- Modify the domain DNS according to the translation languages (automatic mode available).
- Add the language flag switcher link to your Shopify theme (automatic).
How to make your Shopify site multilingual in video
Language selection in the Shopify app
After you’ve installed the Linguise Shopify app, you’ll need to register your domain to authorize the translation and generate the multilingual URLs. No worries if you’re not too technical about domain and DNS:
- There’s an automatic mode to do it
- We can ask us, we’ll do it for you, for free
- Or you can even add the DNS manually if you feel comfortable with that
You need to install the app on your Shopify store if that’s not done already.
After the app is installed, you will be asked to select your original language and target languages (translations).

SEO important note: The number of languages you setup has a large impact on SEO. When you setup your translation languages, if you have a large amount of indexed pages (>500), search engine may take a lot of time to process them. It may impact your SEO in your original language. That’s why we recommend adding at first a maximum of 5 languages, then when it’s indexed, you can add languages in a batch of 3 per month.
Modify the domain DNS according to the languages
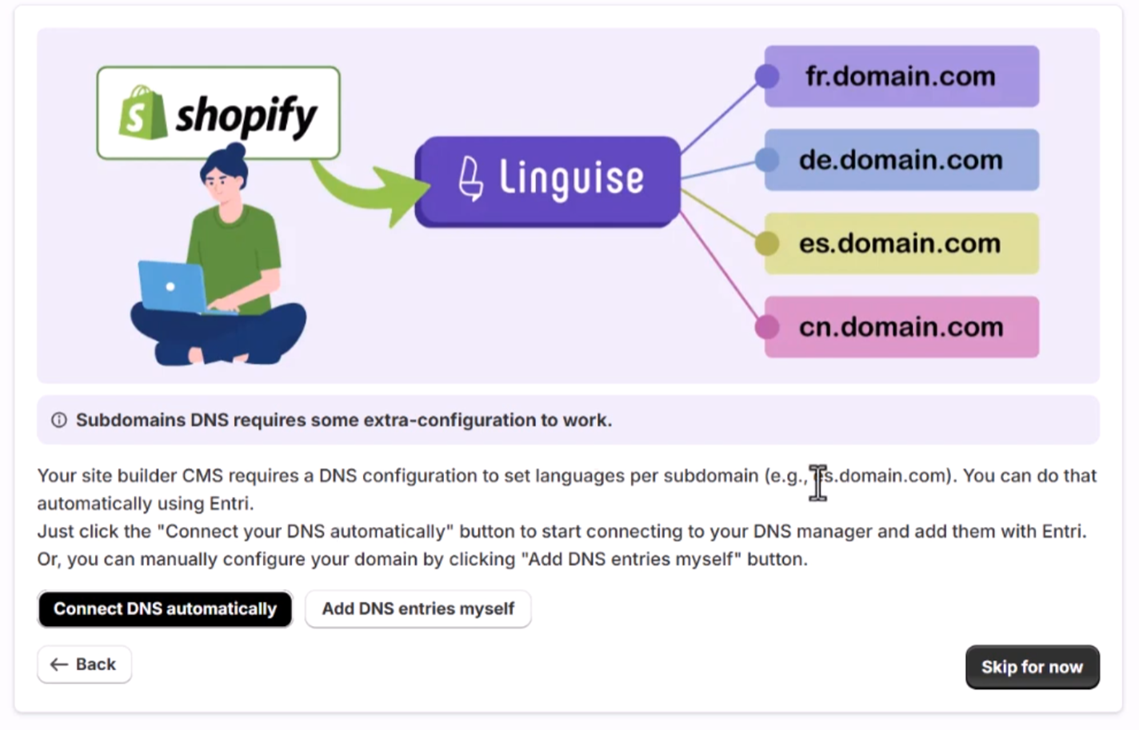
Option 1: Automatically add domain DNS using Entri
You should probably see this content, If you prefer to automatically add the DNS records, you can click on “Connect your DNS automatically.” This feature, called Entri, will automatically add your DNS records, allowing you to proceed with the installation easily. The other option is to manually copy the DNS in your domain provider.
After clicking the button, Entri will analyze your registered website URL and check your public DNS record. Based on that, it will determine the provider and the DNS that are required.
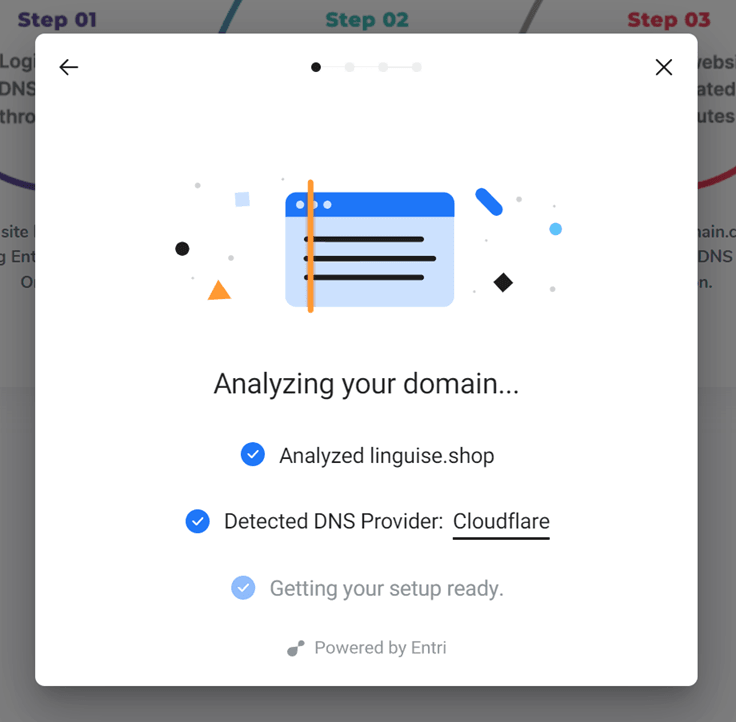
Next, you can click on “Authorize with [your domain provider]” (in this example, it’s Cloudflare). You will then see the panel changing into your domain provider’s login page, where you can log in and continue.

After you log in into your domain provider, Entri will do the rest, automatically adding the proper DNS records. One DNS per language + one TXT DNS for the validation key.
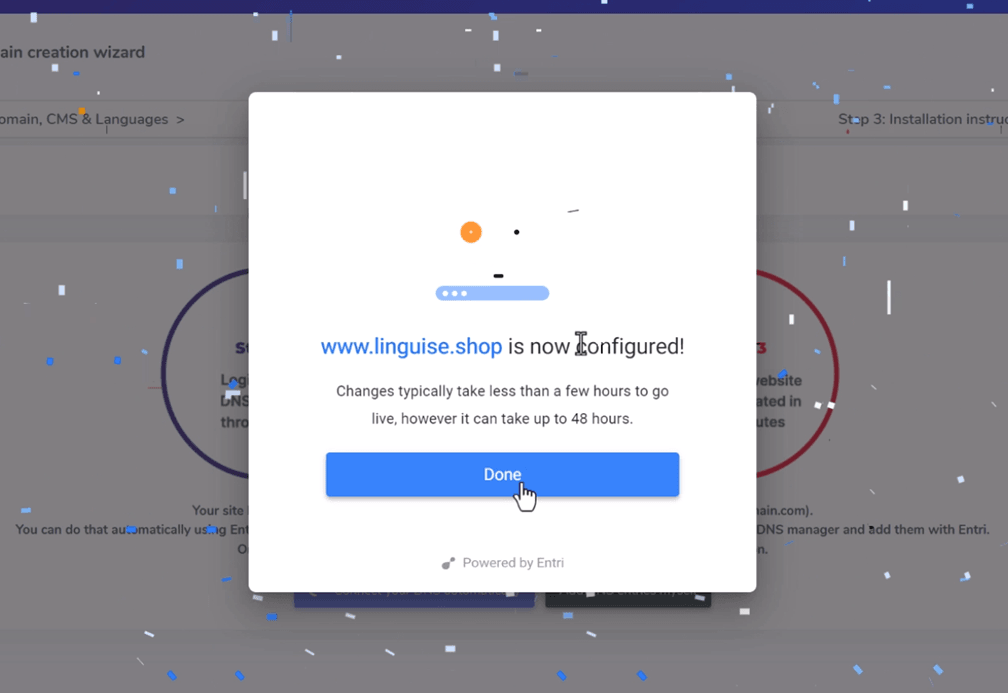
You should be able to see that DNS is added within your domain. For example:
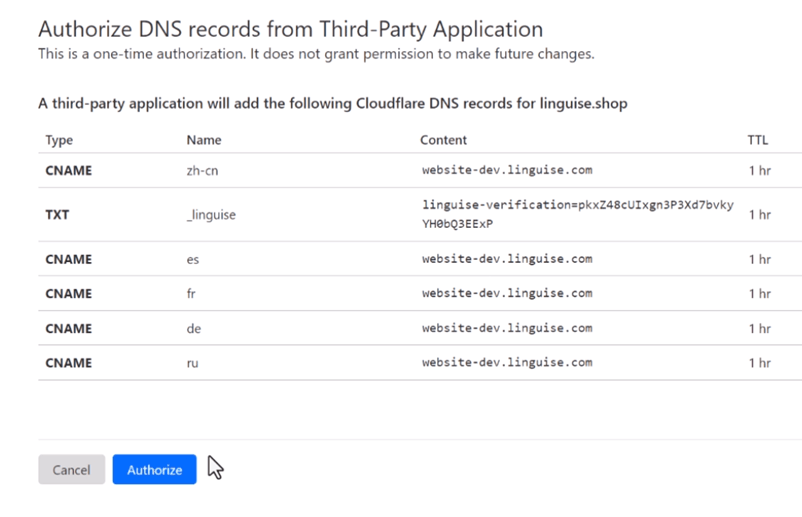
Once you have authorized it, Entri will notify you that all DNS settings have been configured successfully.
You should be able to use the translation feature as soon as all the DNS entries have been propagated on your domain (usually takes 20/30 minutes).
If you prefer Manual Installation, you can also do this manually by following the steps that we will provide below.
Option 2: Copy the DNS records manually
After you’ve validated your domain, you’ll be redirected to a screen where the DNS to add to your domain are ready to be copied. Depending on your hosting company, the domain setup can look a bit different, but the fields names are quite standard. These records are required to load your website’s multilingual pages as fr.domain.com, es.domain.com…
Here are the main elements.
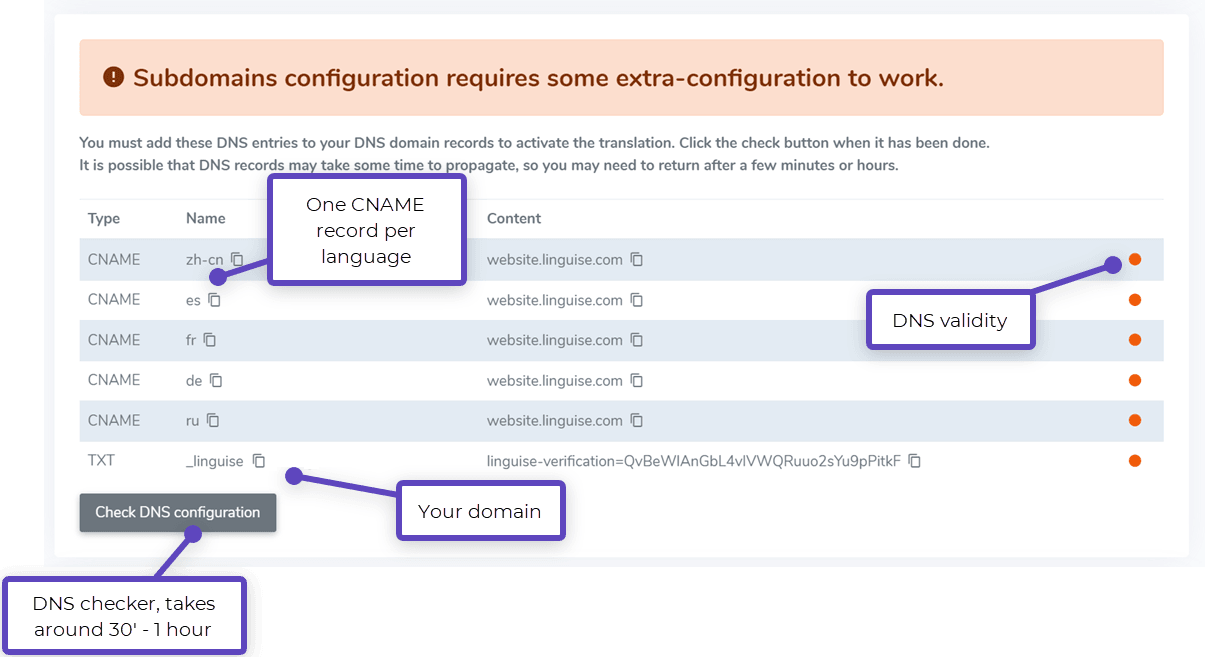
After that, you need to connect to your domain manager and access the DNS setup area. Then following the instructions, you can copy:
- One TXT record for the domain verification
- One or several CNAME records for the languages
Here’s an example for each record type (TXT and CNAME):
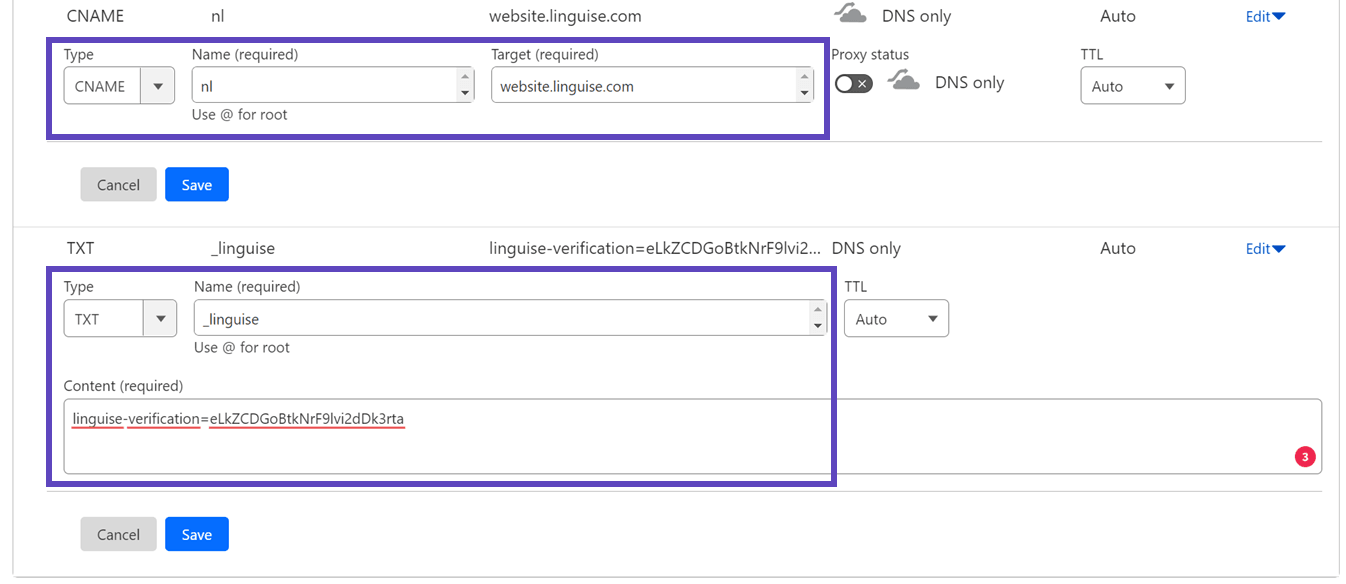
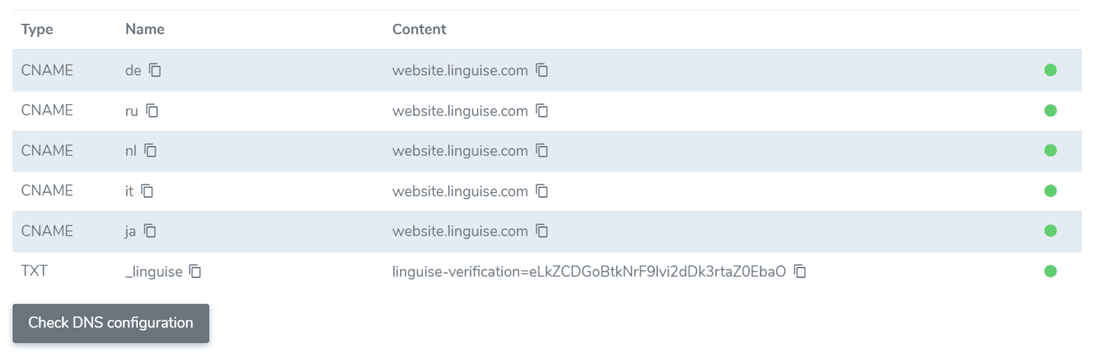
After adding all your records, your configuration should look like that.
Specific DNS Configuration on Shopify domain
On Shopify, you have the capability to manage your DNS configuration within the Shopify platform.
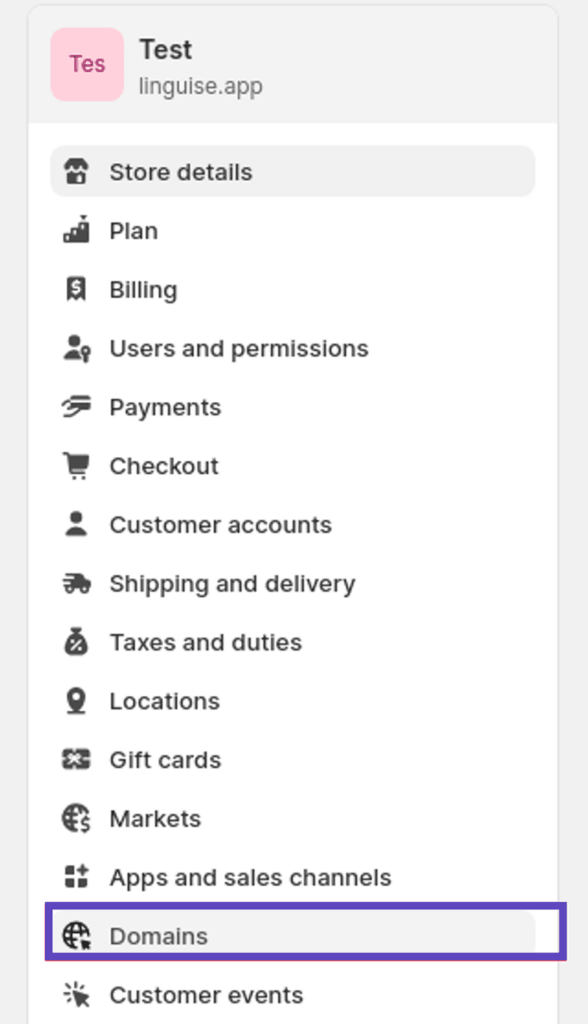
Specifically, you can access and modify DNS settings through your Shopify settings by navigating to ‘Domains‘. Within this section, you can both add and edit your DNS configurations as needed.
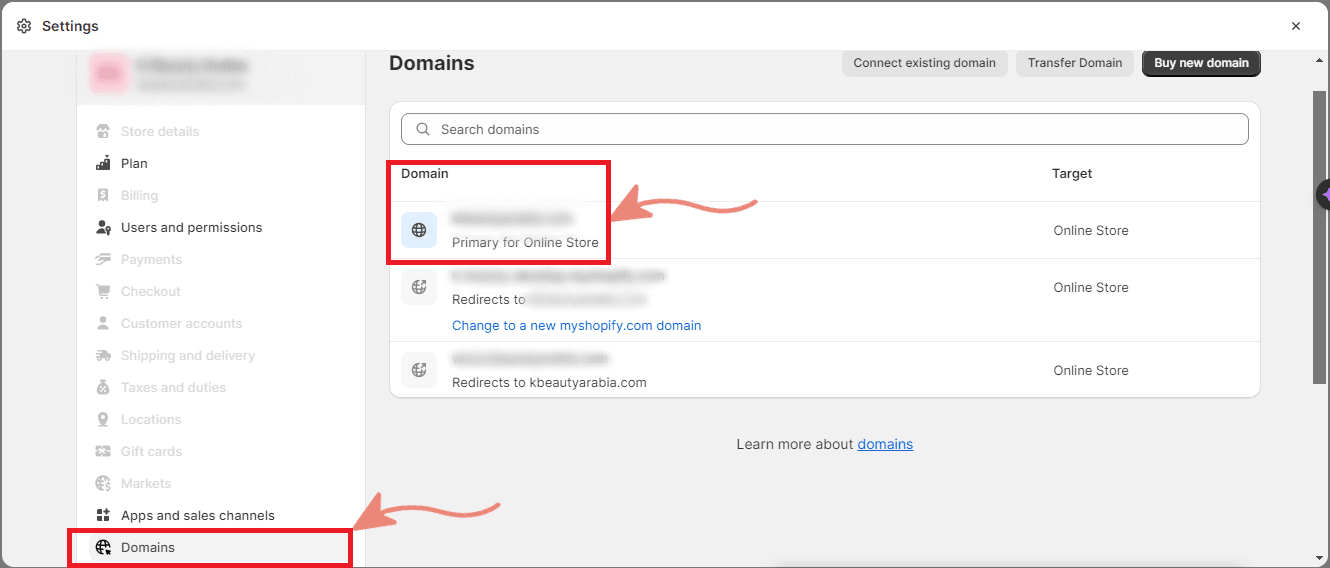
After that, you can select your Primary website, and on the top-right corner, you will find the option labeled ‘Domain settings‘.
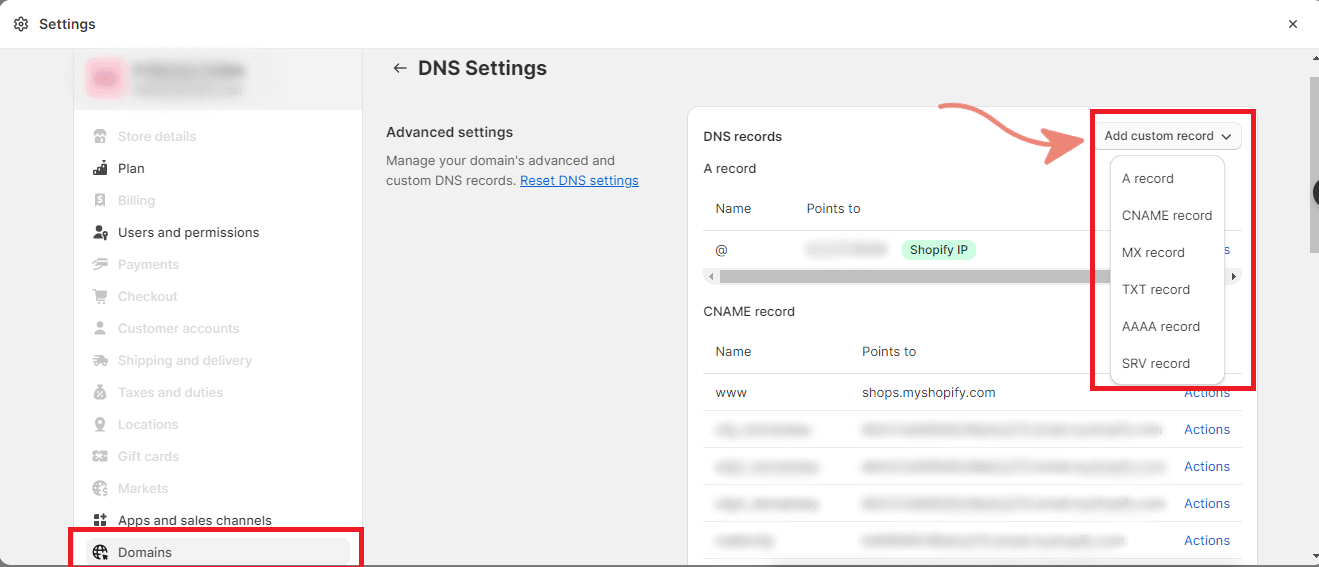
By clicking on this option, you will gain access to ‘Edit DNS settings,’ where you can proceed to add a new DNS record. You can add the CNAME and TXT records.
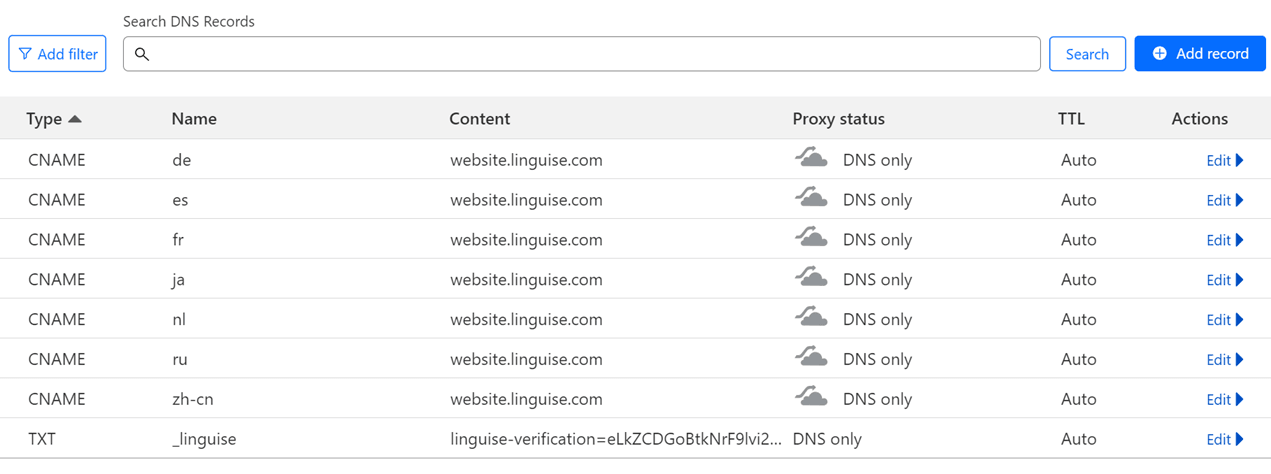
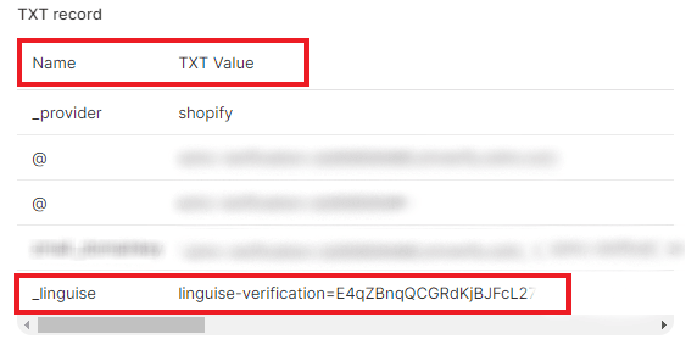
Finally, your CNAME and TXT records should appear as following image:
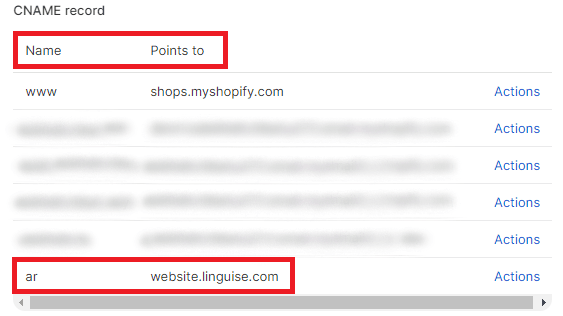
It’s important to notes that Shopify have a rules itself for adding the DNS Configuration. Make sure you follow the steps before.
- When setting up a CNAME record, ensure that the name is the language for translation
- When setting up a TXT record, make sure that the name is _linguise
Shopify will read this dns record you’ve added, and it will propagated accordingly.
Set up the language switcher display options
After this step you can already start to make the setup of the language switcher (you can also change that later in the app configuration).

On the right side of the screen, you have the preview of the language switcher. Here are the elements you can setup:
- 3 layouts: side-by-side, dropdown, or popup
- The language switcher position
- The language switcher content
- Language names in English or native language
- Flags shapes and size
- Colors and box shadow
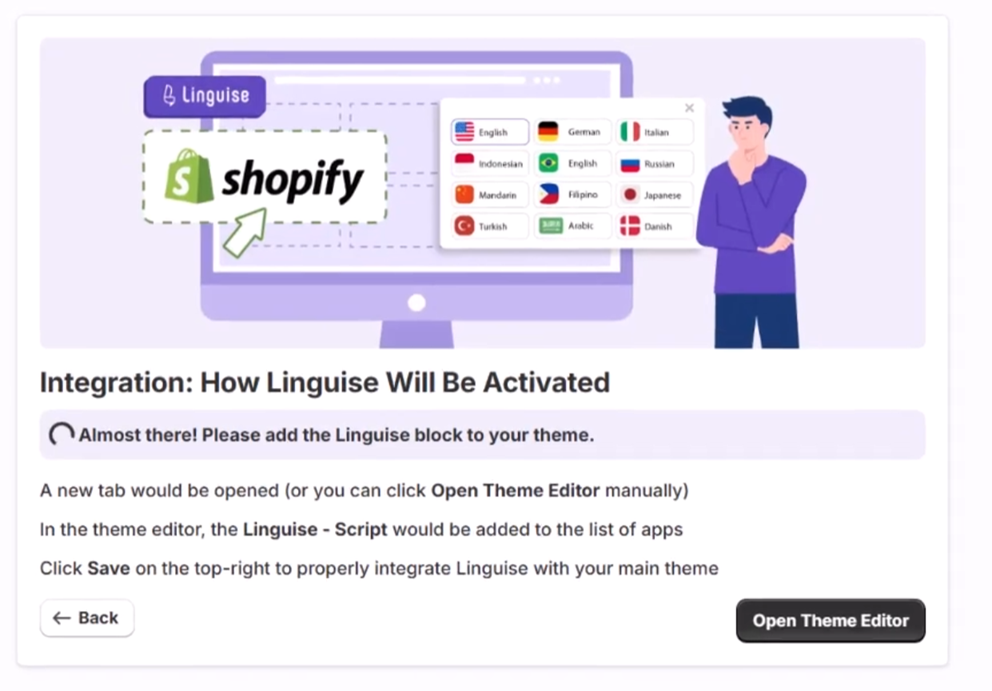
Add the language switcher to Shopify
The language switcher is the flag popup to select the language you want. To load it, you have to add a block to your Shopify theme. We made the process automatic. On step 3 of the installation, click on “Open theme editor”.
That will take you to your theme configuration where the Linguise script block has already been added.
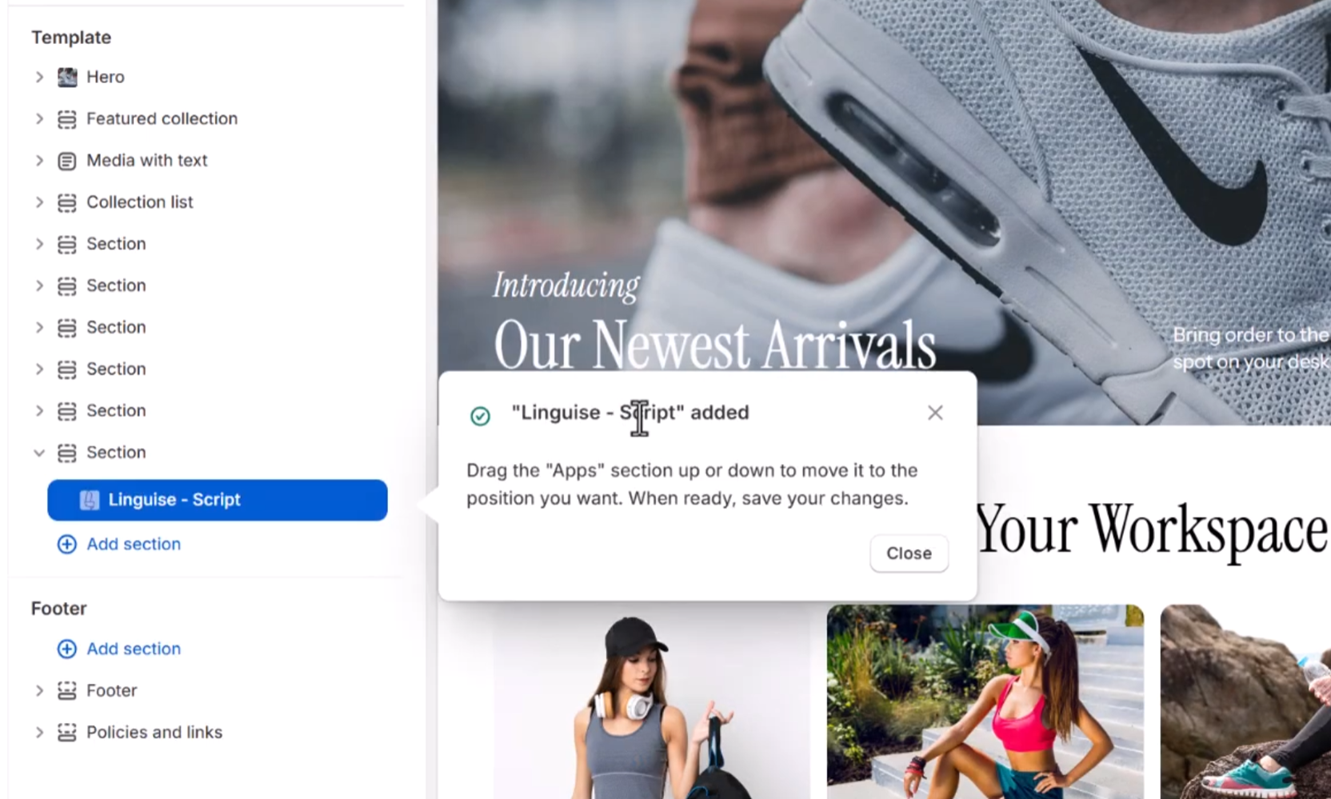
Just save your theme configuration and you can resume and finish the installation!

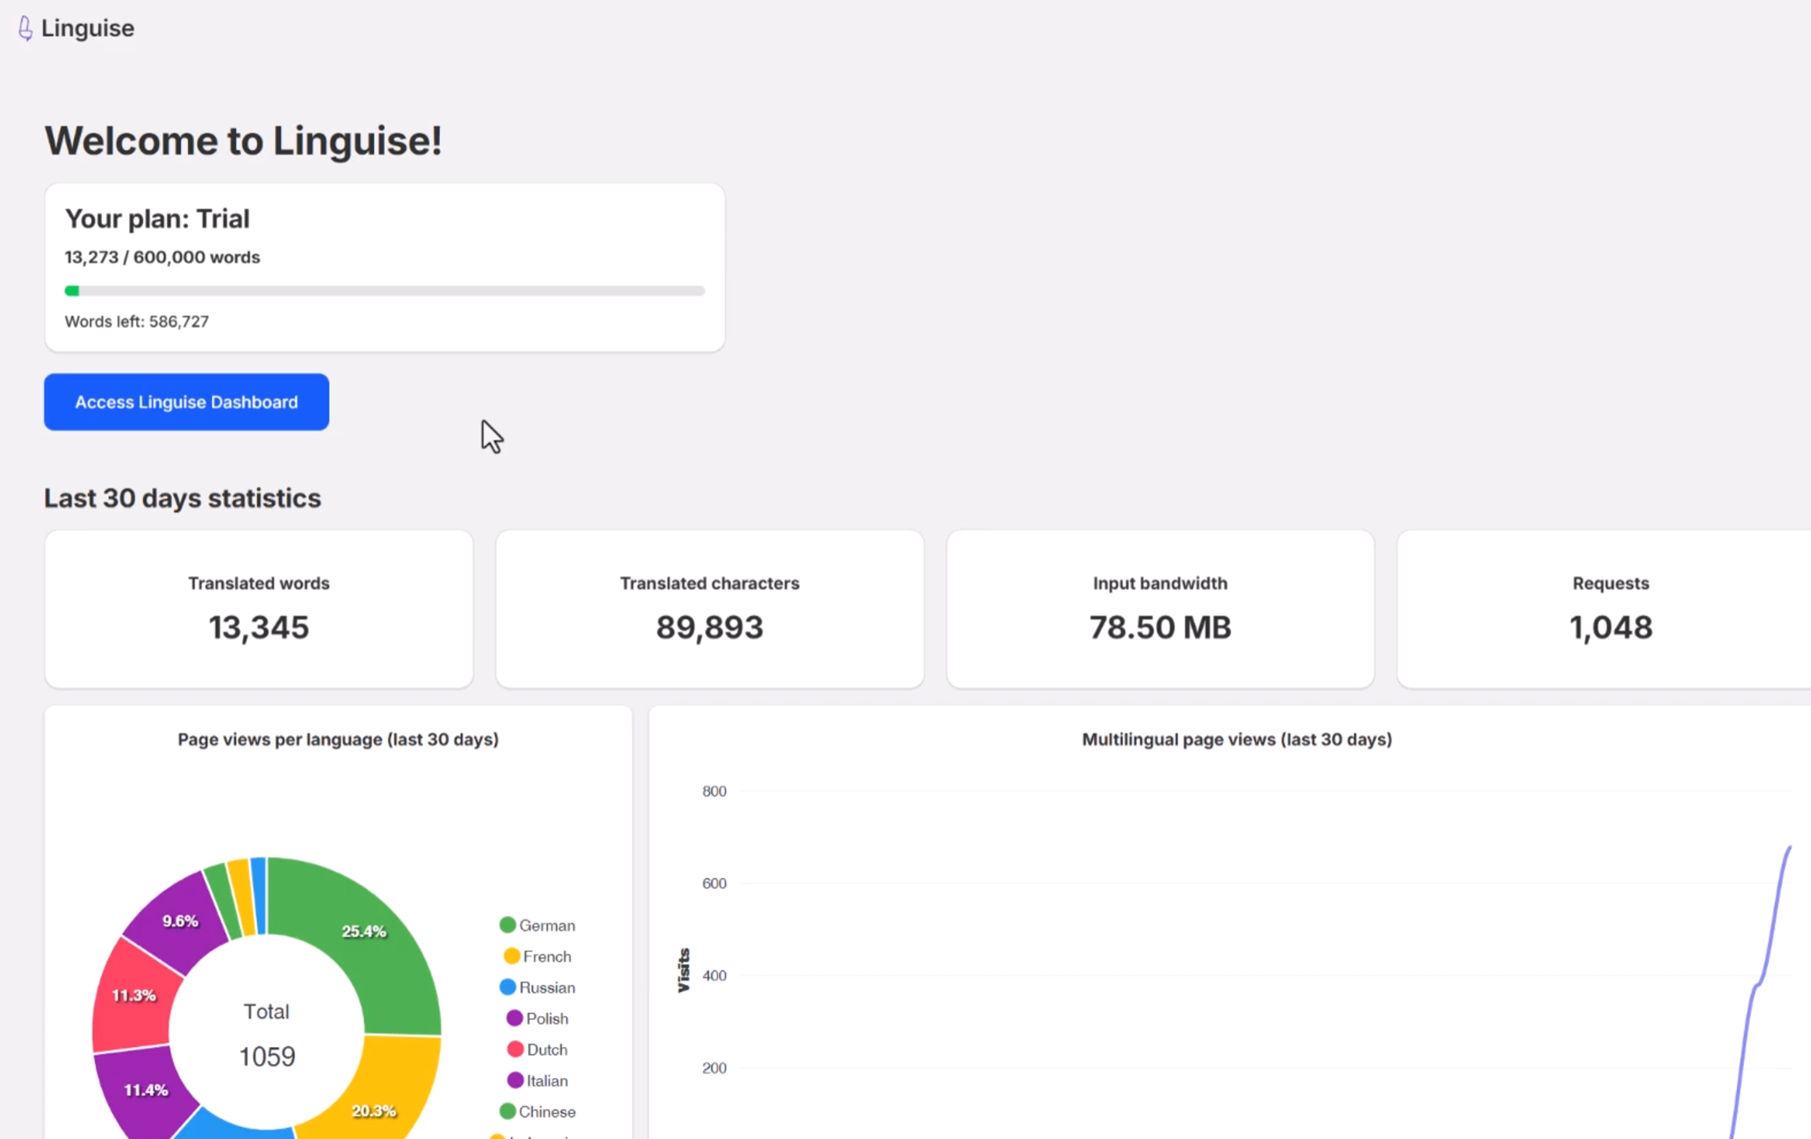
Now your app is installed, and your Shopify website is fully translated!
Linguise dashboard access from Shopify app
Linguise has a dashboard that is synchronized with the app settings and also offers advanced options like automatic translation rules or account settings.
You can find more information about the Linguise dashboard on the documentation main page. Let’s focus on the frontend editor access for now.
Frontend translation editor on Shopify
After clicking on the “Access Linguise Dashboard” button, you will be connected automatically to it.
Then click on “Live editor”, pickup a language, and launch it.
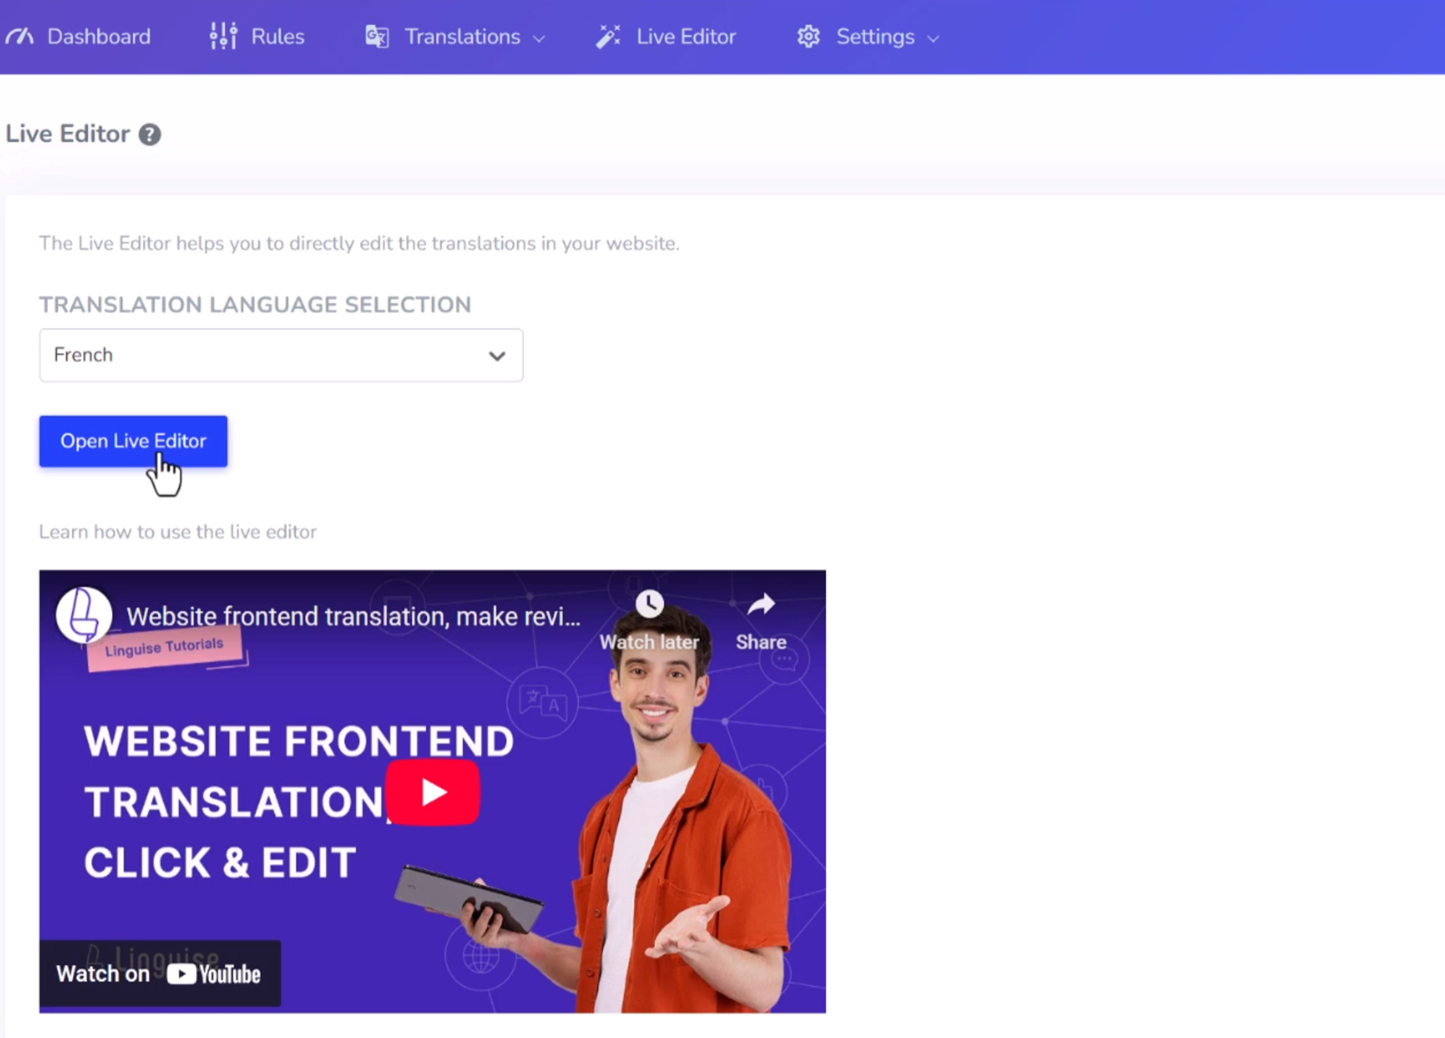
The frontend editor facilitates translators modifying any HTML content on Shopify in any language. You can edit a page by clicking on a page element and replacing the text, link, or image.
Shopify domain configuration for Google ReCAPTCHA
The Google ReCAPTCHA is a free service that is used to prevent spam, for example, in contact forms. To make it available in Shopify, you’ll need to register your multilingual subdomains in Shopify admin.
Open the store settings and the domain settings.
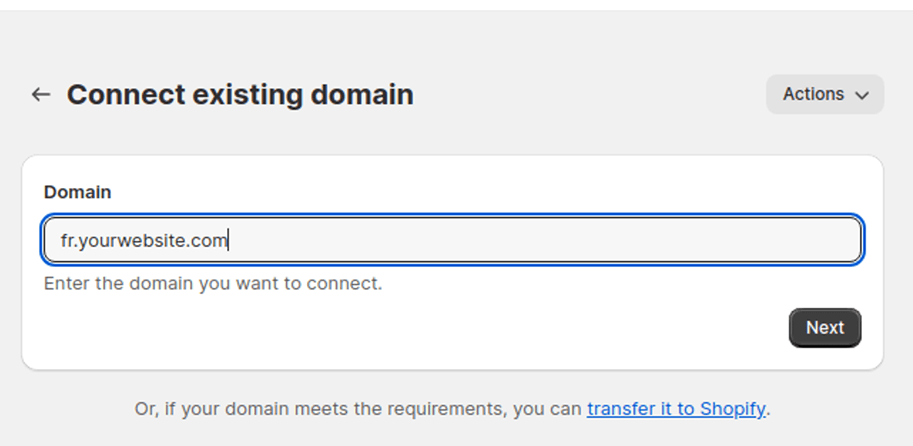
Then click on Connect existing domain
Add an existing language subdomain, for example, if you have your website in French, it will be fr.yourwebsite.com
Then click on Connect existing domain
Add an existing language subdomain, for example, if you have your website in French, it will be fr.yourwebsite.com

Fianly, add [lang].yourwebsite.com, for each translation language you had to display the reCAPTCHA on frontend.
Verify DNS validation from the dashboard
You’ve added all your records to your domain DNS during the app installation; if you have any issue with that, you can check the DNS propagation by clicking on the button Check DNS configuration.
DNS validation usually takes between 30 minutes and 1 hour. After that, you should see green dots on the right part of the DNS list in the Linguise dashboard.