A multilingual website needs to have an accurate translation according to the language’s cultural preferences. Machine translation or NMT alone often results in unnatural translations; therefore it doesn’t hurt to add a translator to your website.
So, in this article, we will discuss how to manage access for translators on your website via Linguise.
Benefit having a translator in various language on your website
Before going into how to provide access to translators, you need to know that there are several benefits when you have a translator for each language you have, including the following.
- Higher quality of translation: translators can provide more accurate and high-quality translations. They have a deep understanding of the target language and can pick up on cultural and contextual nuances that machines cannot.
- Better maintenance and revision: You can collaborate directly with translators to ensure the accuracy and suitability of content for the target language, and change or improve translations as needed.
- Smoother communication: Translators can assist in interpreting messages correctly and avoiding misunderstandings that may occur in the translation process.
- Better Cultural Adaptability: Translators have a deeper understanding of the culture and local norms of the target language. This allows them to make appropriate translation adjustments to suit the relevant cultural context.
- Broader Customization Support: Translators can provide broader customization support, for specialized or technical content to ensure that complex or specialized information is properly expressed in the target language.
- More Personal Service: You can build a more personal and lasting relationship with them. This allows for closer collaboration, a better understanding of your brand needs and preferences, and the ability to produce translations that match your brand’s style and voice.
Linguise pricing for websites multilingual in various language
Linguise is a website translation service that has the feature of adding or inviting translators for each language to translate or edit existing automatic translations.
With 85 languages provided by Linguise, you can add translators for each language that you previously selected. Then how much does the Linguise service cost in order to be able to invite new members as translators?
As you can see below, Linguise is available in 3 packages, namely START, PRO, and LARGE.
Some things that distinguish the three packages are the number of words translated and page views. For the number of languages accessed, all packages offer unlimited language use.
So you don’t need to worry if you want to add various translators for each language.
START
- INCLUDED IN 1st MONTH FREE TRIAL
- 200 000 translated words
- Unlimited translated page views
- Unlimited languages
- 10% OFF compared to monthly prices
- 1 website per plan with one month free
PRO
- INCLUDED IN 1st MONTH FREE TRIAL
- 600 000 translated words
- Unlimited translated page views
- Unlimited languages
- 10% OFF compared to monthly prices
- 1 website per plan with one month free
LARGE
- REGISTER & SUBSCRIBE
- UNLIMITED translated words
- Unlimited translated page views
- Unlimited languages
- 10% OFF compared to monthly prices
- 1 website per plan with one month free
Filter translation by languages
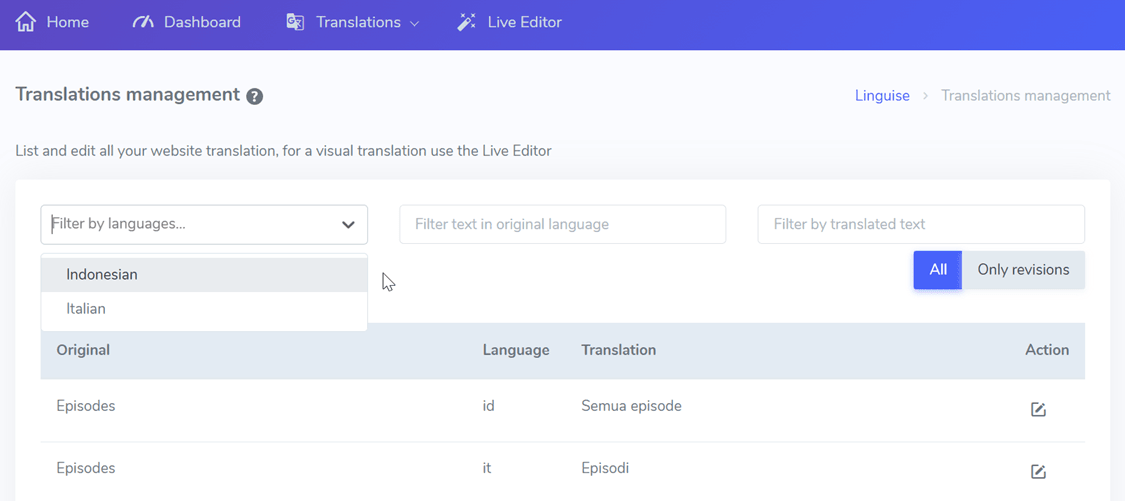
One of the features in Linguise that makes it easier for you to view edited translations is a filter based on language. Here you can choose which language you want to see the modified translation results in.
The trick is to enter the Linguise dashboard > Translations > Translations > choose language > click Only revisions. In the following display, we will try to filter out the modifications that have occurred in Indonesian translations.
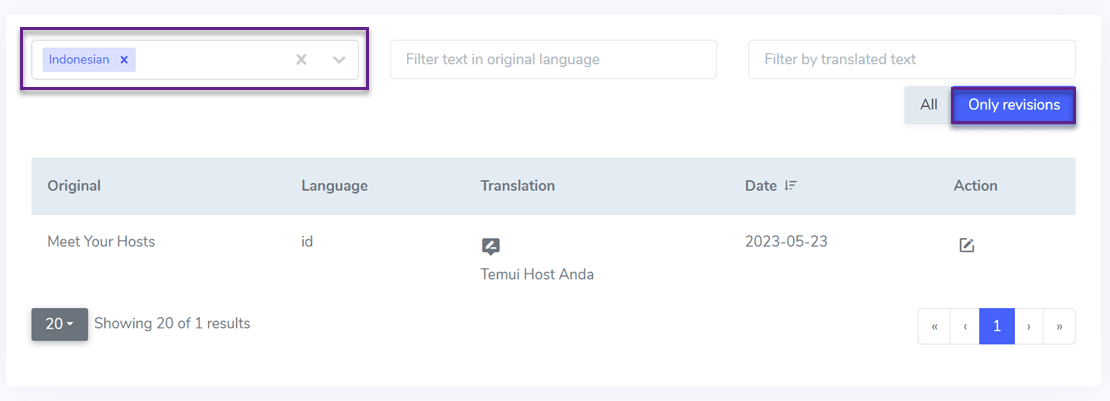
Besides seeing the modifications, you can also find out the date when the modification was made.
Different account types in Linguise
Linguise offers several different types of accounts, each of which has different access rights. Differences in accounts on Linguise will also be related to how to setup access for translators on your website.
The admin
Besides seeing the modifications, you can also find out the date when the modification was made.
- The language backend edition.
- Translation rules.
- Live editor.
- Domain configuration.
- Billing.
The manager
The manager here means the person who manages the language, he has all access related to the translated content, including things like.
- The language backend edition
- Translation rules
- Live editor
- Access to all available languages
What distinguishes between admin and manager language is that the manager does not have access to manage domain configuration and billing.
The translator
Account type translators can only access the content to be translated, other than that, access to domain configuration and assignment is also not given to translators. Here are some accesses that translators can make.
- The live editor only
- He has access only to the languages the admin has selected
How to share access for translators
Now we’ll get into how to set up access for translators on your website. To be able to provide access, we must first add the translator as a new member.
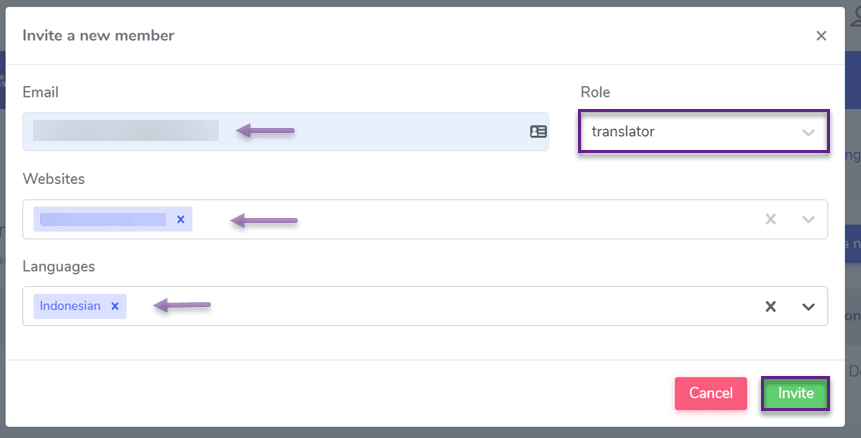
The trick is to open the Linguise dashboard > Members > Invite new members. Then fill in some fields like below. Such as.
- Email: enter the member’s email
- Role: set the role for that member e.g. translator.
- Website: the site that the member will translate.
- Language: the language the translator will translate.
Then click Invite.
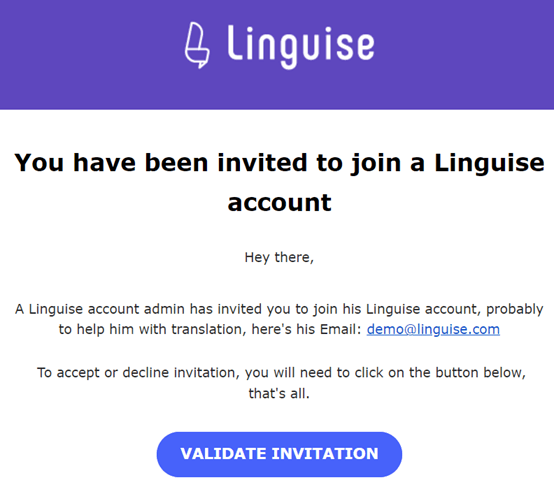
Then, to receive the invitation, members must check email. If there is an incoming email, it must validate by clicking Validate Invitation as shown in the following image.
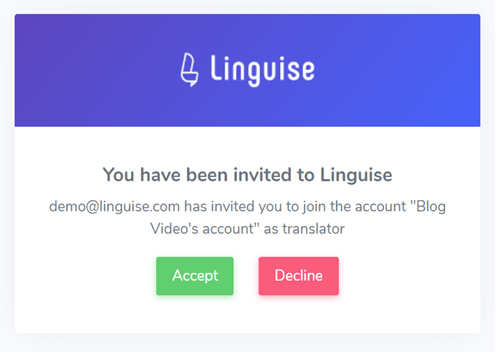
After that you will be asked to accept the invitation by clicking Accept.
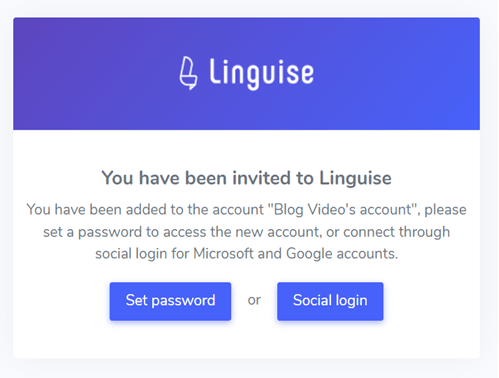
If so, set a password or log in using a Google account that is connected to the email.
Then after that you will enter the Linguise dashboard for the translator account, which is how it looks like.
Then after that you will enter the Linguise dashboard for the translator account, it looks like this.
Resend invitation links
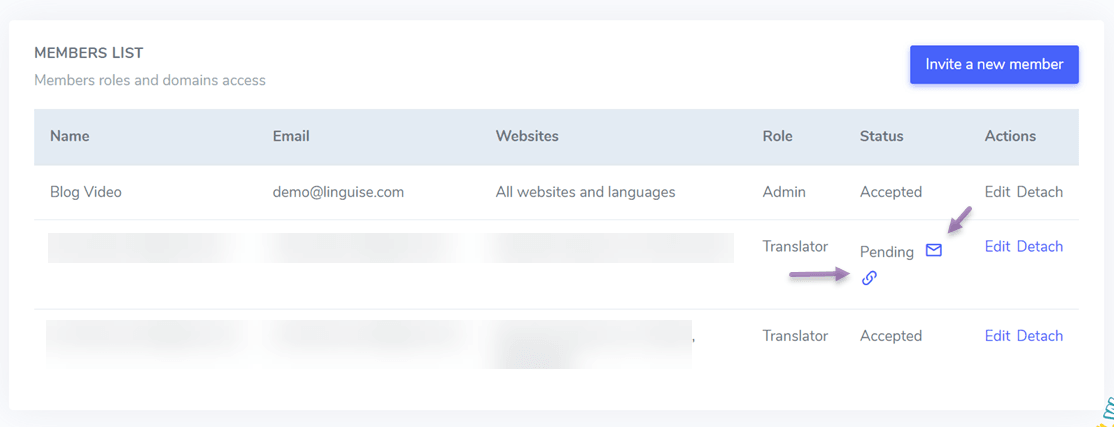
If the member hasn’t received the link or is having problems with the invitation, you can resend the link in the following way.
Click on the message icon, then the invitation link will automatically be sent again, or you can also click on the URL icon to copy the link to the clipboard, after which it will be sent manually by email.
Setup roles for members
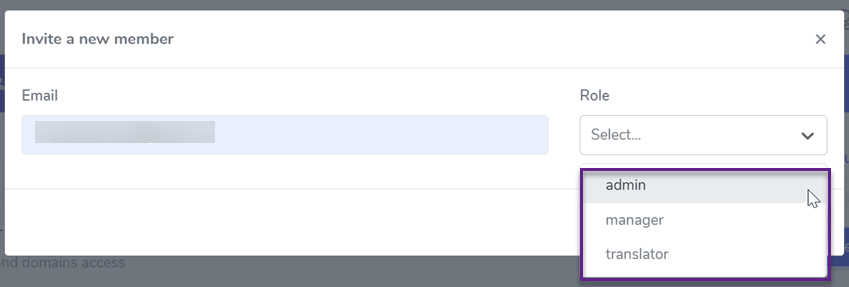
Finally, when you invite members to join, you can already set what roles they will become. As in the Role column below.
When you choose to become an admin, you just need to enter your email. As for the role manager, you need to enter your email and website. Then if the role of translator, you need to enter your email, website, and language according to the steps above.
Conclusion
It’s easy, isn’t it how to setup access for translators on your website with Linguise? Now you understand what roles exist in Linguise and each of the different access rights. Besides that, you also have a better understanding of how to resend invitations.
For those of you who don’t have translators in various languages on your website, let’s immediately invite translators for your website so that website translation can be maximized. If you still don’t have a translator, Linguise can also help you find a verified translator at an affordable cost.

