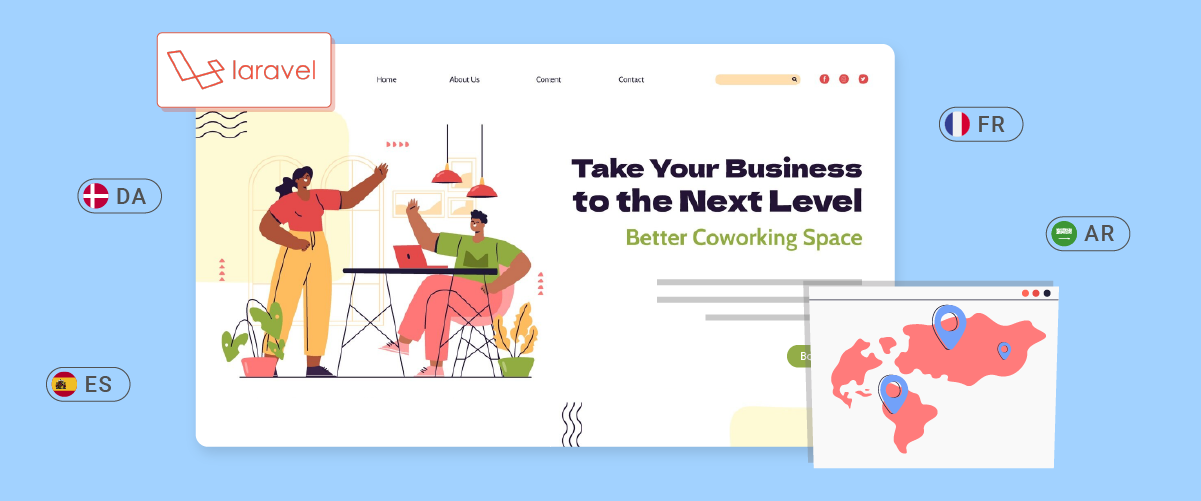
Laravel localization is a powerful that enables developers to create multilingual websites. By implementing web localization in your Laravel projects, you can provide a personalized user experience for visitors from different linguistic backgrounds, ultimately expanding your reach and improving user engagement.
We’ll walk you through implementing localization in your Laravel application and introduce you to a tool that can simplify and enhance your localization efforts!
Why should you localize the Laravel website?
Here are some important reasons why you should localize your Laravel website.
- Reach a global audience: By localizing your Laravel website, you can extend the reach of your app to an international audience. This allows users from different countries and language backgrounds to understand and interact with your content.
- Improves user experience: Localization allows users to interact with the app in their native language, which significantly improves user experience. This can increase engagement rates, reduce bounce rates, and increase conversions.
- Competitive advantage: In a competitive global market, offering apps in multiple languages can provide a significant edge over competitors. It shows your commitment to international markets and can help you enter new markets more effectively.
- Improves SEO: Well-localized websites tend to rank better in search engines for searches in a particular language. This can increase your blog traffic and online visibility in various markets with multilingual translation.
Requirements for a multilingual Laravel localization

There are a few requirements and steps to consider when implementing multilingual localization in Laravel.
- To get the latest localization features, make sure you are using the latest version of Laravel (e.g., version 10.x).
- A basic understanding of PHP and the Laravel framework will be helpful in the implementation process.
- Set up a local development environment or server that supports Laravel, including a web server and database.
- Determine the languages that your application will support from the start.
Simple Laravel translations
After understanding what requirements must be met before translating a Laravel application or web, we will provide some steps for translating Laravel simply.
To do this, open the view file that you want to localize, for example, resources/views/welcome.blade.php. Then, replace the body tag with the following code.
					<body class="antialiased">
    <div class="relative flex items-top justify-center min-h-screen bg-gray-100 sm:items-center py-4 sm:pt-0">
        <div class="max-w-6xl mx-auto sm:px-6 lg:px-8">
            <div class="flex justify-center pt-8 sm:justify-start sm:pt-0">
                Welcome to Linguise website!
            </div>
        </div>
    </div> <script data-no-optimize="1">window.lazyLoadOptions=Object.assign({},{threshold:300},window.lazyLoadOptions||{});!function(t,e){"object"==typeof exports&&"undefined"!=typeof module?module.exports=e():"function"==typeof define&&define.amd?define(e):(t="undefined"!=typeof globalThis?globalThis:t||self).LazyLoad=e()}(this,function(){"use strict";function e(){return(e=Object.assign||function(t){for(var e=1;e<arguments.length;e++){var n,a=arguments[e];for(n in a)Object.prototype.hasOwnProperty.call(a,n)&&(t[n]=a[n])}return t}).apply(this,arguments)}function o(t){return e({},at,t)}function l(t,e){return t.getAttribute(gt+e)}function c(t){return l(t,vt)}function s(t,e){return function(t,e,n){e=gt+e;null!==n?t.setAttribute(e,n):t.removeAttribute(e)}(t,vt,e)}function i(t){return s(t,null),0}function r(t){return null===c(t)}function u(t){return c(t)===_t}function d(t,e,n,a){t&&(void 0===a?void 0===n?t(e):t(e,n):t(e,n,a))}function f(t,e){et?t.classList.add(e):t.className+=(t.className?" ":"")+e}function _(t,e){et?t.classList.remove(e):t.className=t.className.replace(new RegExp("(^|\\s+)"+e+"(\\s+|$)")," ").replace(/^\s+/,"").replace(/\s+$/,"")}function g(t){return t.llTempImage}function v(t,e){!e||(e=e._observer)&&e.unobserve(t)}function b(t,e){t&&(t.loadingCount+=e)}function p(t,e){t&&(t.toLoadCount=e)}function n(t){for(var e,n=[],a=0;e=t.children[a];a+=1)"SOURCE"===e.tagName&&n.push(e);return n}function h(t,e){(t=t.parentNode)&&"PICTURE"===t.tagName&&n(t).forEach(e)}function a(t,e){n(t).forEach(e)}function m(t){return!!t[lt]}function E(t){return t[lt]}function I(t){return delete t[lt]}function y(e,t){var n;m(e)||(n={},t.forEach(function(t){n[t]=e.getAttribute(t)}),e[lt]=n)}function L(a,t){var o;m(a)&&(o=E(a),t.forEach(function(t){var e,n;e=a,(t=o[n=t])?e.setAttribute(n,t):e.removeAttribute(n)}))}function k(t,e,n){f(t,e.class_loading),s(t,st),n&&(b(n,1),d(e.callback_loading,t,n))}function A(t,e,n){n&&t.setAttribute(e,n)}function O(t,e){A(t,rt,l(t,e.data_sizes)),A(t,it,l(t,e.data_srcset)),A(t,ot,l(t,e.data_src))}function w(t,e,n){var a=l(t,e.data_bg_multi),o=l(t,e.data_bg_multi_hidpi);(a=nt&&o?o:a)&&(t.style.backgroundImage=a,n=n,f(t=t,(e=e).class_applied),s(t,dt),n&&(e.unobserve_completed&&v(t,e),d(e.callback_applied,t,n)))}function x(t,e){!e||0<e.loadingCount||0<e.toLoadCount||d(t.callback_finish,e)}function M(t,e,n){t.addEventListener(e,n),t.llEvLisnrs[e]=n}function N(t){return!!t.llEvLisnrs}function z(t){if(N(t)){var e,n,a=t.llEvLisnrs;for(e in a){var o=a[e];n=e,o=o,t.removeEventListener(n,o)}delete t.llEvLisnrs}}function C(t,e,n){var a;delete t.llTempImage,b(n,-1),(a=n)&&--a.toLoadCount,_(t,e.class_loading),e.unobserve_completed&&v(t,n)}function R(i,r,c){var l=g(i)||i;N(l)||function(t,e,n){N(t)||(t.llEvLisnrs={});var a="VIDEO"===t.tagName?"loadeddata":"load";M(t,a,e),M(t,"error",n)}(l,function(t){var e,n,a,o;n=r,a=c,o=u(e=i),C(e,n,a),f(e,n.class_loaded),s(e,ut),d(n.callback_loaded,e,a),o||x(n,a),z(l)},function(t){var e,n,a,o;n=r,a=c,o=u(e=i),C(e,n,a),f(e,n.class_error),s(e,ft),d(n.callback_error,e,a),o||x(n,a),z(l)})}function T(t,e,n){var a,o,i,r,c;t.llTempImage=document.createElement("IMG"),R(t,e,n),m(c=t)||(c[lt]={backgroundImage:c.style.backgroundImage}),i=n,r=l(a=t,(o=e).data_bg),c=l(a,o.data_bg_hidpi),(r=nt&&c?c:r)&&(a.style.backgroundImage='url("'.concat(r,'")'),g(a).setAttribute(ot,r),k(a,o,i)),w(t,e,n)}function G(t,e,n){var a;R(t,e,n),a=e,e=n,(t=Et[(n=t).tagName])&&(t(n,a),k(n,a,e))}function D(t,e,n){var a;a=t,(-1<It.indexOf(a.tagName)?G:T)(t,e,n)}function S(t,e,n){var a;t.setAttribute("loading","lazy"),R(t,e,n),a=e,(e=Et[(n=t).tagName])&&e(n,a),s(t,_t)}function V(t){t.removeAttribute(ot),t.removeAttribute(it),t.removeAttribute(rt)}function j(t){h(t,function(t){L(t,mt)}),L(t,mt)}function F(t){var e;(e=yt[t.tagName])?e(t):m(e=t)&&(t=E(e),e.style.backgroundImage=t.backgroundImage)}function P(t,e){var n;F(t),n=e,r(e=t)||u(e)||(_(e,n.class_entered),_(e,n.class_exited),_(e,n.class_applied),_(e,n.class_loading),_(e,n.class_loaded),_(e,n.class_error)),i(t),I(t)}function U(t,e,n,a){var o;n.cancel_on_exit&&(c(t)!==st||"IMG"===t.tagName&&(z(t),h(o=t,function(t){V(t)}),V(o),j(t),_(t,n.class_loading),b(a,-1),i(t),d(n.callback_cancel,t,e,a)))}function $(t,e,n,a){var o,i,r=(i=t,0<=bt.indexOf(c(i)));s(t,"entered"),f(t,n.class_entered),_(t,n.class_exited),o=t,i=a,n.unobserve_entered&&v(o,i),d(n.callback_enter,t,e,a),r||D(t,n,a)}function q(t){return t.use_native&&"loading"in HTMLImageElement.prototype}function H(t,o,i){t.forEach(function(t){return(a=t).isIntersecting||0<a.intersectionRatio?$(t.target,t,o,i):(e=t.target,n=t,a=o,t=i,void(r(e)||(f(e,a.class_exited),U(e,n,a,t),d(a.callback_exit,e,n,t))));var e,n,a})}function B(e,n){var t;tt&&!q(e)&&(n._observer=new IntersectionObserver(function(t){H(t,e,n)},{root:(t=e).container===document?null:t.container,rootMargin:t.thresholds||t.threshold+"px"}))}function J(t){return Array.prototype.slice.call(t)}function K(t){return t.container.querySelectorAll(t.elements_selector)}function Q(t){return c(t)===ft}function W(t,e){return e=t||K(e),J(e).filter(r)}function X(e,t){var n;(n=K(e),J(n).filter(Q)).forEach(function(t){_(t,e.class_error),i(t)}),t.update()}function t(t,e){var n,a,t=o(t);this._settings=t,this.loadingCount=0,B(t,this),n=t,a=this,Y&&window.addEventListener("online",function(){X(n,a)}),this.update(e)}var Y="undefined"!=typeof window,Z=Y&&!("onscroll"in window)||"undefined"!=typeof navigator&&/(gle|ing|ro)bot|crawl|spider/i.test(navigator.userAgent),tt=Y&&"IntersectionObserver"in window,et=Y&&"classList"in document.createElement("p"),nt=Y&&1<window.devicePixelRatio,at={elements_selector:".lazy",container:Z||Y?document:null,threshold:300,thresholds:null,data_src:"src",data_srcset:"srcset",data_sizes:"sizes",data_bg:"bg",data_bg_hidpi:"bg-hidpi",data_bg_multi:"bg-multi",data_bg_multi_hidpi:"bg-multi-hidpi",data_poster:"poster",class_applied:"applied",class_loading:"litespeed-loading",class_loaded:"litespeed-loaded",class_error:"error",class_entered:"entered",class_exited:"exited",unobserve_completed:!0,unobserve_entered:!1,cancel_on_exit:!0,callback_enter:null,callback_exit:null,callback_applied:null,callback_loading:null,callback_loaded:null,callback_error:null,callback_finish:null,callback_cancel:null,use_native:!1},ot="src",it="srcset",rt="sizes",ct="poster",lt="llOriginalAttrs",st="loading",ut="loaded",dt="applied",ft="error",_t="native",gt="data-",vt="ll-status",bt=[st,ut,dt,ft],pt=[ot],ht=[ot,ct],mt=[ot,it,rt],Et={IMG:function(t,e){h(t,function(t){y(t,mt),O(t,e)}),y(t,mt),O(t,e)},IFRAME:function(t,e){y(t,pt),A(t,ot,l(t,e.data_src))},VIDEO:function(t,e){a(t,function(t){y(t,pt),A(t,ot,l(t,e.data_src))}),y(t,ht),A(t,ct,l(t,e.data_poster)),A(t,ot,l(t,e.data_src)),t.load()}},It=["IMG","IFRAME","VIDEO"],yt={IMG:j,IFRAME:function(t){L(t,pt)},VIDEO:function(t){a(t,function(t){L(t,pt)}),L(t,ht),t.load()}},Lt=["IMG","IFRAME","VIDEO"];return t.prototype={update:function(t){var e,n,a,o=this._settings,i=W(t,o);{if(p(this,i.length),!Z&&tt)return q(o)?(e=o,n=this,i.forEach(function(t){-1!==Lt.indexOf(t.tagName)&&S(t,e,n)}),void p(n,0)):(t=this._observer,o=i,t.disconnect(),a=t,void o.forEach(function(t){a.observe(t)}));this.loadAll(i)}},destroy:function(){this._observer&&this._observer.disconnect(),K(this._settings).forEach(function(t){I(t)}),delete this._observer,delete this._settings,delete this.loadingCount,delete this.toLoadCount},loadAll:function(t){var e=this,n=this._settings;W(t,n).forEach(function(t){v(t,e),D(t,n,e)})},restoreAll:function(){var e=this._settings;K(e).forEach(function(t){P(t,e)})}},t.load=function(t,e){e=o(e);D(t,e)},t.resetStatus=function(t){i(t)},t}),function(t,e){"use strict";function n(){e.body.classList.add("litespeed_lazyloaded")}function a(){console.log("[LiteSpeed] Start Lazy Load"),o=new LazyLoad(Object.assign({},t.lazyLoadOptions||{},{elements_selector:"[data-lazyloaded]",callback_finish:n})),i=function(){o.update()},t.MutationObserver&&new MutationObserver(i).observe(e.documentElement,{childList:!0,subtree:!0,attributes:!0})}var o,i;t.addEventListener?t.addEventListener("load",a,!1):t.attachEvent("onload",a)}(window,document);</script><script data-no-optimize="1">window.litespeed_ui_events=window.litespeed_ui_events||["mouseover","click","keydown","wheel","touchmove","touchstart"];var urlCreator=window.URL||window.webkitURL;function litespeed_load_delayed_js_force(){console.log("[LiteSpeed] Start Load JS Delayed"),litespeed_ui_events.forEach(e=>{window.removeEventListener(e,litespeed_load_delayed_js_force,{passive:!0})}),document.querySelectorAll("iframe[data-litespeed-src]").forEach(e=>{e.setAttribute("src",e.getAttribute("data-litespeed-src"))}),"loading"==document.readyState?window.addEventListener("DOMContentLoaded",litespeed_load_delayed_js):litespeed_load_delayed_js()}litespeed_ui_events.forEach(e=>{window.addEventListener(e,litespeed_load_delayed_js_force,{passive:!0})});async function litespeed_load_delayed_js(){let t=[];for(var d in document.querySelectorAll('script[type="litespeed/javascript"]').forEach(e=>{t.push(e)}),t)await new Promise(e=>litespeed_load_one(t[d],e));document.dispatchEvent(new Event("DOMContentLiteSpeedLoaded")),window.dispatchEvent(new Event("DOMContentLiteSpeedLoaded"))}function litespeed_load_one(t,e){console.log("[LiteSpeed] Load ",t);var d=document.createElement("script");d.addEventListener("load",e),d.addEventListener("error",e),t.getAttributeNames().forEach(e=>{"type"!=e&&d.setAttribute("data-src"==e?"src":e,t.getAttribute(e))});let a=!(d.type="text/javascript");!d.src&&t.textContent&&(d.src=litespeed_inline2src(t.textContent),a=!0),t.after(d),t.remove(),a&&e()}function litespeed_inline2src(t){try{var d=urlCreator.createObjectURL(new Blob([t.replace(/^(?:<!--)?(.*?)(?:-->)?$/gm,"$1")],{type:"text/javascript"}))}catch(e){d="data:text/javascript;base64,"+btoa(t.replace(/^(?:<!--)?(.*?)(?:-->)?$/gm,"$1"))}return d}</script><script data-no-optimize="1">var litespeed_vary=document.cookie.replace(/(?:(?:^|.*;\s*)_lscache_vary\s*\=\s*([^;]*).*$)|^.*$/,"");litespeed_vary||(sessionStorage.getItem("litespeed_reloaded")?console.log("LiteSpeed: skipping guest vary reload (already reloaded this session)"):fetch("/wp-content/plugins/litespeed-cache/guest.vary.php",{method:"POST",cache:"no-cache",redirect:"follow"}).then(e=>e.json()).then(e=>{console.log(e),e.hasOwnProperty("reload")&&"yes"==e.reload&&(sessionStorage.setItem("litespeed_docref",document.referrer),sessionStorage.setItem("litespeed_reloaded","1"),window.location.reload(!0))}));</script><script data-optimized="1" type="litespeed/javascript" data-src="https://www.linguise.com/wp-content/litespeed/js/e27165eba5ecf7369ae0336af1c1fe69.js?ver=fe4bd"></script></body>
As you can see, the text above is currently written directly in the code. This is less efficient and makes it difficult to translate websites to different languages (internationalization).
We are going to make the above text more flexible so that it can be easily adapted to different languages. Laravel provides a very helpful feature for this; the localization system. As a first step, replace the existing text with the following code.
{{ __('Welcome to Linguise website!') }}
Laravel will display the above text by default and look up the translation if the user selects a language other than English. In this case, English will be used as the application’s default language.
Setting up locales in a Laravel multilingual web
But how does Laravel determine the current language or know which languages are available in the application? It checks the locale settings in the config/app.php file. Open this file and look for the following two keys.
					/*
|--------------------------------------------------------------------------
| Application Locale Configuration
|--------------------------------------------------------------------------
|
| The application locale determines the default locale that will be used
| by the translation service provider. You are free to set this value
| to any of the locales which will be supported by the application.
|
*/

'locale' => 'en',

/*
|--------------------------------------------------------------------------
| Application Fallback Locale
|--------------------------------------------------------------------------
|
| The fallback locale determines the locale to use when the current one
| is not available. You may change the value to correspond to any of
| the language folders that are provided through your application.
|
*/

'fallback_locale' => 'en',
The explanation above the keys should be clear. In summary, the locale key holds the default locale for your application (if no other locale is specified in the code). The fallback_locale is activated if a non-existent locale is requested in your application.
Now, let’s add a new key to this file to provide a list of all supported locales.
					/*
|--------------------------------------------------------------------------
| Available locales
|--------------------------------------------------------------------------
|
| List all locales that your application works with
|
*/

'available_locales' => [
  'English' => 'en',
  'Italian' => 'it',
  'French' => 'fr',
],
At this point, we have tried Laravel web to support three languages, namely English, Italian, and French.
Laravel translation files overview
In Laravel, as in many other frameworks, translations for different languages are stored in separate files. Two methods are used for organizing these translation files.
The older method stores files in the following structure: resources/lang/{en,fr,it}/{myfile.php}. The newer method uses JSON files, such as resources/lang/{fr.json, it.json}. This article will focus on the newer method, though the principles are similar for the older method, aside from differences in how translation keys are named and accessed.
For languages with regional variations, you should name the language directories or files according to the ISO 15897 standard. For instance, British English would be named en_GB instead of en-gb.
General information
In Laravel, as with many frameworks, translations for different languages are stored in separate files. There are two primary methods for organizing Laravel translation files.
- The legacy approach involves storing files under the path: resources/lang/{en,fr,it}/{myfile.php}.
- The modern approach utilizes resources/lang/{fr.json, it.json} files.
This article will concentrate on the second method, though the principles are applicable to both (with variations in how translation keys are named and accessed).
For languages that vary by region, it’s recommended to name language directories/files according to ISO 15897 standards. For instance, British English would be denoted as en_GB rather than en-gb.
Creating Laravel translation files
Having configured the locales for our application, we can proceed to translate our default welcome message.
Let’s begin by creating new localization files in JSON format within the resources/lang directory. First, we’ll create a resources/lang/it.json file and populate it with the appropriate translations.
					{
  "Welcome to Linguise website!": "Benvenuti nel sito web di Linguise!"
}
Next, add a resources/lang/fr.json file.
					{
 "Welcome to Linguise website!": "Bienvenue sur le site de Linguise"
}
As you can observe, we’re consistently referencing the default message from the welcome.blade.php file ({{ __(‘Welcome to Linguise website!’) }}). There’s no need to create an en.json file, as Laravel automatically recognizes that the default messages are in English.
Setting language switcher in a Laravel multilingual app
Furthermore, Laravel is not yet set up to override the local language, so for now, we will handle the translation directly within the route. Modify the default welcome route inside the routes/web.php file like this.
					Route::get('/{locale?}', function ($locale = null) {
    if (isset($locale) && in_array($locale, config('app.available_locales'))) {
        app()->setLocale($locale);
    }

    return view('welcome');
});
In this case, we’re capturing an optional locale GET parameter and setting the current locale based on it (if the requested locale is supported).
Now, you can visit your website and include any of the supported languages as the first segment in the URL. For instance, navigating to localhost/it or localhost/fr will display the localized content. If you don’t specify a locale or choose one that isn’t supported, Laravel will default to English (en).
Localization middleware for Laravel
Including the locale in every URL might not be ideal and could disrupt the site’s visual appeal. To address this, we’ll set up a language switcher and utilize the user session to display the translated content. You can create new middleware in the app/Http/Middleware/Localization.php file, or generate it by running the artisan make:middleware Localization command.
Then, add the following code inside.
					<?php

namespace App\Http\Middleware;

use Closure;
use Illuminate\Http\Request;
use Illuminate\Support\Facades\App;
use Illuminate\Support\Facades\Session;

class Localization
{
    /**
    * Handle an incoming request.
    *
    * @param  \Illuminate\Http\Request  $request
    * @param  \Closure  $next
    * @return mixed
    */
    public function handle(Request $request, Closure $next)
    {
        if (Session::has('locale')) {
            App::setLocale(Session::get('locale'));
        }
        return $next($request);
    }
}
This middleware will direct Laravel to use the location selected by the user if this option is present in the session.
Since we need the operation to run on every request, add it to the default middleware stack in app/Http/Kernel.php for the web middleware group.
					/**
* The application's route middleware groups.
*
* @var array<string, array<int, class-string|string>>
*/
protected $middlewareGroups = [
  'web' => [
    \App\Http\Middleware\EncryptCookies::class,
    \Illuminate\Cookie\Middleware\AddQueuedCookiesToResponse::class,
    \Illuminate\Session\Middleware\StartSession::class,
    \Illuminate\View\Middleware\ShareErrorsFromSession::class,
    \App\Http\Middleware\VerifyCsrfToken::class,
    \Illuminate\Routing\Middleware\SubstituteBindings::class,
    \App\Http\Middleware\Localization::class, // <--- add this
],
Modifying routes
Next, define a route to change the locale in the routes/web.php file. We’re using a closure route here, but you can place the same code inside a controller if you prefer.
					Route::get('language/{locale}', function ($locale) {
   app()->setLocale($locale);
   session()->put('locale', $locale);
   return redirect()->back();
});
Additionally, remove the locale switching that was previously added to the default welcome route. Your root route should now look like this.
					Route::get('/', function () {
   return view('welcome');
});
Once this is done, the user can only switch the active language by visiting localhost/language/{locale}. The selected locale will be saved in the session, and users will be redirected back to their previous page (as handled by the Localization middleware).
To test it, go to localhost/language/it (assuming the session cookie is active in your browser), and you should see the translated content. You can navigate the site or refresh the page, and the chosen language will remain in effect.
Language switcher implementation
Now, we need to provide the user with a clickable option to change the language switcher Laravel web rather than requiring them to enter locale codes in the URL manually. To achieve this, create a simple language switcher. Add a new file at resources/views/partials/language_switcher.blade.php and insert the following code.
					<div class="flex justify-center pt-8 sm:justify-start sm:pt-0">
    @foreach($available_locales as $locale_name => $available_locale)
        @if($available_locale === $current_locale)
            <span class="ml-2 mr-2 text-gray-700">{{ $locale_name }}</span>
        @else
            <a class="ml-1 underline ml-2 mr-2" href="language/{{ $available_locale }}">
                <span>{{ $locale_name }}</span>
            </a>
        @endif
    @endforeach
</div>
To include the newly created language switcher in the “welcome” view, simply add the following line to your welcome.blade.php file where you’d like the switcher to appear.
					<body class="antialiased">
    <div class="relative flex items-top justify-center min-h-screen bg-gray-100 sm:items-center py-4 sm:pt-0">
        <div class="max-w-6xl mx-auto sm:px-6 lg:px-8">
            @include('partials/language_switcher')

            <div class="flex justify-center pt-8 sm:justify-start sm:pt-0">
                {{ __('Welcome to our website!') }}
            </div>
        </div>
    </div> <script data-no-optimize="1">window.lazyLoadOptions=Object.assign({},{threshold:300},window.lazyLoadOptions||{});!function(t,e){"object"==typeof exports&&"undefined"!=typeof module?module.exports=e():"function"==typeof define&&define.amd?define(e):(t="undefined"!=typeof globalThis?globalThis:t||self).LazyLoad=e()}(this,function(){"use strict";function e(){return(e=Object.assign||function(t){for(var e=1;e<arguments.length;e++){var n,a=arguments[e];for(n in a)Object.prototype.hasOwnProperty.call(a,n)&&(t[n]=a[n])}return t}).apply(this,arguments)}function o(t){return e({},at,t)}function l(t,e){return t.getAttribute(gt+e)}function c(t){return l(t,vt)}function s(t,e){return function(t,e,n){e=gt+e;null!==n?t.setAttribute(e,n):t.removeAttribute(e)}(t,vt,e)}function i(t){return s(t,null),0}function r(t){return null===c(t)}function u(t){return c(t)===_t}function d(t,e,n,a){t&&(void 0===a?void 0===n?t(e):t(e,n):t(e,n,a))}function f(t,e){et?t.classList.add(e):t.className+=(t.className?" ":"")+e}function _(t,e){et?t.classList.remove(e):t.className=t.className.replace(new RegExp("(^|\\s+)"+e+"(\\s+|$)")," ").replace(/^\s+/,"").replace(/\s+$/,"")}function g(t){return t.llTempImage}function v(t,e){!e||(e=e._observer)&&e.unobserve(t)}function b(t,e){t&&(t.loadingCount+=e)}function p(t,e){t&&(t.toLoadCount=e)}function n(t){for(var e,n=[],a=0;e=t.children[a];a+=1)"SOURCE"===e.tagName&&n.push(e);return n}function h(t,e){(t=t.parentNode)&&"PICTURE"===t.tagName&&n(t).forEach(e)}function a(t,e){n(t).forEach(e)}function m(t){return!!t[lt]}function E(t){return t[lt]}function I(t){return delete t[lt]}function y(e,t){var n;m(e)||(n={},t.forEach(function(t){n[t]=e.getAttribute(t)}),e[lt]=n)}function L(a,t){var o;m(a)&&(o=E(a),t.forEach(function(t){var e,n;e=a,(t=o[n=t])?e.setAttribute(n,t):e.removeAttribute(n)}))}function k(t,e,n){f(t,e.class_loading),s(t,st),n&&(b(n,1),d(e.callback_loading,t,n))}function A(t,e,n){n&&t.setAttribute(e,n)}function O(t,e){A(t,rt,l(t,e.data_sizes)),A(t,it,l(t,e.data_srcset)),A(t,ot,l(t,e.data_src))}function w(t,e,n){var a=l(t,e.data_bg_multi),o=l(t,e.data_bg_multi_hidpi);(a=nt&&o?o:a)&&(t.style.backgroundImage=a,n=n,f(t=t,(e=e).class_applied),s(t,dt),n&&(e.unobserve_completed&&v(t,e),d(e.callback_applied,t,n)))}function x(t,e){!e||0<e.loadingCount||0<e.toLoadCount||d(t.callback_finish,e)}function M(t,e,n){t.addEventListener(e,n),t.llEvLisnrs[e]=n}function N(t){return!!t.llEvLisnrs}function z(t){if(N(t)){var e,n,a=t.llEvLisnrs;for(e in a){var o=a[e];n=e,o=o,t.removeEventListener(n,o)}delete t.llEvLisnrs}}function C(t,e,n){var a;delete t.llTempImage,b(n,-1),(a=n)&&--a.toLoadCount,_(t,e.class_loading),e.unobserve_completed&&v(t,n)}function R(i,r,c){var l=g(i)||i;N(l)||function(t,e,n){N(t)||(t.llEvLisnrs={});var a="VIDEO"===t.tagName?"loadeddata":"load";M(t,a,e),M(t,"error",n)}(l,function(t){var e,n,a,o;n=r,a=c,o=u(e=i),C(e,n,a),f(e,n.class_loaded),s(e,ut),d(n.callback_loaded,e,a),o||x(n,a),z(l)},function(t){var e,n,a,o;n=r,a=c,o=u(e=i),C(e,n,a),f(e,n.class_error),s(e,ft),d(n.callback_error,e,a),o||x(n,a),z(l)})}function T(t,e,n){var a,o,i,r,c;t.llTempImage=document.createElement("IMG"),R(t,e,n),m(c=t)||(c[lt]={backgroundImage:c.style.backgroundImage}),i=n,r=l(a=t,(o=e).data_bg),c=l(a,o.data_bg_hidpi),(r=nt&&c?c:r)&&(a.style.backgroundImage='url("'.concat(r,'")'),g(a).setAttribute(ot,r),k(a,o,i)),w(t,e,n)}function G(t,e,n){var a;R(t,e,n),a=e,e=n,(t=Et[(n=t).tagName])&&(t(n,a),k(n,a,e))}function D(t,e,n){var a;a=t,(-1<It.indexOf(a.tagName)?G:T)(t,e,n)}function S(t,e,n){var a;t.setAttribute("loading","lazy"),R(t,e,n),a=e,(e=Et[(n=t).tagName])&&e(n,a),s(t,_t)}function V(t){t.removeAttribute(ot),t.removeAttribute(it),t.removeAttribute(rt)}function j(t){h(t,function(t){L(t,mt)}),L(t,mt)}function F(t){var e;(e=yt[t.tagName])?e(t):m(e=t)&&(t=E(e),e.style.backgroundImage=t.backgroundImage)}function P(t,e){var n;F(t),n=e,r(e=t)||u(e)||(_(e,n.class_entered),_(e,n.class_exited),_(e,n.class_applied),_(e,n.class_loading),_(e,n.class_loaded),_(e,n.class_error)),i(t),I(t)}function U(t,e,n,a){var o;n.cancel_on_exit&&(c(t)!==st||"IMG"===t.tagName&&(z(t),h(o=t,function(t){V(t)}),V(o),j(t),_(t,n.class_loading),b(a,-1),i(t),d(n.callback_cancel,t,e,a)))}function $(t,e,n,a){var o,i,r=(i=t,0<=bt.indexOf(c(i)));s(t,"entered"),f(t,n.class_entered),_(t,n.class_exited),o=t,i=a,n.unobserve_entered&&v(o,i),d(n.callback_enter,t,e,a),r||D(t,n,a)}function q(t){return t.use_native&&"loading"in HTMLImageElement.prototype}function H(t,o,i){t.forEach(function(t){return(a=t).isIntersecting||0<a.intersectionRatio?$(t.target,t,o,i):(e=t.target,n=t,a=o,t=i,void(r(e)||(f(e,a.class_exited),U(e,n,a,t),d(a.callback_exit,e,n,t))));var e,n,a})}function B(e,n){var t;tt&&!q(e)&&(n._observer=new IntersectionObserver(function(t){H(t,e,n)},{root:(t=e).container===document?null:t.container,rootMargin:t.thresholds||t.threshold+"px"}))}function J(t){return Array.prototype.slice.call(t)}function K(t){return t.container.querySelectorAll(t.elements_selector)}function Q(t){return c(t)===ft}function W(t,e){return e=t||K(e),J(e).filter(r)}function X(e,t){var n;(n=K(e),J(n).filter(Q)).forEach(function(t){_(t,e.class_error),i(t)}),t.update()}function t(t,e){var n,a,t=o(t);this._settings=t,this.loadingCount=0,B(t,this),n=t,a=this,Y&&window.addEventListener("online",function(){X(n,a)}),this.update(e)}var Y="undefined"!=typeof window,Z=Y&&!("onscroll"in window)||"undefined"!=typeof navigator&&/(gle|ing|ro)bot|crawl|spider/i.test(navigator.userAgent),tt=Y&&"IntersectionObserver"in window,et=Y&&"classList"in document.createElement("p"),nt=Y&&1<window.devicePixelRatio,at={elements_selector:".lazy",container:Z||Y?document:null,threshold:300,thresholds:null,data_src:"src",data_srcset:"srcset",data_sizes:"sizes",data_bg:"bg",data_bg_hidpi:"bg-hidpi",data_bg_multi:"bg-multi",data_bg_multi_hidpi:"bg-multi-hidpi",data_poster:"poster",class_applied:"applied",class_loading:"litespeed-loading",class_loaded:"litespeed-loaded",class_error:"error",class_entered:"entered",class_exited:"exited",unobserve_completed:!0,unobserve_entered:!1,cancel_on_exit:!0,callback_enter:null,callback_exit:null,callback_applied:null,callback_loading:null,callback_loaded:null,callback_error:null,callback_finish:null,callback_cancel:null,use_native:!1},ot="src",it="srcset",rt="sizes",ct="poster",lt="llOriginalAttrs",st="loading",ut="loaded",dt="applied",ft="error",_t="native",gt="data-",vt="ll-status",bt=[st,ut,dt,ft],pt=[ot],ht=[ot,ct],mt=[ot,it,rt],Et={IMG:function(t,e){h(t,function(t){y(t,mt),O(t,e)}),y(t,mt),O(t,e)},IFRAME:function(t,e){y(t,pt),A(t,ot,l(t,e.data_src))},VIDEO:function(t,e){a(t,function(t){y(t,pt),A(t,ot,l(t,e.data_src))}),y(t,ht),A(t,ct,l(t,e.data_poster)),A(t,ot,l(t,e.data_src)),t.load()}},It=["IMG","IFRAME","VIDEO"],yt={IMG:j,IFRAME:function(t){L(t,pt)},VIDEO:function(t){a(t,function(t){L(t,pt)}),L(t,ht),t.load()}},Lt=["IMG","IFRAME","VIDEO"];return t.prototype={update:function(t){var e,n,a,o=this._settings,i=W(t,o);{if(p(this,i.length),!Z&&tt)return q(o)?(e=o,n=this,i.forEach(function(t){-1!==Lt.indexOf(t.tagName)&&S(t,e,n)}),void p(n,0)):(t=this._observer,o=i,t.disconnect(),a=t,void o.forEach(function(t){a.observe(t)}));this.loadAll(i)}},destroy:function(){this._observer&&this._observer.disconnect(),K(this._settings).forEach(function(t){I(t)}),delete this._observer,delete this._settings,delete this.loadingCount,delete this.toLoadCount},loadAll:function(t){var e=this,n=this._settings;W(t,n).forEach(function(t){v(t,e),D(t,n,e)})},restoreAll:function(){var e=this._settings;K(e).forEach(function(t){P(t,e)})}},t.load=function(t,e){e=o(e);D(t,e)},t.resetStatus=function(t){i(t)},t}),function(t,e){"use strict";function n(){e.body.classList.add("litespeed_lazyloaded")}function a(){console.log("[LiteSpeed] Start Lazy Load"),o=new LazyLoad(Object.assign({},t.lazyLoadOptions||{},{elements_selector:"[data-lazyloaded]",callback_finish:n})),i=function(){o.update()},t.MutationObserver&&new MutationObserver(i).observe(e.documentElement,{childList:!0,subtree:!0,attributes:!0})}var o,i;t.addEventListener?t.addEventListener("load",a,!1):t.attachEvent("onload",a)}(window,document);</script><script data-no-optimize="1">window.litespeed_ui_events=window.litespeed_ui_events||["mouseover","click","keydown","wheel","touchmove","touchstart"];var urlCreator=window.URL||window.webkitURL;function litespeed_load_delayed_js_force(){console.log("[LiteSpeed] Start Load JS Delayed"),litespeed_ui_events.forEach(e=>{window.removeEventListener(e,litespeed_load_delayed_js_force,{passive:!0})}),document.querySelectorAll("iframe[data-litespeed-src]").forEach(e=>{e.setAttribute("src",e.getAttribute("data-litespeed-src"))}),"loading"==document.readyState?window.addEventListener("DOMContentLoaded",litespeed_load_delayed_js):litespeed_load_delayed_js()}litespeed_ui_events.forEach(e=>{window.addEventListener(e,litespeed_load_delayed_js_force,{passive:!0})});async function litespeed_load_delayed_js(){let t=[];for(var d in document.querySelectorAll('script[type="litespeed/javascript"]').forEach(e=>{t.push(e)}),t)await new Promise(e=>litespeed_load_one(t[d],e));document.dispatchEvent(new Event("DOMContentLiteSpeedLoaded")),window.dispatchEvent(new Event("DOMContentLiteSpeedLoaded"))}function litespeed_load_one(t,e){console.log("[LiteSpeed] Load ",t);var d=document.createElement("script");d.addEventListener("load",e),d.addEventListener("error",e),t.getAttributeNames().forEach(e=>{"type"!=e&&d.setAttribute("data-src"==e?"src":e,t.getAttribute(e))});let a=!(d.type="text/javascript");!d.src&&t.textContent&&(d.src=litespeed_inline2src(t.textContent),a=!0),t.after(d),t.remove(),a&&e()}function litespeed_inline2src(t){try{var d=urlCreator.createObjectURL(new Blob([t.replace(/^(?:<!--)?(.*?)(?:-->)?$/gm,"$1")],{type:"text/javascript"}))}catch(e){d="data:text/javascript;base64,"+btoa(t.replace(/^(?:<!--)?(.*?)(?:-->)?$/gm,"$1"))}return d}</script><script data-optimized="1" type="litespeed/javascript" data-src="https://www.linguise.com/wp-content/litespeed/js/e27165eba5ecf7369ae0336af1c1fe69.js?ver=fe4bd"></script></body>
Open the app/Providers/AppServiceProvider.php file and add the following code in the boot() method to share the current locale with all views when the language switcher is used
					* Bootstrap any application services.
 *
 * @return void
 */
public function boot()
{
    view()->composer('partials.language_switcher', function ($view) {
        $view->with('current_locale', app()->getLocale());
        $view->with('available_locales', config('app.available_locales'));
    });
}
Advanced translation features in Laravel PHP
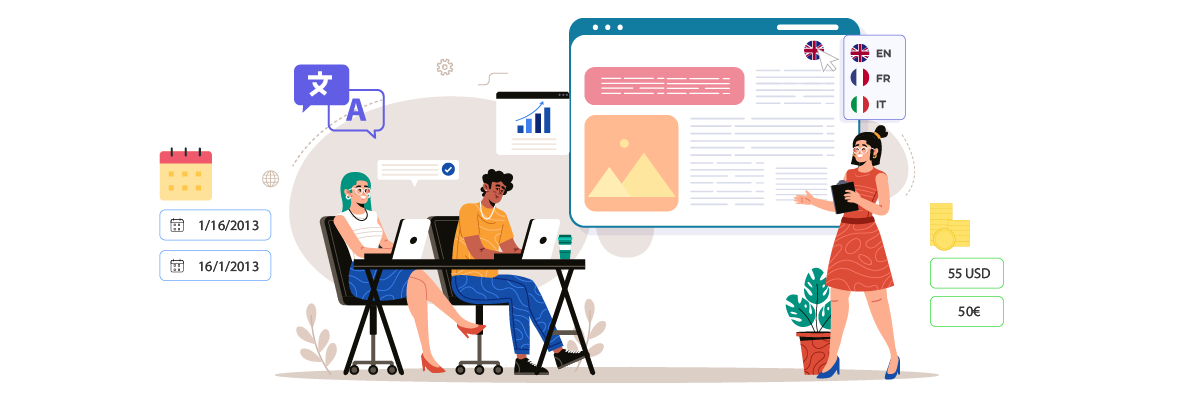
In this discussion, we will then handle other localization components, namely date, number, and currency. Here are the steps.
Localized dates in Laravel
Handling dates and times is crucial in the localization process. Laravel uses Carbon to manage dates and times. Here’s how you can use Carbon to display a localized date.
					<?php
Route::get('/', function () {
    $today = \Carbon\Carbon::now()
        ->settings(
            [
                'locale' => app()->getLocale(),
            ]
        );

    // LL is macro placeholder for MMMM D, YYYY (you could write same as dddd, MMMM D, YYYY)
    $dateMessage = $today->isoFormat('dddd, LL');

    return view('welcome', [
        'date_message' => $dateMessage
    ]);
});
This code sets the Carbon locale based on the application’s current locale and formats the date accordingly.
To display the localized date in a view:
					{{ __('Welcome to our website, :Name', ['name' => ‘Johb’]) }}
<br>
{{ trans_choice('{0} There :form :count apples|{1} There :form just :count apple|[2,19] There :form :count apples', 1, ['form' => 'is']) }}
<br>
{{ $date_message }}
Formatting numbers and currencies
Different countries have various ways of formatting numbers. For instance.
- France → 123 123,12
- Germany → 123.123,12
- Japan → 123,123
To accommodate these variations in your Laravel application, you can use NumberFormatter.
					<?php
$num = NumberFormatter::create('en_US', NumberFormatter::DECIMAL);

$num2 = NumberFormatter::create('fr', NumberFormatter::DECIMAL);
You can also spell out numbers in a specific language.
					<?php
$num = NumberFormatter::create('en_US', NumberFormatter::SPELLOUT);

$num2 = NumberFormatter::create('it', NumberFormatter::SPELLOUT);
Here are the currencies. For the French locale (`fr`), the currency will be displayed in euros (€), while for the US locale (`en_US`), it will be shown in US dollars ($).
					<?php
$currency1 = NumberFormatter::create('it', NumberFormatter::CURRENCY);

$currency2 = NumberFormatter::create('en_US', NumberFormatter::CURRENCY);
Alternative solution Laravel localization with Linguise

After understanding the steps of Laravel localization as described in the article, this process involves many steps that require users to understand the Laravel program code in depth.
This can certainly make it difficult for novice users who want to localize their applications. Therefore, a more innovative solution is needed that is capable of fast translation, supports localization, and requires only a few simple steps to implement.
One promising solution is Linguise. Linguise offers an easier and more efficient approach to Laravel localization without the need for in-depth coding knowledge. Key features of Linguise include.
- Easy integration with Laravel
- Customize language switcher without coding
- Image translation
- Live editor to customize translations to the local context
- Dynamic translation for dynamically generated content
- SEO optimization for multi-language versions
The steps to install Linguise on Laravel websites can also be done easily. Here’s a brief explanation.
- Create a Linguise account (use the 30-day free trial for free)
- Register your Laravel web domain and enter some information. You will get an API key.
- Upload and connect the Linguise translation script to the Laravel folder you got.
- Setup language URLs in the htaccess file.
- Insert the language switcher script in the head of your HTML.
- Customize the language switcher as needed
- The language switcher will appear on the Laravel web, and the content can be translated automatically.
How? With Linguise, you only need to register and activate, and the language switcher will appear. After that, you are free to localize, for example, through the live editor, translate media, images, etc.
Conclusion
Laravel localization is a powerful feature that enables developers to create multilingual websites and applications. As we’ve seen, the built-in Laravel localization process involves multiple steps and requires a good understanding of the framework. It can be challenging for beginners or those looking for a quicker solution.
Tools like Linguise provide an innovative alternative for those seeking a more streamlined approach. These solutions offer rapid translation capabilities, easy integration, and user-friendly features like customizable language switchers and image translation. Now, create your Linguise account and enjoy our feature for localizing your Laravel!