Language switcher is one of the elements of a multilingual website that is important to pay attention to when building a multilingual site, one of which is a Drupal multilingual website.
The language switcher is a language switch button that is used to switch to another language when visiting a website. Making the language switcher visitor-friendly is important because it can improve the user experience and can optimize SEO.
So how do you set up a language switcher for Drupal and what are the benefits for a website? Continue reading the explanation below.
Why creating a language switcher is important for multilingual Drupal websites?
Developing a user-friendly language switcher is crucial for the success of a multilingual website. Below are the reasons why creating a setup language switcher for Drupal multilingual sites is beneficial.
- Enhanced user experience: A user-friendly language switcher facilitates seamless transitions between languages, simplifying navigation and comprehension of content. This contributes to an improved overall user experience, reducing frustration and boosting engagement.
- Intuitive navigation: Users should easily locate and utilize the language switcher. An intuitively designed switcher, featuring clear placement and easily recognizable icons or labels, encourages users to switch between languages effortlessly.
- Reduction in bounce rate: A user-friendly language switcher helps decrease bounce rates. When visitors can swiftly find and select their preferred language, they are more likely to remain on the site, explore content, and potentially convert.
- Clear communication: Effective communication with users is vital for language switchers. Clear and concise labels or symbols aid in conveying available language options, minimizing confusion, and ensuring users can make well-informed choices.
- SEO optimization: Search engines factor in user experience when ranking websites. A well-implemented, user-friendly language switcher can positively impact multilingual SEO, enhancing the visibility and accessibility of your site to users searching in multiple languages.
How to setup the language switcher for Drupal?
The language switching feature is usually provided by the website translation service. This feature can be adjusted according to the needs of what the user wants to design.
However, sometimes not all translation services provide a language switching feature that is easy to customize and easy to use. Therefore, it is important to look for an automatic translation service that provides and is compatible with many CMS, one of which is Linguise.
Linguise automatic translation provides a flexible and easily customizable language-switching feature and is integrated with Drupal.
Then, how to setup language switcher for Drupal website. Just continue reading the explanation below.
Step 1: Register Linguise account
The initial process to sign up involves creating a free account with Linguise and taking advantage of their one-month free trial. To register for a Linguise account, simply provide your email address to create a username and password.
During the trial period, which spans a full month, you will have access to a range of comprehensive and compelling features offered by Linguise. Once the trial period concludes, you will be directed to the Linguise dashboard.
Step 2: Add domain website Drupal
Within the Linguise dashboard, you will be required to add the domain of your Drupal site in need of translation. Several fields must be completed, including.
- Account
- URLs
- Platforms/CMS
- Language
- Translation language
- Translate URLs
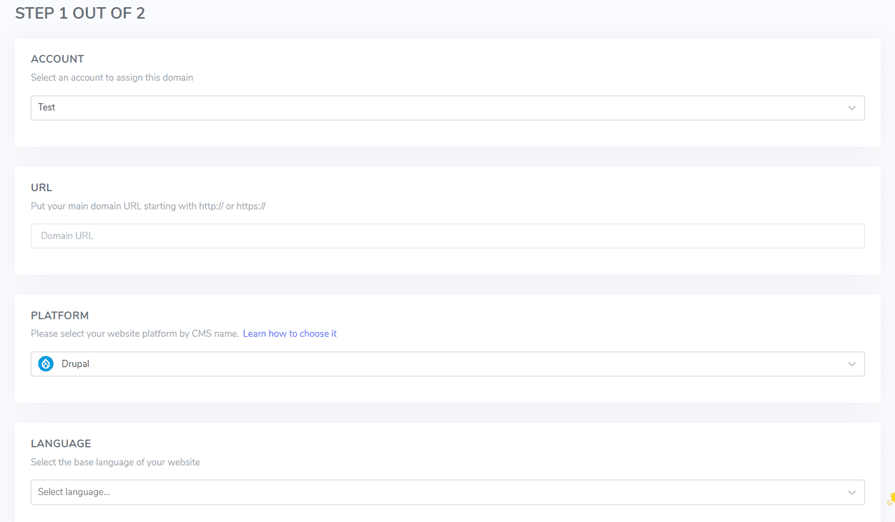
Proceed by enabling the API key and configuring the language URL. For comprehensive guidance on adding a website domain, consult the instructions in the guide for install Linguise automatic translation in Drupal or view the instructional video provided below.
Step 3: Activate language switcher
Following the completion of all configurations, the subsequent action involves entering the language switch settings and presenting a flag to enhance user convenience during language transitions. To accomplish this, copy the code provided in the Linguise dashboard by navigating to Linguise dashboard > Settings > copy to clipboard.

To add content to your page header, you can make use of a Drupal module named Add to Head. Simply navigate to Configuration > Development > Add profile.

Finally, make sure to validate or verify the script location.

The language switcher will initially display in a floating position at the upper right corner of your website. You have the flexibility to customize based on your preferences.
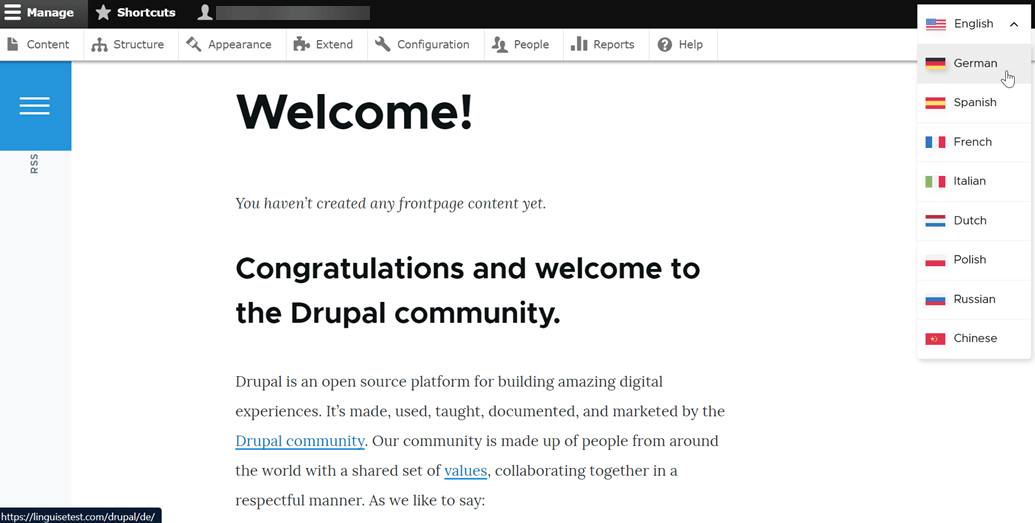
Step 4: Setup main display
Additionally, you have the option to personalize the language switcher by accessing the Linguise dashboard and moving to the Settings section. Within this area, proceed to the Language flags display settings. Any changes implemented in this segment will be automatically reflected in the language switcher on your website.

In the initial setup, we will adjust the primary display, focusing on various components.
The initial consideration is the configuration of the language list display form, providing three options to choose from, side-by-side, dropdown, or popup. On the left side, there is a preview display for each form.
The first form, presented below, is the side-by-side layout.
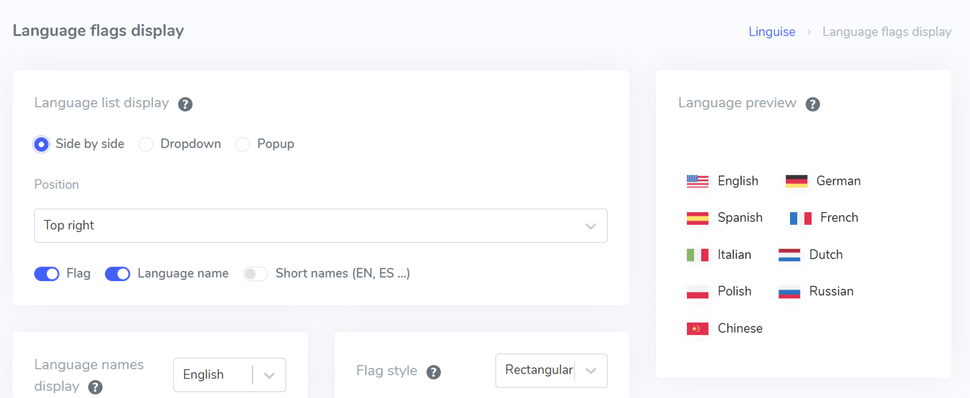
The subsequent form takes the shape of a dropdown, as illustrated below.
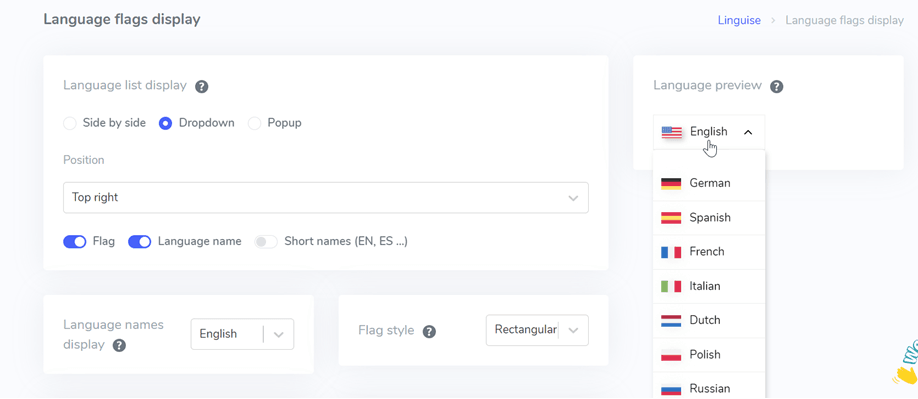
Finally, there is the popup form.

Moving on, the following step involves configuring the position, where you can determine the placement of the language switcher. There are multiple position options to select from, so be sure to opt for a position that is easily noticeable to visitors.
Lastly, decide on the combination preference, whether it’s flag + language name, flag + short name, or solely the flag.
Step 5: Set flags design
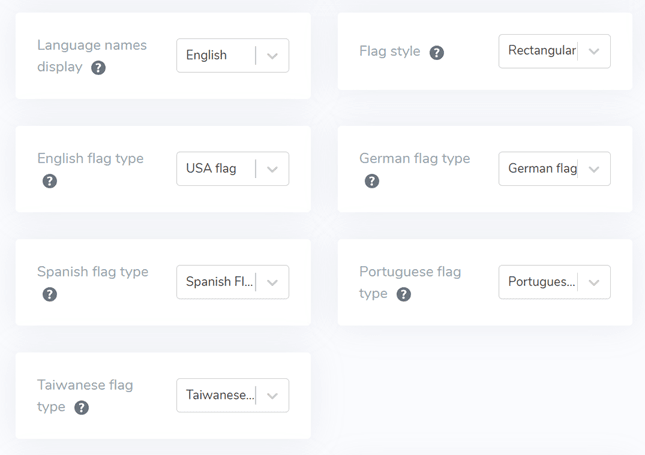
Following that, beneath the primary display section, you’ll find design configurations for the flag. The image below illustrates some of the available setting options.
- Display of language name: You have the choice to display the name based on the country or language, such as “German” or “Deutsch.”
- English flag type: This option is applicable to languages with multiple variations, like “English USA” or “English Britain” (similar to Spanish, Taiwanese, German, and Portuguese).
- Flag style: This setting allows you to define the shape of the flag icon, whether it should be round or square (rectangular).
Step 6: Set the color and size of the flag
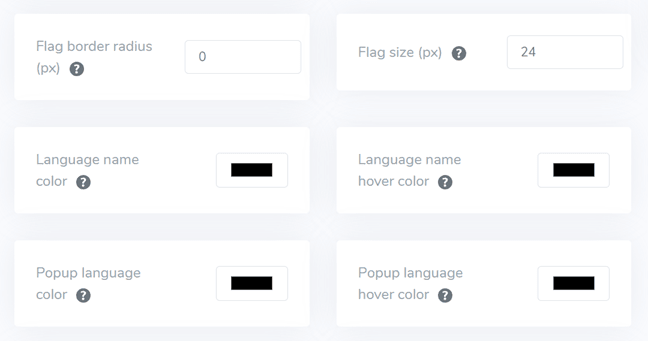
After setting up the flag design, the subsequent action involves adjusting colors, size, and various other elements. In the following interface, numerous customizable settings are available, including:
- Flag border-radius: Personalizing the border radius in pixels when utilizing a rectangle.
- Language name color: Selecting the default text color for the language name.
- Popup language color: The color of the language title in the popup or dropdown areas.
- Flag size: Modifying the size of the flag.
- Language name hover color: The text color when hovering the mouse over language names.
- Popup language hover color: The text color when hovering the mouse over the language title in the popup or dropdown.
Step 7: Set flag box-shadow
During the last phase, you have the option to configure shadow settings for the flag. The initial setting permits you to specify a shadow for each flag displayed on your website, while the subsequent setting pertains to the shadow effect when hovering over the language flag.
Ensure to click on Save to preserve the customization settings for the language switcher.
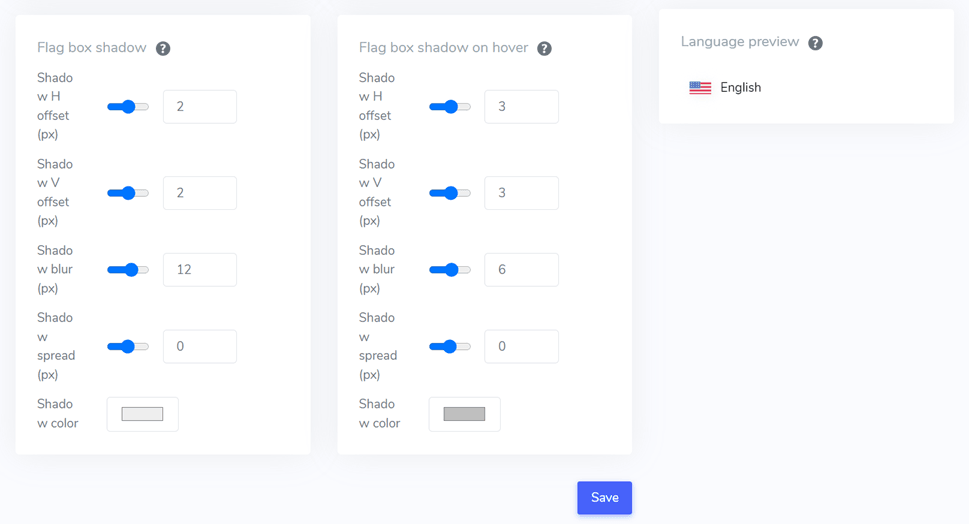
Once you’ve configured the language switcher for Drupal, here are the outcomes you can expect from the language switcher.
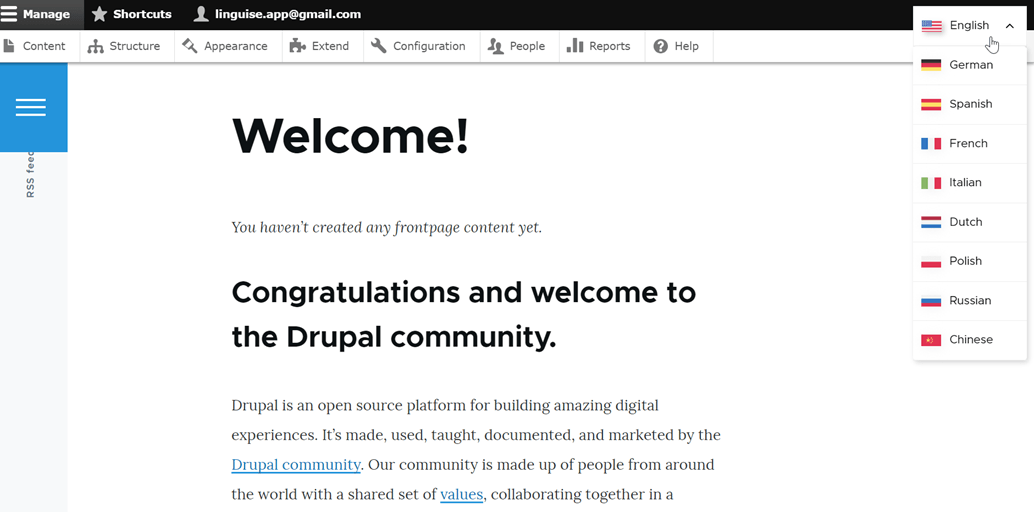
How to create a user-friendly language switcher for your Drupal website?
After the process of establishing a language switcher for Drupal, it’s now essential to understand how to craft a user-friendly language switcher to enhance various benefits for your website.
- Recognizable icons or flags: Utilize well-known language icons or flags to represent different languages. Ensure that the chosen icon or flag is visually prominent and universally recognized for clarity.
- Strategic placement: Position the language-switching tool prominently on your website, ideally consistently across all pages such as headers, footers, or navigation menus. Ensure visibility and easy accessibility of the translation tool.
- Language label on flags: Clearly label each language option in its respective language. For instance, use “English” for English, “Español” for Spanish, “Deutsch” for German, etc. This aids users in identifying and selecting their preferred language effortlessly.
- Innovative design: Employ an innovative design for the translation tool, utilizing familiar symbols or text to indicate language choices. For example, use “EN” for English and “DE” for Deutsch. Ensure the language-switching tool stands out by employing distinct colors or highlighting.
- User-friendly switching: Simplify the process for users to switch to another language if the default language doesn’t align with their preferences. Avoid the use of drop-down menus, flag/icon lists, or toggle buttons for language selection.
- Responsive design: Ensure the language-switching tool is responsive and functions seamlessly across various devices and screen sizes. Test its functionality on desktops, smartphones, and tablets to guarantee a smooth experience for all users.
Setup the language switcher for mutlilingual website Drupal using Linguise!
At to this point, you have gained insights into the language switcher configurations for Drupal. Creating a language switcher can bring about numerous advantages and, subsequently, ensure optimization based on the aforementioned points.
By appropriately optimizing the language switcher, it has the potential to enhance the overall user experience.
Now? Go ahead and register a Linguise account, enroll your Drupal website, and fine-tune the language switcher to deliver an improved user experience.

