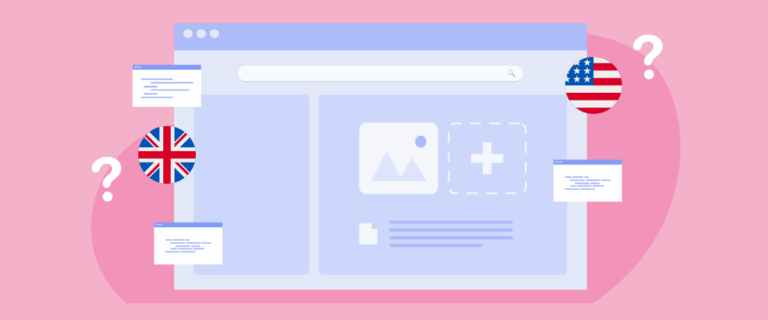
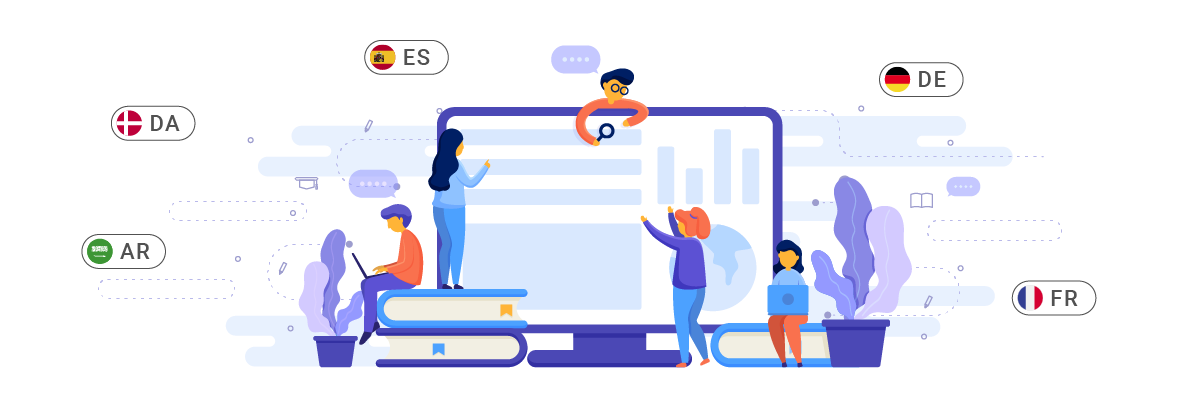
A language switcher on the Moodle platform can facilitate users’ switching between available languages. This feature is highly beneficial for educational institutions with international students, allowing them to interact with the learning management system in a language they are proficient in. As a popular open-source online learning platform, Moodle offers built-in localization capabilities, enabling administrators to create multilingual courses and sites without requiring deep programming knowledge.
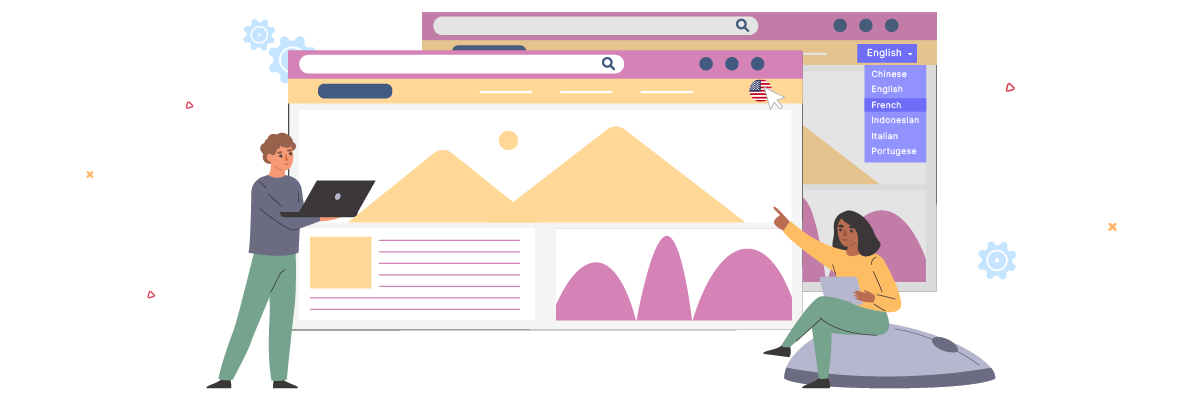
To implement a language switcher in Moodle, administrators typically start by selecting the languages they wish to support in the site settings. They can then enable a dropdown element or button that allows users to change the language quickly. This article will discuss setting up a language switcher in Moodle by leveraging the built-in localization features and available customization options.
Importance of setup a language switcher on Moodle

Adding a language switcher to a website like Moodle can have several benefits. Here is the importance of setting one up on Moodle.
- Enhancing accessibility: A language switcher allows users from various linguistic backgrounds to access content quickly. Example: An international university uses Moodle with English and Mandarin options. Students from China can easily switch to the Mandarin interface, better understanding assignment instructions and course materials.
- Supporting inclusion and diversity: Providing multi-language options demonstrates an institution’s commitment to inclusion and respect for cultural diversity. For example, a high school in Canada offers courses in English, French, and local Indigenous languages. This enables students from various communities to participate fully in online learning.
- Increasing user engagement: Users tend to be more engaged and active when they can interact in the language they’re most comfortable with. For example, in a foreign language course on Moodle, participants can switch between the target language and their native language, facilitating understanding and increasing participation in discussion forums.
- Expanding global reach: A language switcher allows institutions to reach an international audience without creating separate sites for each language. For example, a MOOC (Massive Open Online Course) about climate change on Moodle offers content in 10 different languages. This allows participants worldwide to access this important information in their language of choice, expanding the course’s reach and impact.
How to setup a language switcher on Moodle
Now that we understand the importance of switching languages on multilingual Moodle platforms let’s discuss how to implement it. Moodle’s built-in language pack system offers this feature, which can be tailored to the institution’s needs.
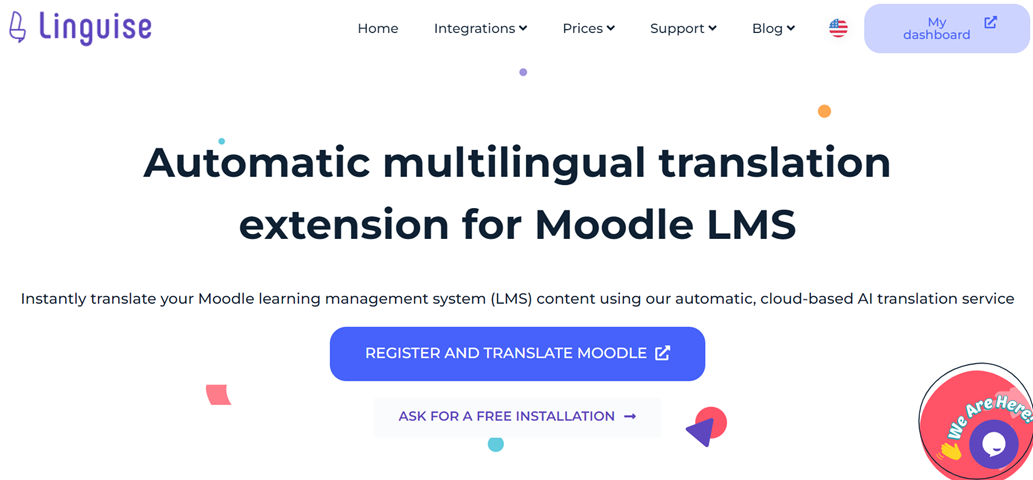
One automatic translation service that can be a customizable language switcher is Linguise automatic translation. Linguise is an easy-to-use language-switching feature that integrates with popular CMS and platforms like Moodle.
Moodle provides straightforward integration of multiple languages, allowing administrators to incorporate language switching into their multilingual courses and sites quickly. By leveraging Moodle’s advanced features and user-friendly interface, you can simplify setting up and maintaining language switchers on your Moodle platform.
Here are the steps to install Linguise automatic translation on a Moodle LMS and set up the language switcher.
Step 1: Add your domain website
The first step is to prepare your Moodle LMS site for translation. Ensure you can access the Moodle admin dashboard to install Linguise automatic translation on your Moodle LMS platform. Then, create a free Linguise account and add your website’s domain. You can use the 30-day free trial before deciding on a subscription plan.
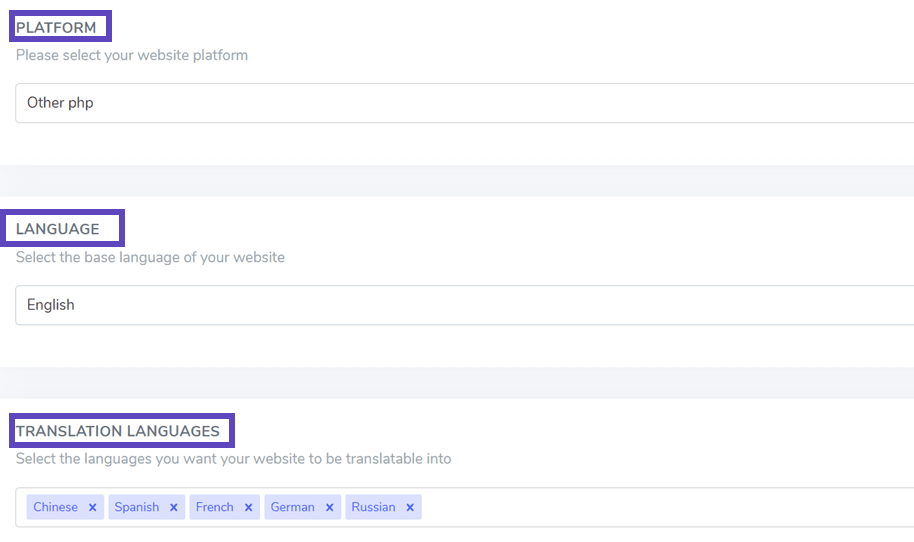
Once connected or registered to your Linguise dashboard, you must set up a new domain and save its settings before obtaining the API Key. Select “Other PHP” as the platform for the Linguise domain registration, specifying the source and target languages according to the documentation.
Step 2: Upload the Linguise script
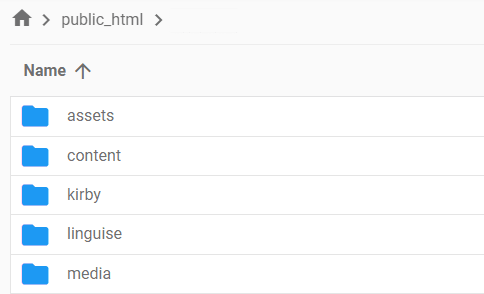
Upload the Linguise translation script to the server where your Moodle LMS is installed. Begin by downloading the script.
After downloading the script, unzip it and upload it to the root folder where your Moodle LMS is installed. Ensure it is placed at the root level of your website alongside your Moodle LMS files. Keep the folder’s default name as “linguise.”
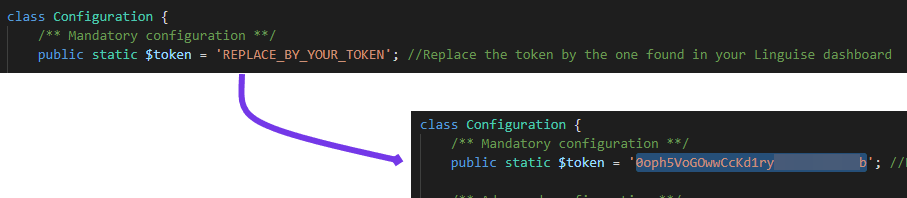
Copy the Linguise API key into the Configuration.php file you’ve uploaded to your server. Edit the file and paste your API key between the quotes, replacing the text “REPLACE_BY_YOUR_TOKEN”.
URL rewriting is enabled by default in Moodle LMS. If it isn’t, you can activate it through your hosting provider. To configure the URL by language, update the .htaccess file. Copy the code below and paste it after the “RewriteEngine on” line in the default Moodle LMS .htaccess file.
					<IfModule mod_rewrite.c>
    RewriteEngine On
    RewriteRule ^(af|sq|am|ar|hy|az|eu|be|bn|bs|bg|ca|ceb|ny|zh-cn|zh-tw|co|hr|cs|da|nl|en|eo|et|tl|fi|fr|fy|gl|ka|de|el|gu|ht|ha|haw|iw|hi|hmn|hu|is|ig|id|ga|it|ja|jw|kn|kk|km|ko|ku|ky|lo|la|lv|lt|lb|mk|mg|ms|ml|mt|mi|mr|mn|ne|no|ps|fa|pl|pt|pa|ro|ru|sm|gd|sr|st|sn|sd|si|sk|sl|so|es|su|sw|sv|tg|ta|te|th|tr|uk|ur|uz|vi|cy|xh|yi|yo|zu|zz-zz)(?:$|/)(.*)$ linguise/linguise.php?linguise_language=$1&original_url=$2 [L,QSA]
</IfModule>
You can now access all your translated pages using their URLs, such as www.shop.com/fr/. Next, it’s time to load the language switcher.
Step 4: Activate language switcher
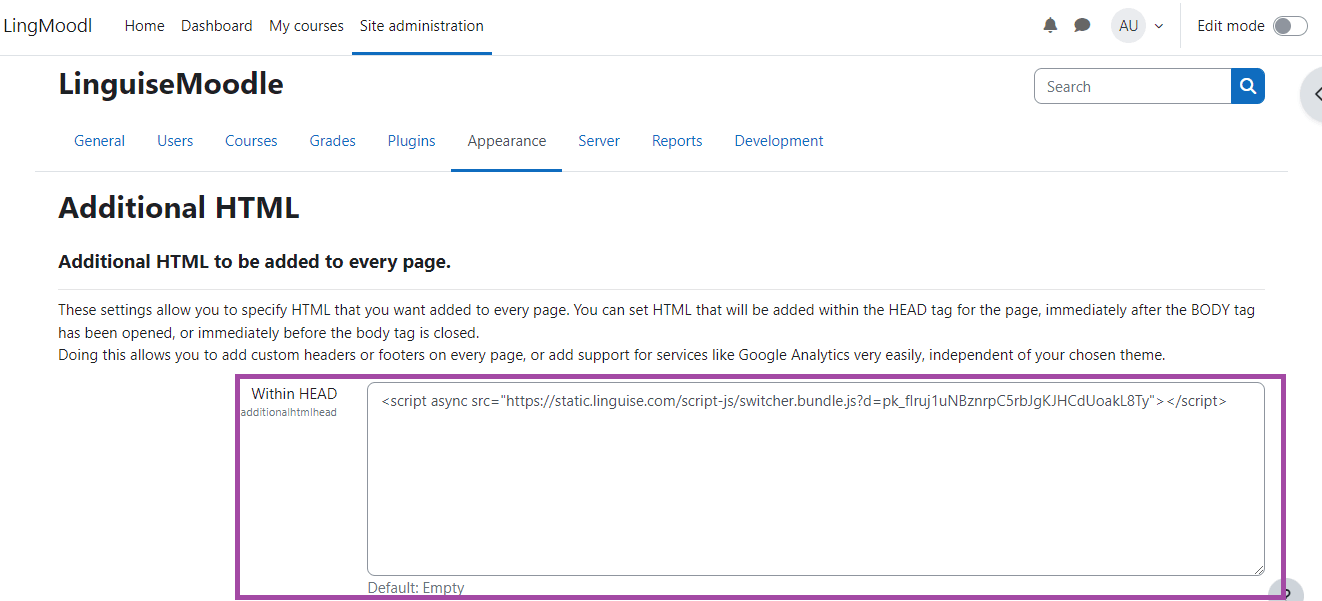
The Linguise JavaScript link must be loaded on all your Moodle LMS pages to display the language switcher with flags and alternate URLs for SEO purposes. To obtain the script link, navigate to the Linguise dashboard’s domain settings and copy the link.

The easiest way to load this code in Moodle LMS is by inserting it into your website’s `<head>` section. You can do this by following these steps, Access Site Administration, then navigate to Settings > Site Administration > Appearance > Additional HTML. This method is available by default.
Add the script link to the header section, as illustrated below.
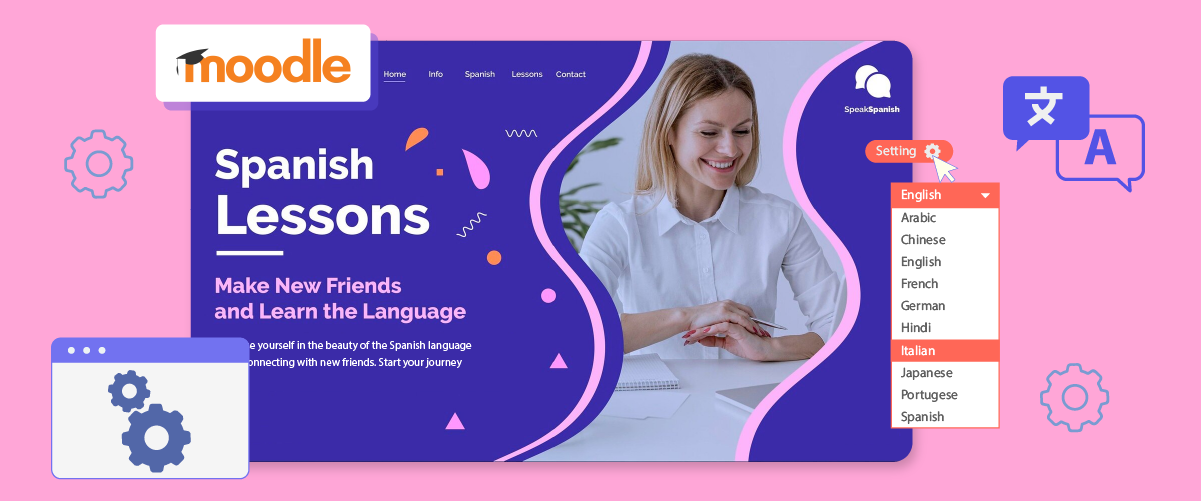
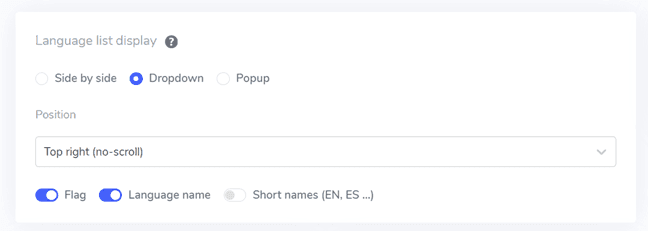
You can customize the language switcher through the Linguise dashboard by going to Settings > Language flags display. Any modifications made in this section will be reflected on the website.
Step 5: Set the main display
To start configuring the language switcher, go to the “Settings” > “Language flags display” section in the Linguise dashboard. On this page, you can modify several settings:
- Flag Icon Style: Choose from three options: side-by-side display, dropdown menu, or popup.
- Position: Select where the language switcher will be located on your site. Various position options are available; ensure it is easily accessible to visitors.
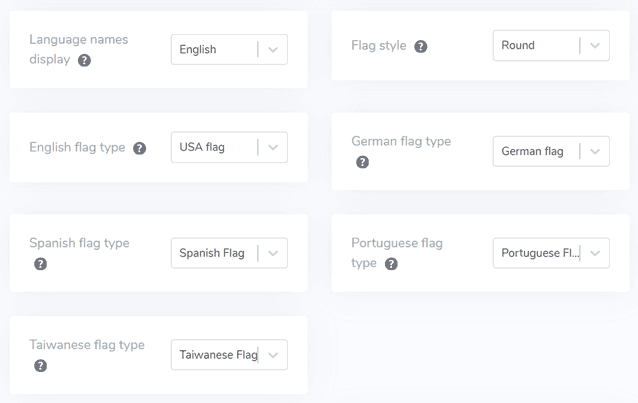
Step 6: Set the flag's design
Once you’ve set up the main display, you can further customize the design of the flags that will be shown.
- Display Language Name: You can display the language name based on either the country name or the language itself. For instance, you can show “French” or “Français.”
- English Flag Type: This option is beneficial for languages with multiple variations, such as US or British English, and it also applies to Spanish, Taiwanese, German, and Portuguese.
- Flag Style: Select the shape of the flag icon, choosing between round or rectangular.
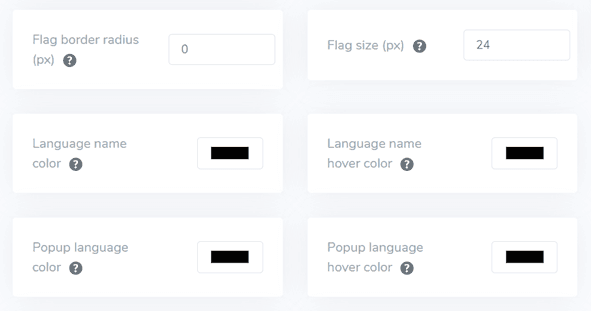
Step 7: Configure color and size
After adjusting the flag design, you can further customize the color and size of the flags. Here are the settings you can modify:
- Flag Border Radius: Customize the radius in pixels for the rectangular flag style.
- Language Name Color: Select the default text color to display the language name.
- Popup Language Color: Specify the color of the language title text in the popup or dropdown area.
- Flag Size: Adjust the dimensions of the flag icons.
- Language Name Hover Color: Set the text color that appears when users hover over the language name.
- Popup Language Hover Color: Define the text color when users hover over the language title in the popup or dropdown area.
Step 8: Setting the flag box-shadow
Finally, you can modify the flag box shadow settings. The first option enables you to apply a shadow effect to each flag icon displayed on your website. The second option controls the shadow effect when users hover their mouse over the language flags.
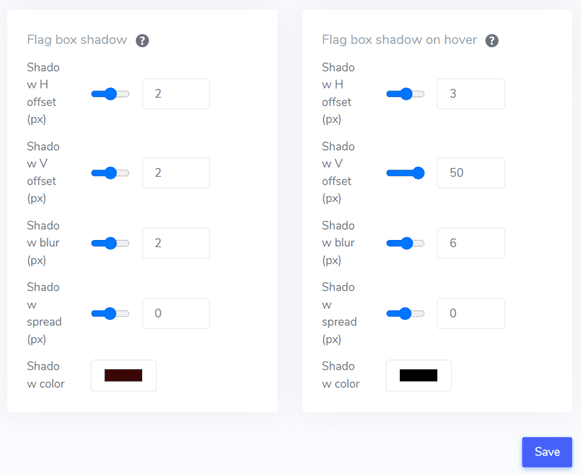
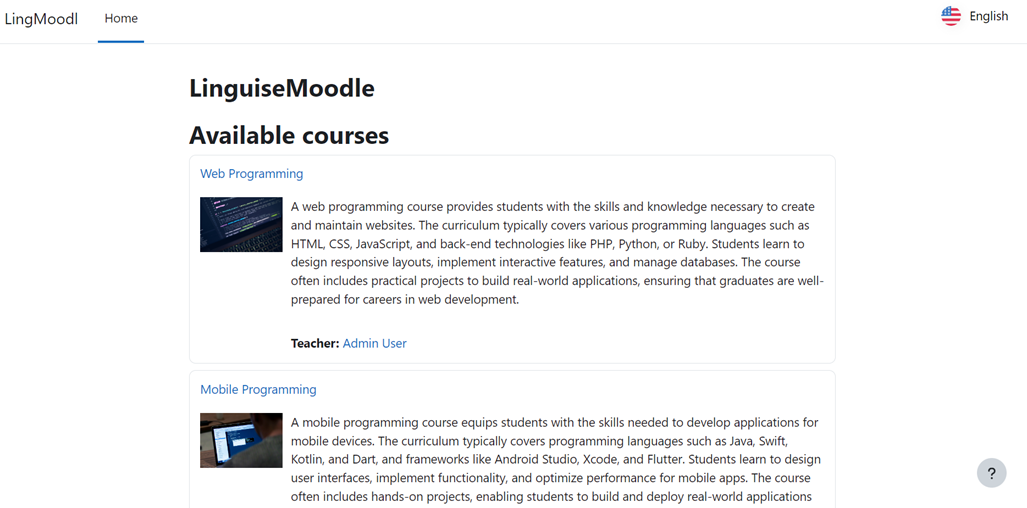
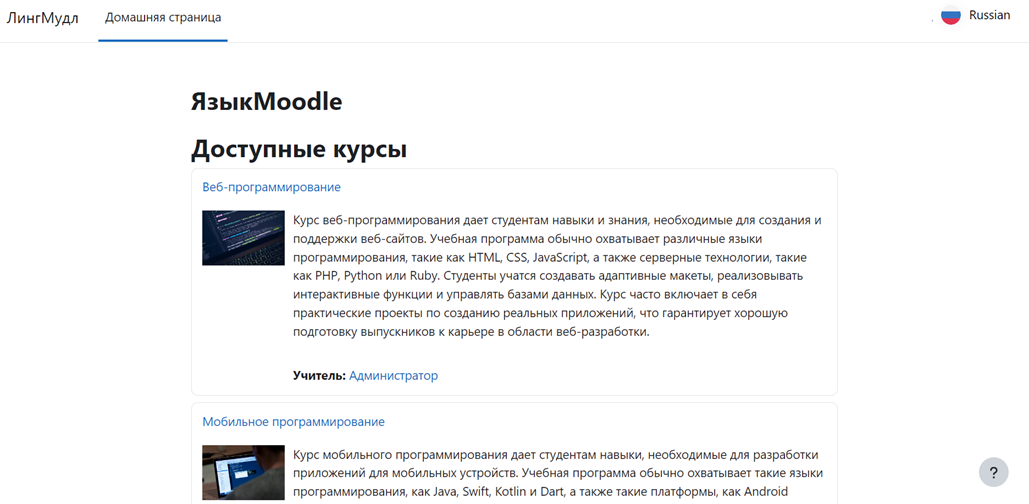
Once you’ve made all the desired adjustments, click the Save button to apply your customization changes. Then, visit your Bubble website to confirm the configuration has been successfully implemented. This will show you how the language switcher appears. After completing the setup, you can observe how the language switcher functions on your multilingual Bubble website.
Furthermore, you can translate the website into other languages , such as Russian.
Tips for optimizing language switcher on Moodle
Optimizing the language switcher on Moodle is crucial in enhancing user experience within a multilingual learning environment. Here are some key tips for optimizing the language switcher on your Moodle platform.
Combine language names and flags
Combining language names with flag icons is an effective strategy to enhance the clarity and accessibility of your language switcher. This approach provides users with two visual cues, allowing them to quickly identify and select their preferred language. The language name offers clarity, while the flag icon provides a quick visual reference.
This implementation is particularly beneficial for users who may need to become more familiar with specific flag icons or languages used in multiple countries with different flags.
For example, an international university uses Moodle to offer online courses to students from various countries. Their language switcher displays a combination of flag icons and language names such as “🇬🇧 English”, “🇪🇸 Español”, “🇫🇷 Français”, and “🇯🇵 日本語”. When a student from Japan accesses the platform, they can quickly identify and select the Japanese language option, enhancing navigation comfort and content comprehension.
Use identifiable language flag icons
Using easily recognizable flag icons is key in designing an effective language switcher. These icons should be clear, high-quality, and easily distinguishable, even in small sizes. The goal is to allow users to identify their preferred language quickly and intuitively without needing to read text or search for too long.
It’s important to choose universally recognized flag icons to represent specific languages while remaining sensitive to cultural nuances. In some cases, it may be more appropriate to use icons representing the language rather than a specific national flag, especially for languages widely used across various countries.
For example, an international high school uses a Moodle platform that offers English, Mandarin, and Arabic courses. Their language switcher uses the Chinese flag for Mandarin and an Arabic calligraphy symbol for Arabic. These icons are carefully designed to remain clear even when displayed in small sizes in the corner of the screen. A new student from China, although not yet fluent in English, can quickly identify and select the Mandarin language option based on the familiar flag icon, facilitating their adaptation process to the new learning environment.
Strategically position the language switcher
The language switcher should be positioned in a location that is easily visible and accessible to users yet does not interfere with other important elements of the Moodle interface. Common and effective positions include the site header, footer, or as part of the main navigation menu.
The language switcher should be in the same location across all pages and sections of the Moodle site so users can easily find it whenever they want to switch languages, regardless of the page or activity they are currently accessing.
For example, a university uses Moodle for a distance education program serving students from various countries. They place the language switcher in the top right corner of the site header, which remains visible as users scroll through pages. The language switcher is integrated into the hamburger menu on mobile devices to save screen space without reducing accessibility.
Maintain consistency in language switcher across all pages
This consistency includes not only the visual appearance but also its functionality. Users should be able to rely on the language switcher to function similarly, regardless of the page or activity they currently access on the Moodle platform.
This consistency also involves translating and displaying content when users switch languages. Ideally, when users change languages, they should remain on the same page, with content displayed in the newly selected language. This helps maintain context and user workflow, enhancing navigation and learning efficiency.
For example, a professional training institution uses Moodle to offer skill development courses in various languages. Their language switcher consistently appears as a dropdown in the top right corner of every page, including the student dashboard, individual course pages, discussion forums, and assignment submission pages. The participant can easily switch back to English to check original terminology whenever necessary without losing their place in the course material.
Setup a language switcher on the multilingual Moodle LMS with Linguise!
Now, you can set up a language switcher on Moodle for a multilingual site. Understanding how the language selector works can provide various benefits and lead to optimization based on the previously mentioned points.
Effectively optimizing the language selector can significantly improve the user experience. To do so, sign up for a Linguise account, integrate it with your Moodle website, and customize the language selector.