Setting up a language switcher in Kirby CMS is an important feature to make it easier for visitors from abroad to still interact with your site. The ability to switch between different languages easily has become an essential requirement for many online platforms.
By setting up a language switcher in Kirby CMS, you can significantly increase your site’s accessibility for international visitors, potentially improve search engine performance, and grow global trust in your brand. While the process may seem daunting initially, this guide will walk you through the steps to implement this feature efficiently on your Kirby CMS website, ensuring a smooth and user-friendly multilingual experience.
Importance of setup a language switcher on Kirby CMS
Implementing a language switcher on Kirby CMS is more than just a feature – it’s a strategic decision that can significantly impact your website’s performance and reach. Let’s explore the key reasons why setting up a language switcher on your Kirby CMS website.
- Enhancing user experience: A language switcher enables visitors to access content in their preferred language, significantly improving their comprehension and engagement with the website.
- Lowering bounce rates: Visitors unable to find content in their language will likely leave quickly. Offering multiple language options encourages users to explore the site further.
- Boosting conversion rates: When users can understand product details, policies, and purchase processes in their native language, they’re more inclined to purchase or take desired actions.
- Strengthening multilingual SEO: Search engines factor in user experience when ranking websites. An intuitive language switcher can enhance your multilingual SEO performance by facilitating easy access to content in various languages.
How to setup a language switcher on Kirby CMS
Now that we’ve explored the importance of implementing a language switcher on a multilingual Kirby CMS website let’s delve into the practical aspects of setting it up. While many website translation services offer this feature, finding one that provides a highly customizable and user-friendly language switcher can be challenging.
It’s crucial to select an automatic translation service that not only works well with various frameworks but also offers a flexible language switcher feature. One service that stands out in meeting these requirements is Linguise automatic translation website. Their language switcher is known for its ease of customization and user-friendly interface, making it an excellent choice for integration with Kirby CMS.
By seamlessly incorporating Linguise into your Kirby CMS, you can effortlessly add a language switcher to your multilingual application. Linguise’s advanced features and intuitive interface simplify the setup and maintenance of a language switcher on your Kirby CMS website.
Let’s follow the steps to install Linguise on a multilingual Kirby CMS website and configure the language switcher.
Step 1: Register your Linguise account
Start by preparing your Kirby CMS website for translation, which requires access to the Kirby CMS admin dashboard. Then, create a free Linguise account and add your website’s domain. You can take advantage of the 30-day free trial before selecting a subscription plan.
Step 2: Add your Kirby CMS website domain
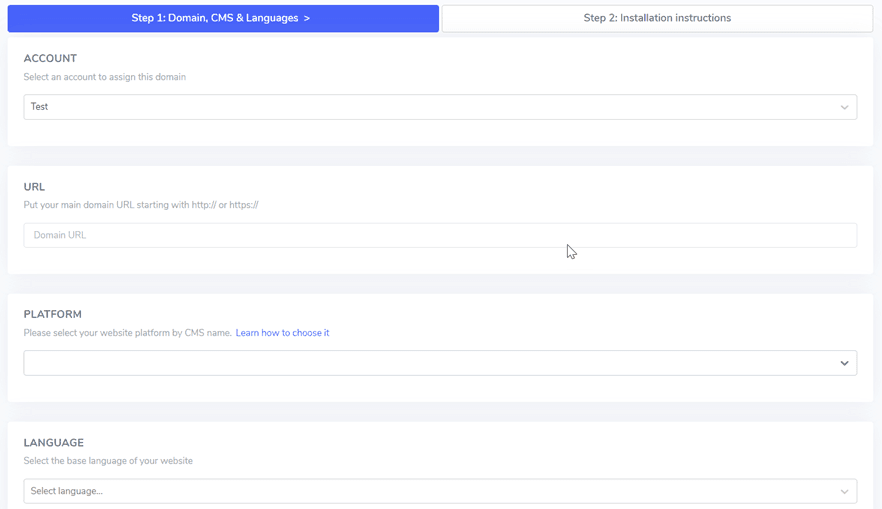
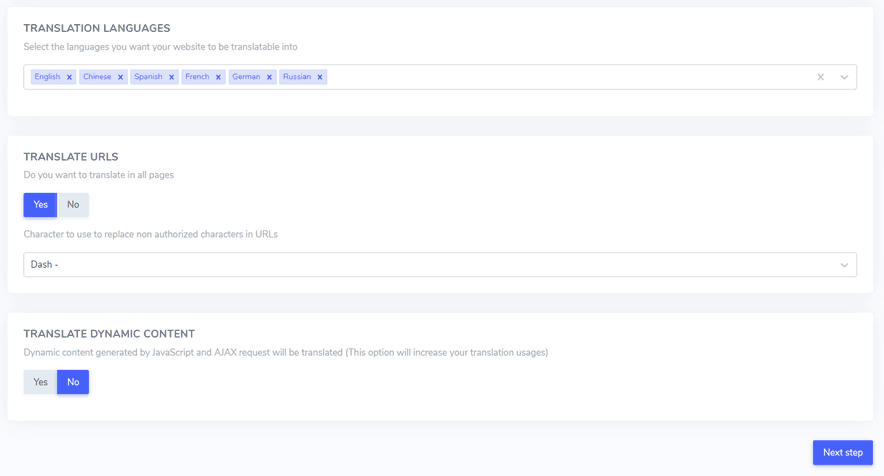
Once your Linguise account is set up, go to the dashboard and add your Kirby CMS website domain. Click “Add domain” and provide the following details:
- Account
- URL
- Platform (Kirby CMS)
- Default language
- Translation languages
- Translate URLs
- Dynamic content translation
Step 3: Upload & connect the Linguise script
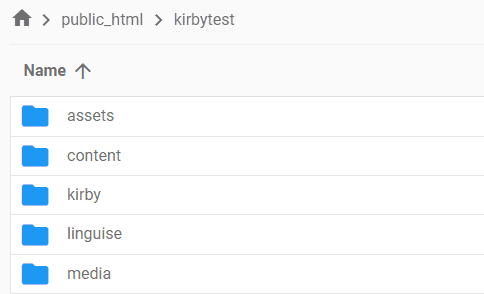
Download the Linguise translation script and upload it to the root folder of your Kirby CMS installation.
Unzip the script and ensure the folder named “linguise” remains at the root level of your website.
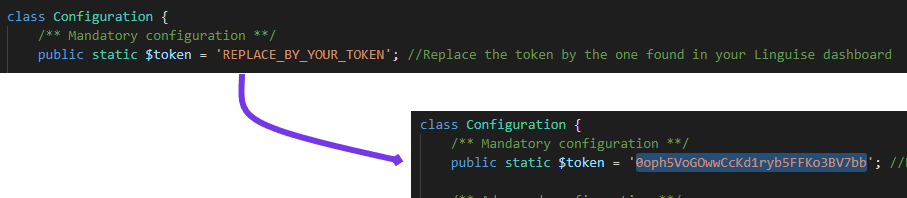
Next, copy the Linguise API key into the `Configuration.php` file on your server. Open the file, replace `REPLACE_BY_YOUR_TOKEN` with your API key, and save the changes.
Step 4: Set up URL rewriting for Kirby CMS
Kirby CMS has URL rewriting enabled by default. If it’s not active, you can enable it through your hosting provider.
To configure URLs by language, add the following code to your `.htaccess` file right after the `RewriteEngine on` line in the default Kirby CMS `.htaccess` file.
					<IfModule mod_rewrite.c>
  RewriteEngine On
  RewriteRule ^(af|sq|am|ar|hy|az|eu|be|bn|bs|bg|ca|ceb|ny|zh-cn|zh-tw|co|hr|cs|da|nl|en|eo|et|tl|fi|fr|fy|gl|ka|de|el|gu|ht|ha|haw|iw|hi|hmn|hu|is|ig|id|ga|it|ja|jw|kn|kk|km|ko|ku|ky|lo|la|lv|lt|lb|mk|mg|ms|ml|mt|mi|mr|mn|my|ne|no|ps|fa|pl|pt|pa|ro|ru|sm|gd|sr|st|sn|sd|si|sk|sl|so|es|su|sw|sv|tg|ta|te|th|tr|uk|ur|uz|vi|cy|xh|yi|yo|zu|zz-zz)(?:$|/)(.*)$ linguise/linguise.php?linguise_language=$1&original_url=$2 [L,QSA]
</IfModule>
Step 5: Activate & customize the language switcher
To display the language switcher with flags and alternate URLs for SEO purposes, the Linguise JavaScript link must be loaded on all Kirby CMS pages.
Obtain the script link from the domain settings on the Linguise dashboard and copy it.

The easiest way to load this script in Kirby CMS is by adding it to your website’s header.php or <head> section. Here’s how to do it:
- Access the root folder of your website.
- Navigate to site > snippets > header.php.
- Edit the header.php file to include the script link in the header section.

The language switcher will initially display in its default format. But you can customize the language switcher using the Linguise dashboard by navigating to Settings > Language flags display. This section offers various customization options, including main display settings, language names, and design elements.
Step 6: Configure the main display
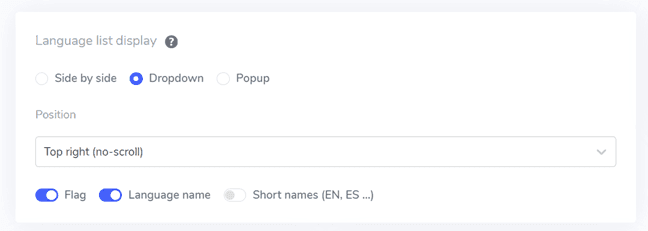
To begin configuring the language switcher, navigate to Settings > Language flags display in the Linguise dashboard.
In this section, you can adjust various settings. The main display settings allow you to customize elements such as.
- Flag icon style: Choose between a side-by-side display, dropdown menu, or popup.
- Position: Determine the placement of the language switcher on your website. Choose a position that is easily accessible to visitors.
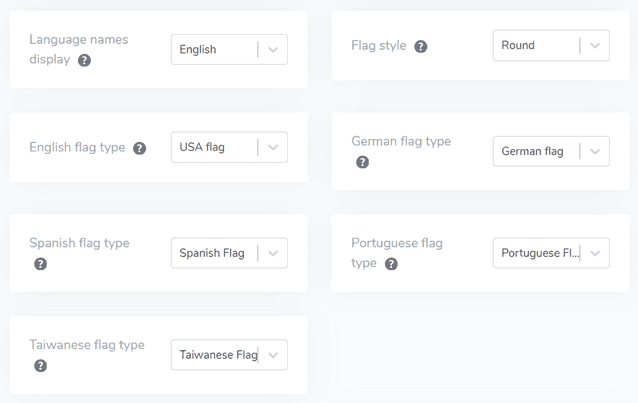
Step 7: Set the flag design
After configuring the main display settings, customize the design of the displayed flags.
- Language name display: Choose to display the language name based on the country or the language itself, such as “French” or “Français.”
- English flag type: This is useful for languages with multiple variations, like US or British English, and is also applicable to Spanish, Taiwanese, German, and Portuguese.
- Flag style: Select the shape of the flag icon, either round or rectangular.
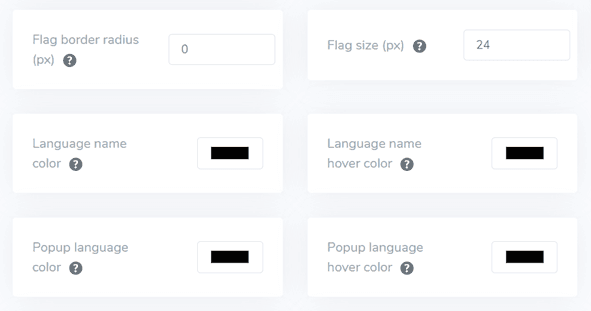
Step 8: Set the color and size
After configuring the flag design, customize the color and size of the flags. Here are some settings you can adjust.
- Flag border-radius: Adjust the border radius for rectangular flags, measured in pixels.
- Language name color: Choose the default text color to display the language name.
- Popup language color: Set the color for the language title text in the popup or dropdown area.
- Flag size: Adjust the size of the flag icons.
- Language name hover color: Specify the text color that appears when the user hovers over the language name.
- Popup language hover color: Define the text color that appears when the user hovers over the language title in the popup or dropdown area.
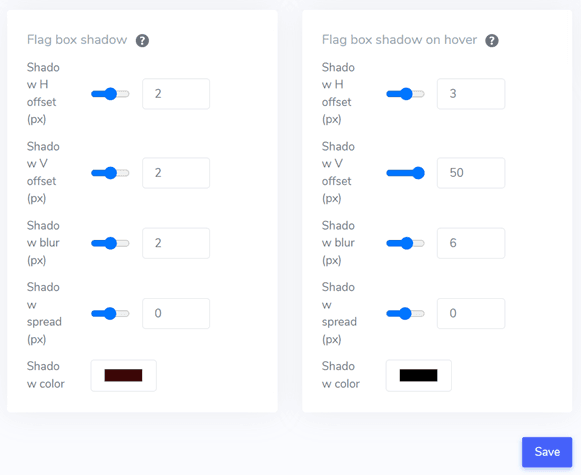
Step 9: Configure box-shadow
Finally, adjust the flag box shadow settings. The first option lets you add a shadow effect to each flag icon displayed on your website. The second option controls the shadow effect when users hover over the language flags.
After making the necessary adjustments, click the Save button to apply the changes. Then, check your Kirby CMS website to ensure the configuration has been successfully implemented. This will show you how the language switcher will appear.
Once the setup process is complete, you can see the language switcher in action on your Kirby CMS multi-language website.
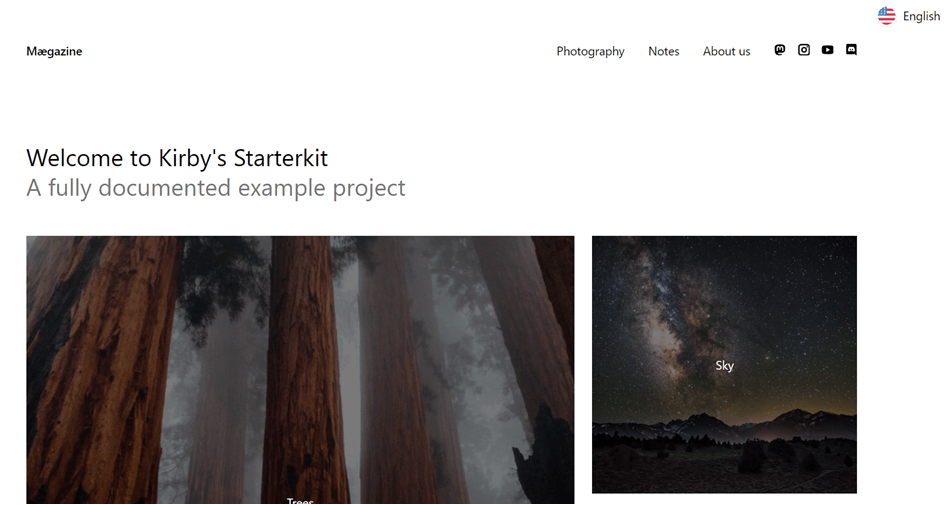
We will then automatically translate the Kirby CMS website into other languages, such as French.

4 tips for optimizing language switcher on Kirby CMS
Here are four essential tips to help you refine your language switcher and make it more effective for your global audience.
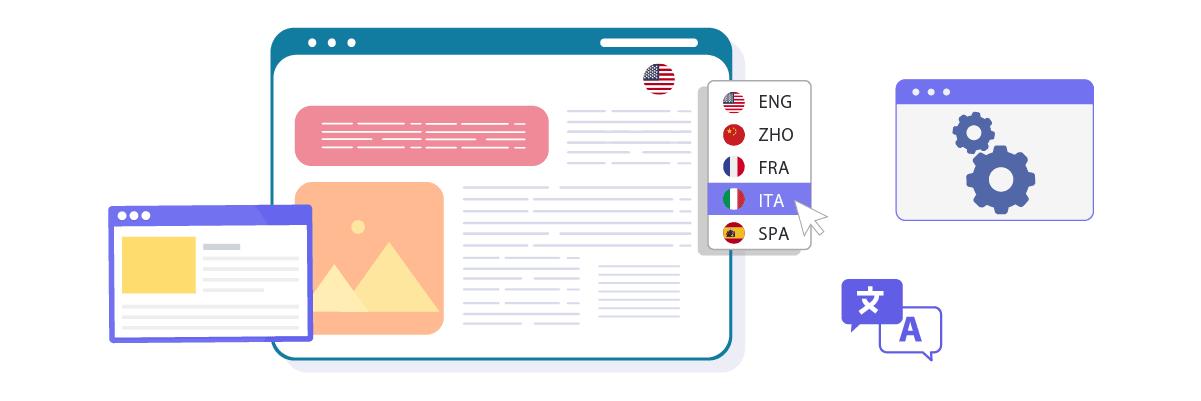
#1 Use a clearly identifiable language flag icon
Incorporating easily recognizable language symbols or flags in your language switcher is vital for quick language identification. This approach allows visitors to swiftly locate and select their preferred language, creating an intuitive user experience. The key is to choose universally understood indicators to avoid any misinterpretation.
When implementing flag icons, ensure they are high-quality and easily distinguishable, even at smaller sizes. Consider using a combination of flags and language codes to provide both visual and textual cues for your users.
Example:
Imagine a Kirby-based travel blog covering destinations worldwide. The site’s language switcher could use a globe icon along with small flag icons and two-letter language codes.
🌎 🇺🇸 EN | 🇪🇸 ES | 🇫🇷 FR | 🇩🇪 DE | 🇯🇵 JP
This setup lets users quickly identify their language, whether they recognize the flag or the language code, enhancing the overall user experience.
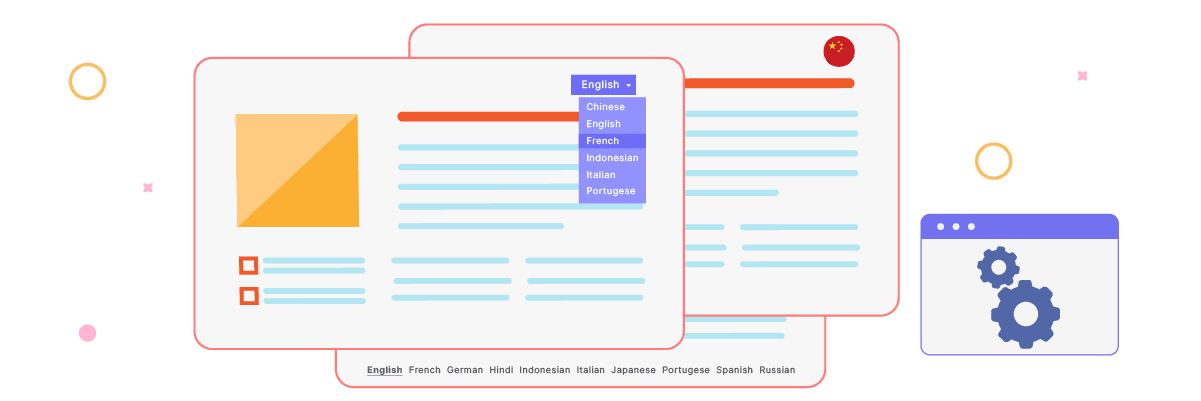
#2 Display language names alongside flags
While flags provide a quick visual reference, pairing them with the native names of languages offers additional clarity. This strategy helps prevent confusion, especially for languages spoken in multiple countries with different flags.
By including the actual language names, you eliminate ambiguity and ensure visitors can accurately identify their preferred language. This approach also demonstrates respect for cultural diversity and promotes inclusivity.
Example:
Consider a Kirby-powered educational platform offering courses in multiple languages. Their language switcher might look like this.
🇺🇸 English | 🇪🇸 Español | 🇫🇷 Français | 🇩🇪 Deutsch | 🇯🇵 日本語
This design allows users to see both the flag and the language name in its native script, making it instantly recognizable to speakers of that language. It’s particularly helpful for languages like Spanish or English that are spoken in multiple countries with different flags.
#3 Position the language switcher button thoughtfully
The placement of your language switcher is crucial for its effectiveness. It should be prominent and easily accessible on your website. Common and effective positions include the header, footer, or main navigation menu.
Ensure the language switcher is visible and easily reachable from any page on your site. This consistency in placement helps users quickly find the language options, regardless of their current location within your website.
Example:
For example a Kirby-based portfolio website for a multinational architecture firm. They could implement their language switcher as follows.
- Header placement: The language switcher is located in the top-right corner of the header, next to the search icon.
- Sticky navigation: As users scroll, the header remains fixed at the top, ensuring the language switcher is always accessible.
- Mobile optimization: On mobile devices, the language switcher is included in the hamburger menu for easy access without cluttering the small screen.
This strategic placement ensures that users can easily switch languages at any point, whether they are viewing project galleries, reading about the firm’s history, or checking contact information.
#4 Maintain consistency of the language switcher across all pages
It’s essential to keep the appearance and functionality of your language switcher uniform throughout your website. Users should be able to change languages effortlessly, regardless of their current page or the content they’re viewing.
This consistency provides a seamless user experience and reinforces the accessibility of language options, building trust and confidence in your multilingual website.
Example:
Consider a Kirby-powered e-commerce site selling products globally. Here’s how they might implement a consistent language switcher strategy.
- Uniform design: The language switcher appears as a dropdown menu labeled “Language” in the top-right corner of every page, including product listings, individual product pages, and checkout pages.
- Content preservation: When users switch languages, they remain on the same page, but the content is displayed in the newly selected language. For instance, if a user views a handcrafted vase’s description in English and switches to French, they will see the same product details in French.
- URL structure: The URL structure changes consistently when switching languages.
English: www.yourmarket.com/products/blue-ceramic-vase
French: www.yourmarket.com/fr/produits/vase-ceramique-bleu
This consistent experience across all pages ensures that users can confidently navigate and shop in their preferred language, potentially increasing their likelihood of completing a purchase and returning to the site in the future.
Setup a language switcher on your Kirby website with Linguise!
Setting up a language switcher on Kirby CMS is a crucial step towards creating a truly global and user-friendly website. By implementing this feature, you open your digital doors to a diverse international audience, potentially boosting engagement, reducing bounce rates, and improving your site’s overall performance.
To streamline this process and ensure optimal results, consider using Linguise for your Kirby CMS website. Linguise offers a powerful, customizable language switcher that integrates seamlessly with Kirby CMS, allowing you to easily implement and fine-tune your multilingual strategy. Let’s create a Linguise account, integrate it with your Kirby CMS website, and customize the language switcher to further improve the user experience.