Setting up a language switcher on the Duda website can simplify the process of users changing languages. This feature is especially beneficial for platforms catering to a global audience, allowing users to access the content in their preferred language.
To implement a language switcher in your Duda website, you should use translation tools that support language switcher options. So, his article will cover the steps to set up a language switcher in Duda using one of the automatic translation service tools.
Important language switcher on your Duda website

Setting up a language switcher on your Duda website serves several crucial purposes; the following are among them.
- Enhanced accessibility for global users: A language switcher enables visitors from different countries to browse your site in their preferred language. This feature significantly improves user experience.
- Improved international SEO performance: By offering multiple language versions, your Duda site can achieve better rankings in foreign language search results. For example, a German version of your website is more likely to appear in German Google searches.
- Boost in conversion rates: Providing content in various languages can positively impact your sales. For instance, an e-commerce platform allowing customers to switch languages can attract a wider customer base and increase purchases.
- Enhanced user engagement and retention: A language switcher can prolong user sessions on your site. For example, users interacting with a community forum in their preferred language tend to stay engaged for longer periods. This increased engagement is significant, as users typically spend twice as much time on sites in their native language compared to those in a second language, leading to improved user retention rates.
How to setup a language switcher on the Duda web builder
Understanding the significance of language switching for multilingual Duda websites is crucial. While many website translation services offer this feature, it’s important to choose one that aligns with your specific requirements.
Not all translation services provide customizable and user-friendly language switchers. Therefore, it’s essential to select an automatic translation service that is compatible with various frameworks and offers flexible language-switching capabilities.
Linguise is an automatic translation service that meets these criteria. It offers a highly adaptable and intuitive language-switching feature that integrates seamlessly with popular CMS and web builders, including Duda.
Linguise’s integration with Duda is smooth, allowing developers to incorporate language switching into their multilingual sites easily. By utilizing Linguise’s advanced features and user-friendly interface, you can streamline the process of setting up and maintaining language switchers on your Duda website.
To implement Linguise on your Duda website and configure the language switcher, follow these steps.
Step 1: Register your Linguise account
Begin by creating a Linguise account, which includes a 30-day free trial to help you get started. After signing up and entering the Linguise dashboard, you’ll need to register your domain to enable translations.
To do this, copy your domain URL (including the https://) and select “Other Cloud Hosted CMS” as your platform.

Then, choose your source language and the target languages you wish to translate your site into.

Step 2: Automatically add DNS using entri
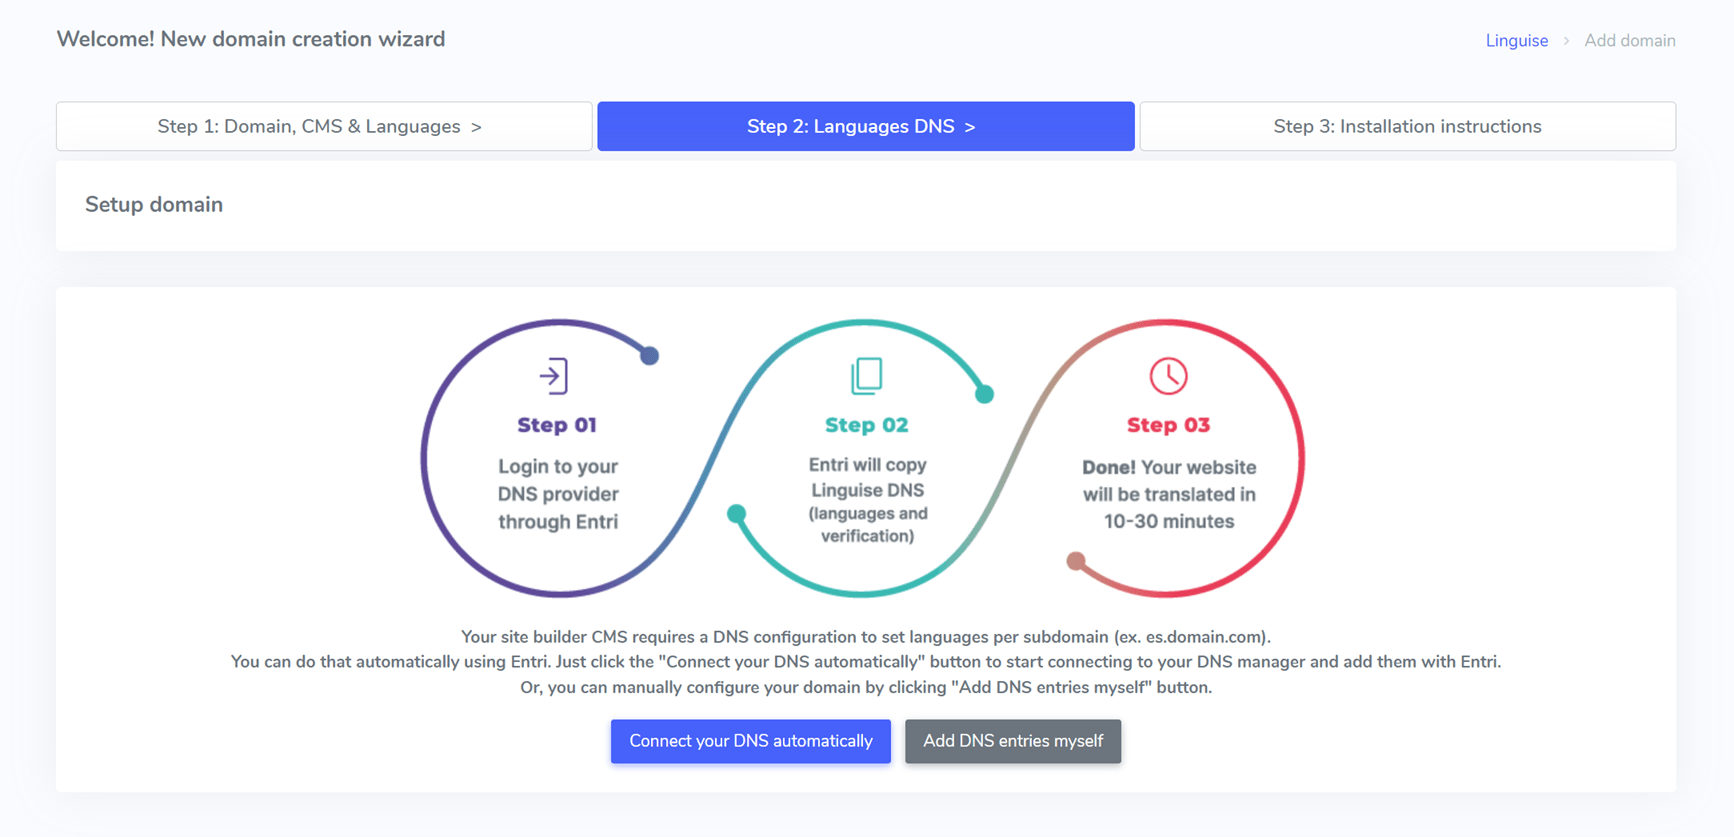
After successfully registering your website in the Linguise dashboard, you’ll have two installation options. For automatic DNS configuration, click “Connect your DNS automatically.” This will utilize the Entri feature, which simplifies the setup by handling the DNS changes for you. Alternatively, you can manually copy and add the DNS records to your domain provider.
When you choose the automatic option, Entri will scan your website’s URL and review the public DNS records to determine the necessary settings.
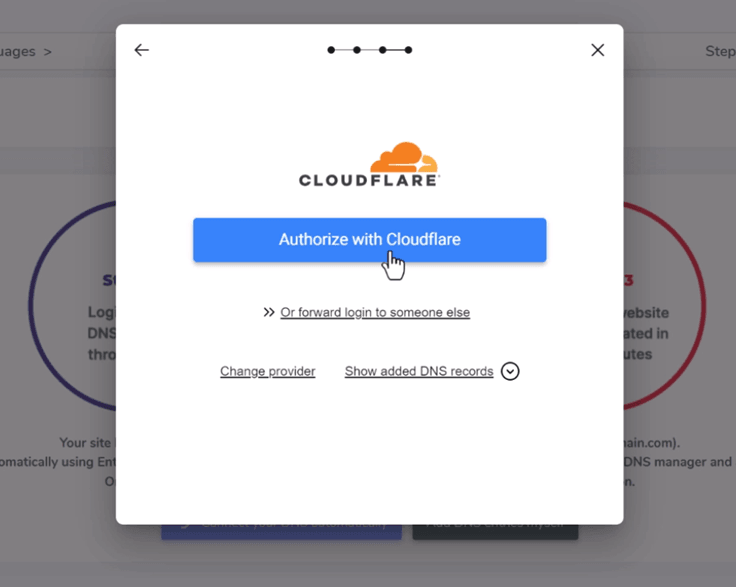
Next, click “Authorize with [your domain provider]” (e.g., Cloudflare), which will redirect you to your domain provider’s login page.
After logging in, Entri will automatically insert the correct DNS records—one per language and a TXT record for the validation key.
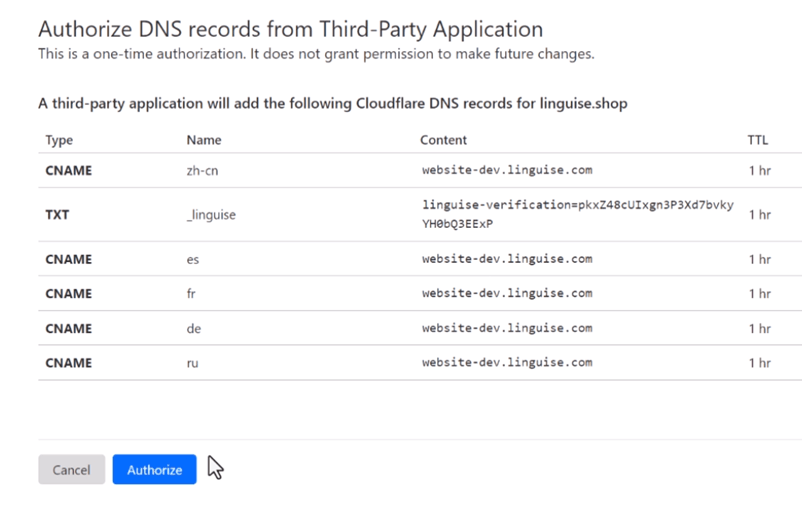
You should then see the DNS records added to your domain, and Entri will confirm once the DNS configuration is complete. The translation feature will activate after the DNS entries propagate, typically within 20-30 minutes.
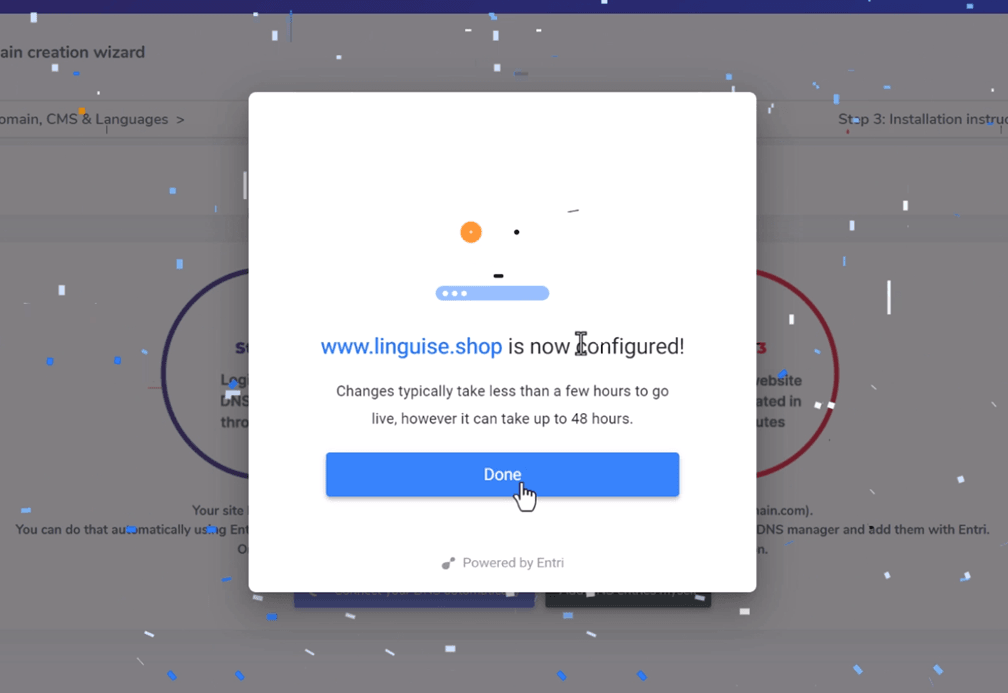
For those opting for manual setup, instructions are available below.
Step 3: Copy DNS records
After your domain is successfully validated, you’ll be taken to a screen where you can copy the required DNS records. These records are essential for loading your multilingual pages, like fr.domain.com, es.domain.com, and so on.
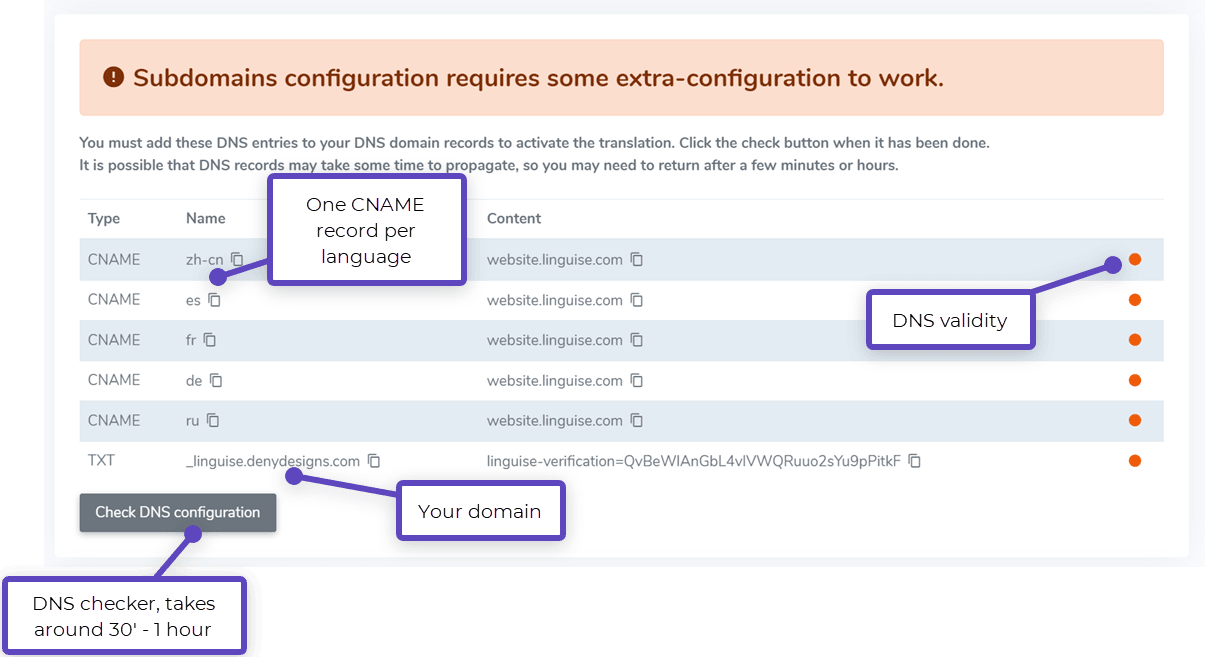
Next, log in to your domain manager and go to the DNS settings section. You will need to add the following:
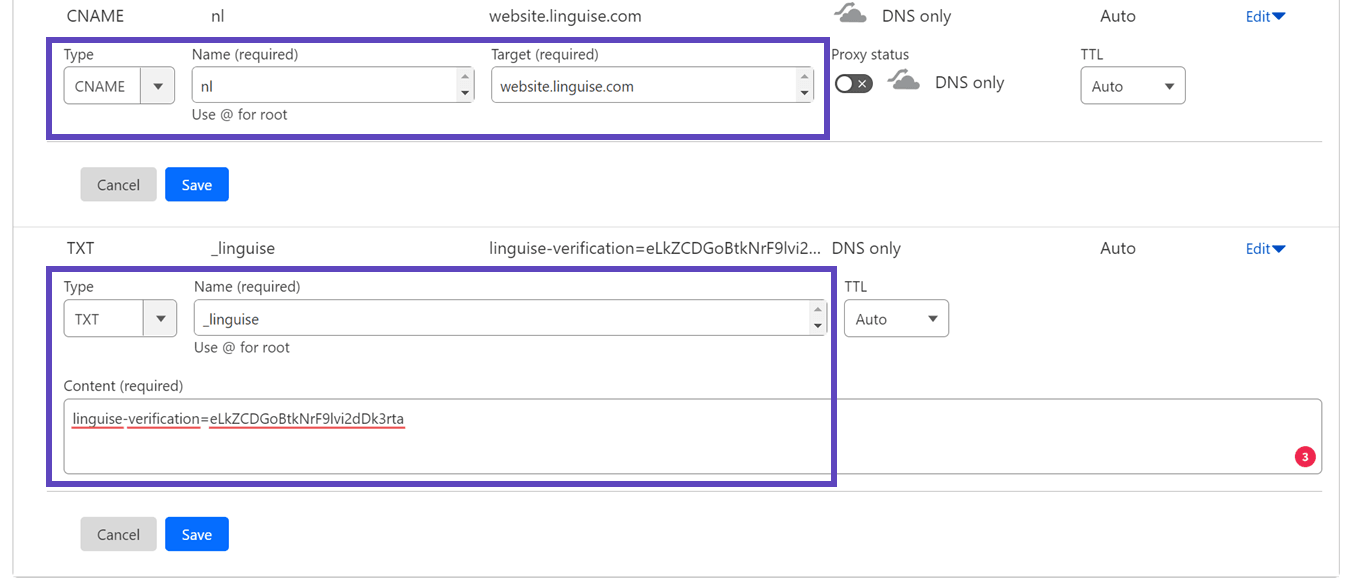
- A TXT record for domain verification
- One or more CNAME records for the target languages
Below is an example of how the TXT and CNAME records should appear.
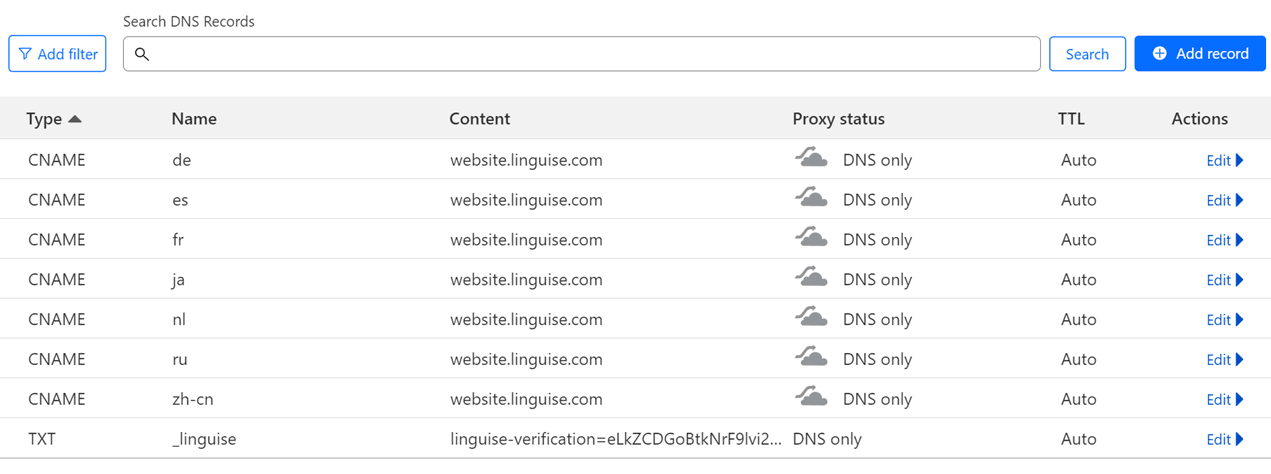
Once all records are added, your configuration should look similar to this setup.
Step 4: Verify DNS
After adding all the DNS records to your domain, you can verify the DNS propagation by clicking the “Check DNS configuration” button. DNS validation usually takes between 30 minutes and an hour. Once it’s complete, green dots will appear next to the DNS entries in your Linguise dashboard. The last step is to add the language switcher with country flags to finalize the translation setup for your Duda website.

Step 5: Enable and language switcher
The language switcher is a flag popup that lets users choose their preferred language. To activate it, copy the provided code into the head section of your Duda site pages. This will automatically display the flag-based language switcher on your live website.
The code is at the end of the domain registration process or in your domain settings. Copy it to your clipboard.

Next, open your website editor, go to ‘Settings’ from the left-hand menu, and select ‘HEAD HTML.’
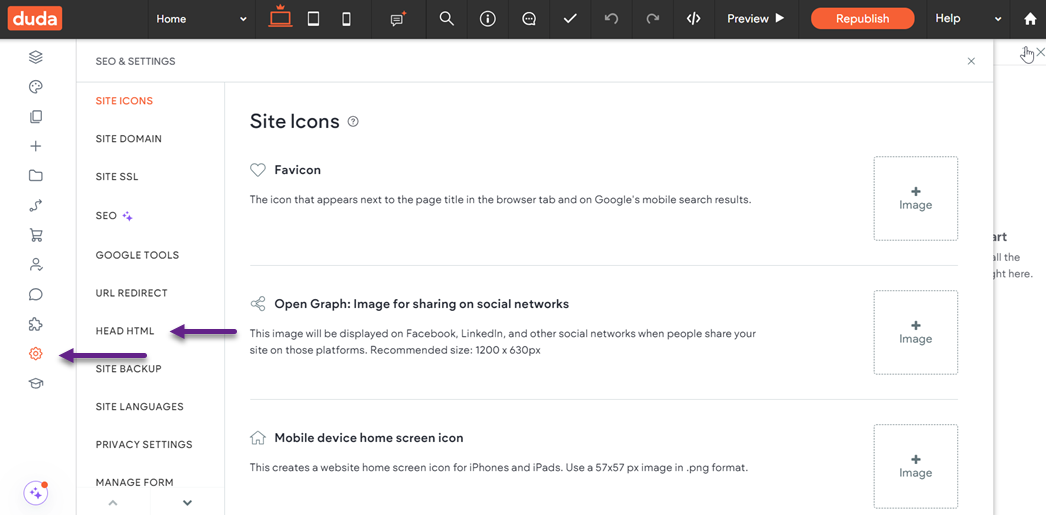
Paste the Linguise script, click ‘Save,’ and publish your site.
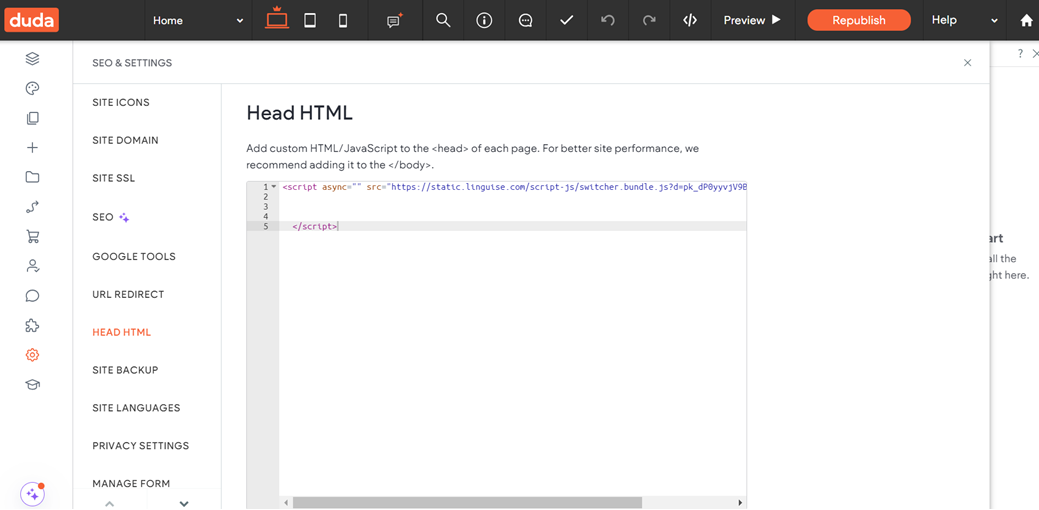
The Linguise language switcher will then be visible on the front end of your Duda website.
Step 6: Configure main display
To start configuring the language switcher, go to the “Settings” > “Language flags display” section in the Linguise dashboard. Here, you can customize several options.
- Flag icon style: Choose between a side-by-side display, dropdown menu, or popup.
- Position: Decide where the language switcher will appear on your website. Multiple placement options are available, so make sure it’s easily accessible for users.
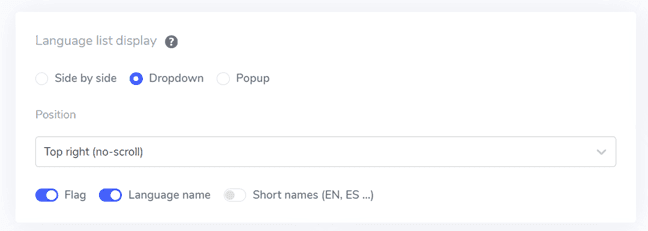
You have the option to display a combination of flags and language names, flags and language abbreviations, or just language names. It’s recommended to use both flags and language names for better user recognition and easier navigation.
Step 6: Set the flag's design
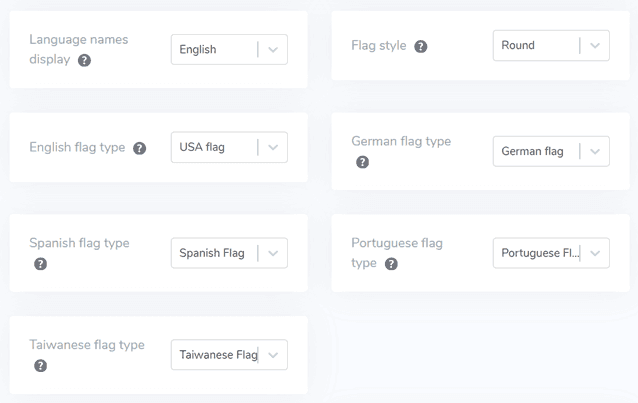
Once you’ve set up the main display, you can further customize the appearance of the flags.
- Display language name: You can choose to show the language name based on the country or the language itself. For instance, you can display “French” or “Français.”
- English flag type: This option is helpful for languages with multiple regional variations, like US or British English, and applies to other languages like Spanish, Taiwanese, German, and Portuguese.
- Flag style: Select the shape of the flag icon, either round or rectangular
Step 7: Customize color and size
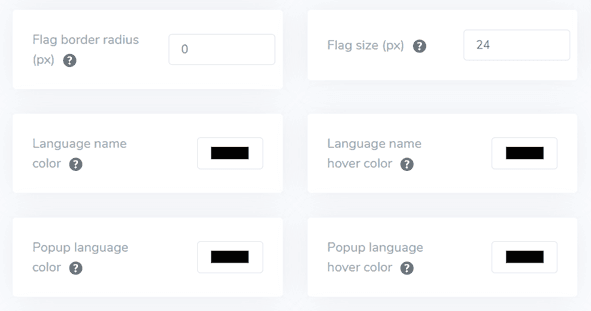
After setting up the flag design, you can further personalize the flags’ color and size. Here are the options you can adjust.
- Flag border-radius: Customize the corner radius in pixels for rectangular flags.
- Language name color: Select the default text color to display the language name.
- Popup language color: Set the color for the language title text in the popup or dropdown menu.
- Flag size: Adjust the size of the flag icons to fit your design.
- Language name hover color: Choose the text color that appears when users hover over the language name.
- Popup language hover color: Set the hover text color for language titles in the popup or dropdown menu.
Step 8: Setting the flag box-shadow
Lastly, you can modify the flagbox shadow settings. The first option lets you apply a shadow effect to each flag icon shown on your website, while the second option manages the shadow effect when users hover their mouse over the language flags.
Once you’ve made all the desired adjustments, click the Save button to apply your changes. Then, check your Duda website to confirm that the configuration has been successfully implemented. This is how the language switcher will look.
After completing the setup, you can observe how the language switcher operates on your multilingual Duda website.

Next, you can translate the website into other languages, such as Russian.

Best practices for optimizing language switcher on Duda website
After successfully implementing the language switcher on a Duda multilingual website, it’s essential to consider tips for optimizing its functionality for both your site and visitors.
Use easily recognizable language flags or icons
When adding a language switcher to your Duda website, it’s crucial to utilize easily identifiable language flags or icons. These visual elements assist users in quickly recognizing and selecting their preferred language. For instance, a globe icon is widely understood to represent language options. While country flags can also be used, it’s important to remember that not all languages are associated with a single country, which can sometimes lead to confusion.
Example: The Amazon website features a small globe icon next to the currently selected language (e.g., “EN”) in the top navigation bar. This straightforward yet effective design allows users to swiftly find the language options, regardless of their current language setting.
Include language names alongside flags
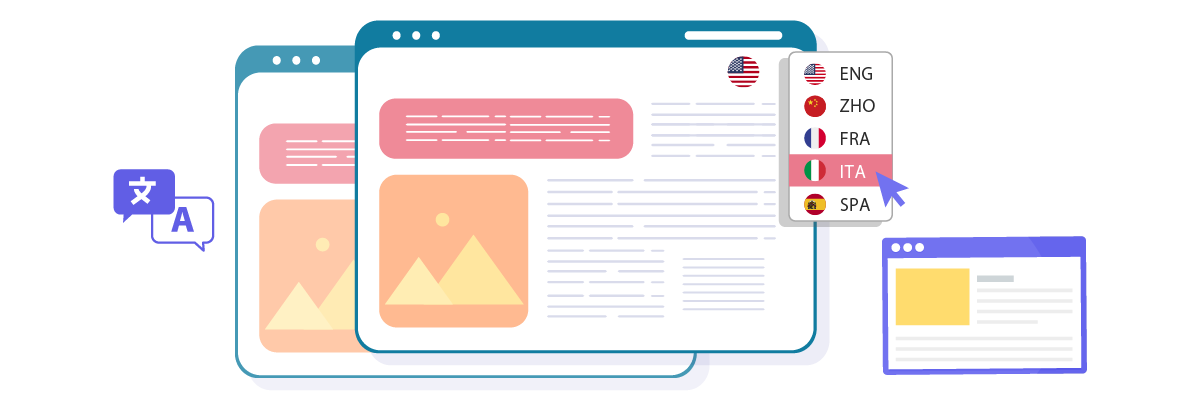
Although flags can be helpful, they shouldn’t stand alone. Displaying the name of the language in its native script alongside the flag or icon enhances clarity and reduces potential misunderstandings. This is particularly significant for languages spoken across multiple countries or regions.
Example: The Airbnb language switcher presents both the language name and the corresponding country flag. For instance, it shows “English (UK)” with the UK flag and “Italian” with the Italian flag. This combination ensures users can accurately select their preferred language option.
Thoughtfully position the language switcher button
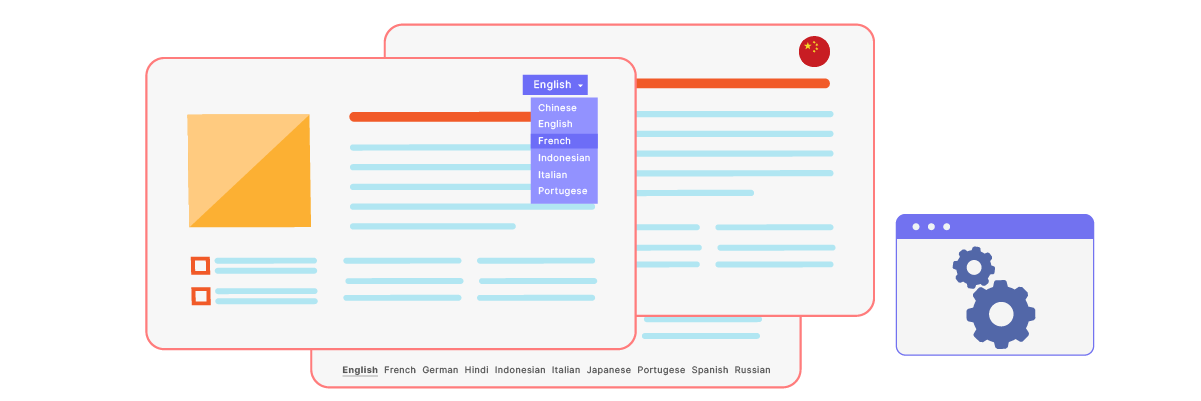
The placement of your language switcher is crucial for user accessibility. Common locations include the top right corner of the header, in the footer, or within the main navigation menu. The key is to ensure it is easily discoverable without cluttering the primary content area.
Example: On linguise.com, the language switcher is located in the top right corner of the page, making it consistently visible and accessible. This strategic positioning guarantees that users can quickly find and utilize the language options, regardless of their location on the site.
Design the language switcher to be responsive

Make sure your language switcher functions well on all devices, from desktop computers to smartphones. For smaller screens, you might need to adjust the design—such as using a dropdown menu instead of a horizontal list of options.
Example: The UNESCO website’s language switcher adapts seamlessly across devices. On desktop, it appears as a horizontal list in the header, while on mobile, it transforms into a compact dropdown menu, ensuring usability without sacrificing the mobile layout.
Ensure consistency of the language switcher across pages

Maintain the same design, functionality, and position of your language switcher throughout all pages of your Duda website. This consistency helps users navigate your site more efficiently, as they will know exactly where to find the language options, regardless of the page they are on.
Example: The website consistently places its language switcher in the footer across all pages, from the homepage to product pages and during the checkout process. This uniformity ensures that users can easily switch languages anytime during their browsing or shopping experience.
Setup a language switcher on your Duda website using Linguise!

Now that you know how to select the language for your Duda multilingual website, understanding the language selector can offer numerous advantages and facilitate optimization based on the points discussed earlier.
Effectively optimizing the language selector can greatly enhance the user experience. Create a Linguise account, integrate it with your Duda website, and customize the language selector to elevate user satisfaction.


