Do you have a website created with Concrete CMS and want to add a language switcher? Setting a language switcher simplifies the process for users to switch between languages. This functionality is especially useful for websites with an international user base, allowing visitors to navigate the platform in their preferred language.
To set up a language switcher in Concrete CMS, administrators usually start by specifying the languages they want to support in the system’s settings. They then add a dropdown menu or button that users can use to select their preferred language. This article will guide you through implementing a language switcher in Concrete CMS using one of the available automatic translation services.
Importance of setup a language switcher on Concrete CMS
The need to serve content in multiple languages is becoming increasingly important. A recent study from DeepL revealed that 75% of respondents agreed that localized content significantly increases customer engagement.
Implementing a language switcher is about translating content and creating a more personalized experience for website visitors. This is evident from the data showing that 96% of respondents observed a positive ROI (Return on Investment) from their content localization efforts.
With these data in mind, implementing a language switcher on Concrete CMS is a strategic move that cannot be abandoned. That’s why this article will discuss how to set up a language switcher on your Concrete CMS website.
How to setup a language switcher on Concrete CMS
Now that we understand the importance of the language change feature on the multilingual Concrete CMS platform let’s discuss how to implement it. Concrete CMS has a built-in language management system that can be customized to suit your organization’s needs.
One of the automatic translation services you can use is Linguise. Linguise offers easy-to-use language-switching features and can be integrated with various popular CMS, including Concrete CMS.
Concrete CMS provides easy multi-language integration, allowing administrators to add language-switching features to their sites quickly. By utilizing Concrete CMS’s advanced features and user-friendly interface, you can simplify setting up and maintaining a language switcher on your platform. Here are the steps to install Linguise automatic translation on Concrete CMS and set up the language switcher.
#1 Register Concrete CMS domain
Start by creating a free Linguise account and adding your website’s domain. You can use a 30-day free trial before deciding on a subscription.

Next, you’ll need to authorize your domain for translation. Copy your domain name, including “https://”, and select “Concrete CMS” as your platform. Choose your source language and the target languages for automatic translation setup within Concrete CMS.

#2: Upload and connect the Linguise script
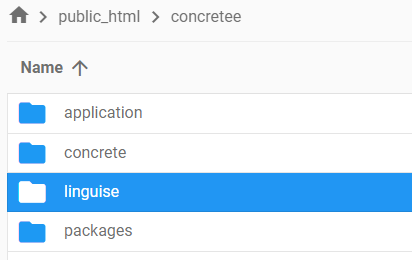
You must upload the Linguise translation script to the server where Concrete CMS is installed. Download the script from the provided link, unzip it, and place the folder in the root directory of your Concrete CMS installation. Make sure the folder is named “linguise.”
Then, insert the Linguise API key into the Configuration.php file on your server. Open the file and replace “REPLACE_BY_YOUR_TOKEN” with your API key, placing it within the single quotes.

#3: Set up Concrete CMS URL rewriting
In Concrete CMS, URL rewriting is typically enabled by default. If not, you can enable it through your hosting provider. Update the .htaccess file by adding specific code after the “RewriteEngine on” line. This will configure language-specific URLs.
					<IfModule mod_rewrite.c>
    RewriteEngine On
    RewriteRule ^(af|sq|am|ar|hy|az|eu|be|bn|bs|bg|ca|ceb|ny|zh-cn|zh-tw|co|hr|cs|da|nl|en|eo|et|tl|fi|fr|fy|gl|ka|de|el|gu|ht|ha|haw|iw|hi|hmn|hu|is|ig|id|ga|it|ja|jw|kn|kk|km|ko|ku|ky|lo|la|lv|lt|lb|mk|mg|ms|ml|mt|mi|mr|mn|my|ne|no|ps|fa|pl|pt|pa|ro|ru|sm|gd|sr|st|sn|sd|si|sk|sl|so|es|su|sw|sv|tg|ta|te|th|tr|uk|ur|uz|vi|cy|xh|yi|yo|zu|zz-zz)(?:$|/)(.*)$ /concretee/linguise/linguise.php?linguise_language=$1&original_url=$2 [L,QSA]
    RewriteCond %{REQUEST_FILENAME} !-f
    RewriteCond %{REQUEST_FILENAME}/index.html !-f
    RewriteCond %{REQUEST_FILENAME}/index.php !-f
    RewriteRule . /concretee/index.php [L]
</IfModule>
#4: Enable and customize the language switcher
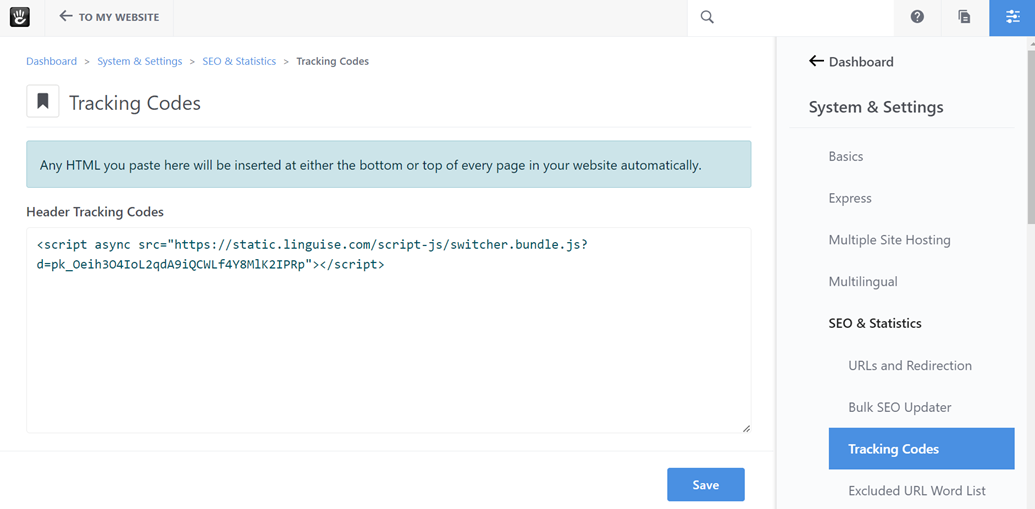
The Linguise JS script link must be loaded on all your Concrete CMS pages to display the language switcher with flags and alternate URLs (crucial for SEO). You can find the script link under domain settings in your Linguise dashboard.

To load the script in Concrete CMS, insert the code into the header.php file or within your site’s <head> section through the Admin panel by navigating to System & Settings > SEO & Statistics.
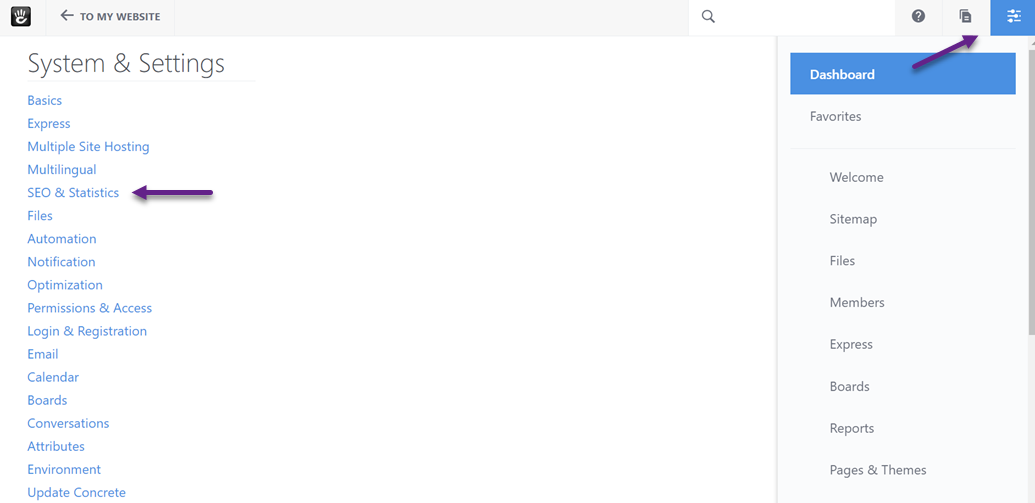
Then, add it under Tracking Codes.
By default, the switcher appears in the top-right corner.
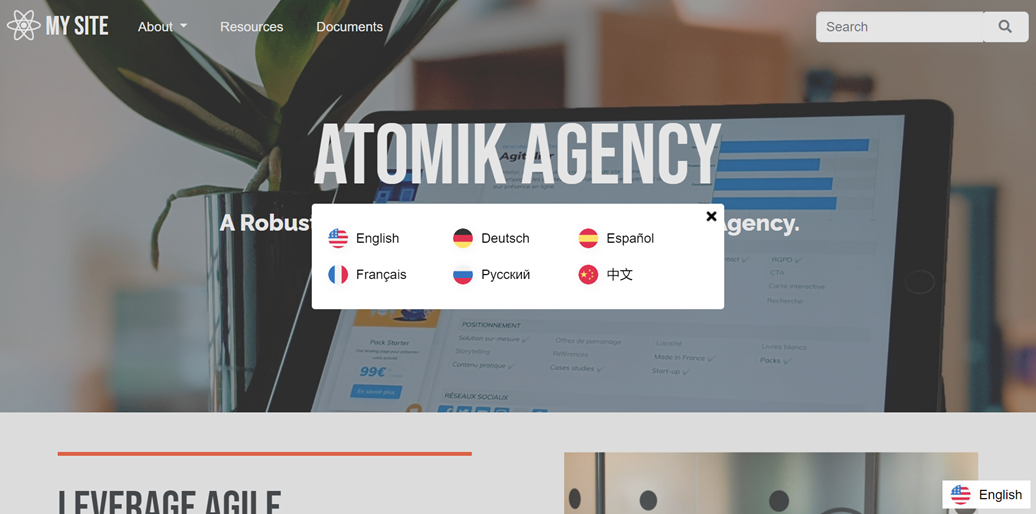
However, your dashboard can customise its appearance using the “Language flags display” feature.
#5: Configure the main display
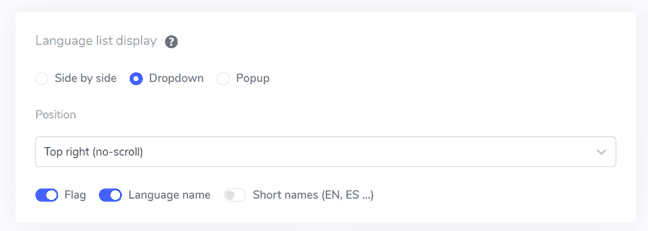
To start setting up the language switcher, navigate to the “Settings” > “Language Flags Display” section in the Linguise dashboard. Here, you can adjust several settings.
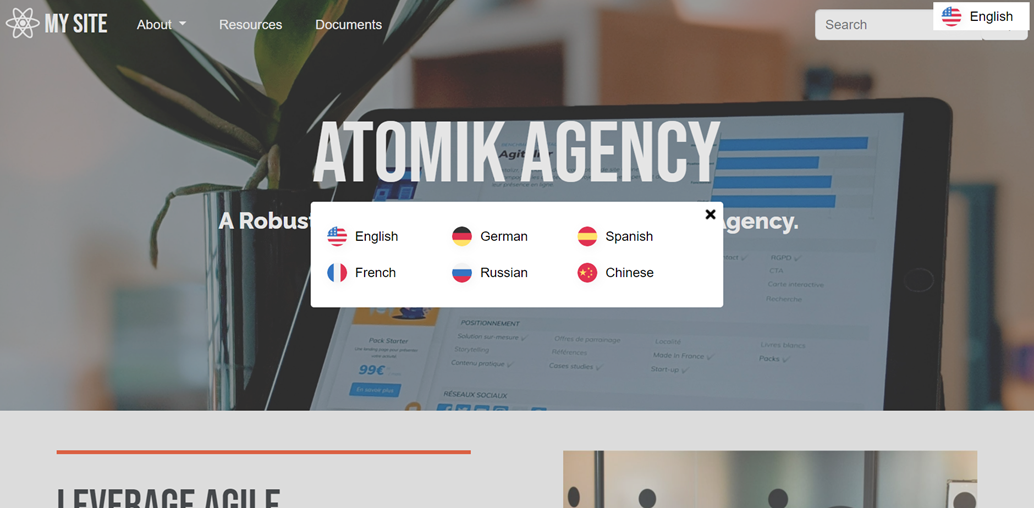
- Flag icon style: Choose from three display styles: side-by-side, dropdown menu, or popup.
- Position: Select the location of the language switcher on your website, ensuring it is easily accessible to visitors.
#6: Customize the flag design
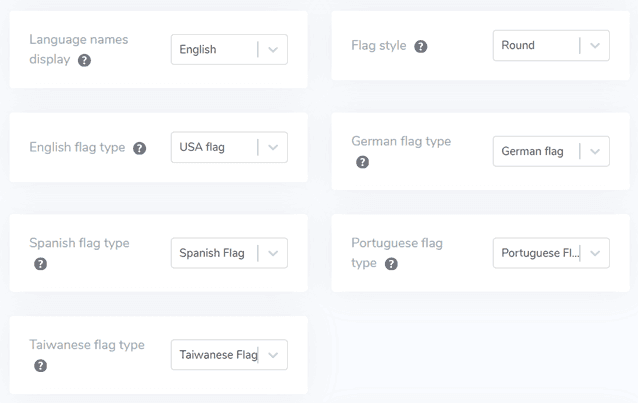
After setting up the main display, you can customize the design of the language flags.
- Display language name: Decide whether to display the name based on the country or the language, such as “French” or “Français.”
- English flag type: This option allows you to differentiate between US or British English variations and applies similarly to Spanish, Portuguese, or German.
- Flag style: Select the shape of the flag icon, either round or rectangular.
#7: Adjust color and size
Next, you can personalize the color and size of the flags.
- Flag border-radius: Set the radius in pixels for the rectangular flags.
- Language name color: Choose the default text color for displaying the language names.
- Popup language color: Specify the text color for language titles in the popup or dropdown.
- Flag size: Adjust the size of the flag icons.
- Language name hover color: Set the hover color for language names.
- Popup language hover color: Define the hover color for language titles in the popup or dropdown.

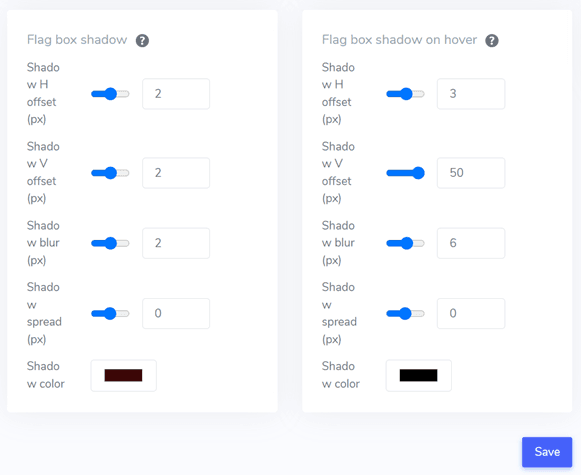
#8: Add a flag box-shadow
Lastly, you can customize the flag box shadow settings.
- The first option adds a shadow effect to the flag icons displayed on your website.
- The second option controls the shadow effect when users hover over the language flags.
Once satisfied with the settings, click “Save” to apply the changes. Visit your Concrete CMS website to confirm that the language switcher is working as expected and to preview its appearance.
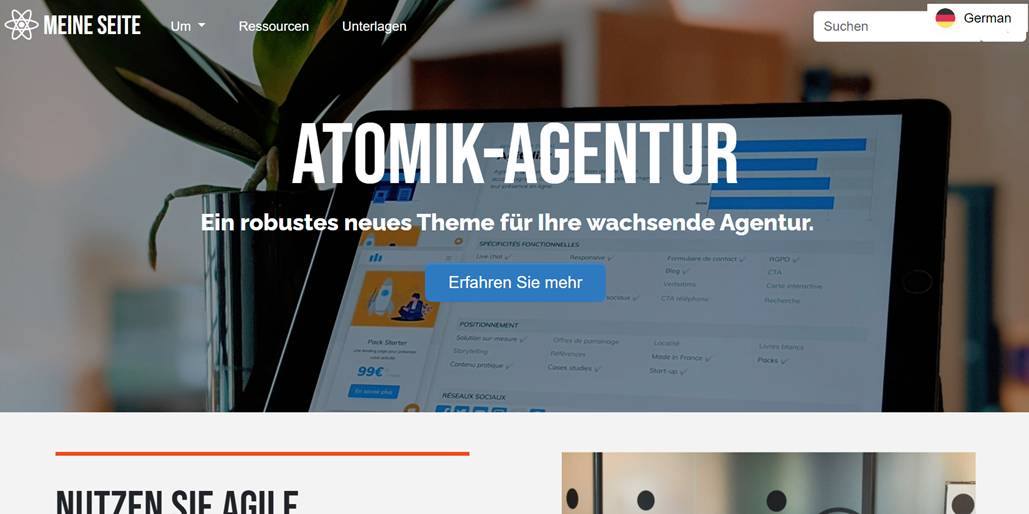
You can also translate the site into additional languages, such as German.
Best practices for optimizing language switcher on Concrete CMS
Optimizing the language switcher on Concrete CMS enhances the user experience in a multilingual environment. Below are key tips to improve the language switcher on your platform.
Using language names and flags
Combining language names with flag icons is an effective way to make your language switcher more user-friendly. This approach offers two visual cues, helping users quickly identify and select their language of choice. The language name provides clarity, while the flag offers a visual reference, making it easier for users to choose, especially when a language is used in multiple countries with different flags.
For example, if your Concrete CMS site caters to a global e-commerce audience, combining “🇺🇸 English,” “🇫🇷 Français,” and “🇩🇪 Deutsch” in the language, switcher can make it easier for users to quickly locate their preferred language, enhancing their shopping experience and helping them navigate the site effortlessly.
Recognizable flag icons
It’s essential to use clear, high-quality flag icons that are easily recognisable, even in smaller sizes. These icons help users identify their language quickly without having to read text. When needed, it’s important to choose culturally sensitive icons that represent languages rather than countries. For instance, using a neutral symbol for a widely spoken language like Arabic may be more appropriate than selecting a national flag.
For instance, a Concrete CMS platform designed for a global travel agency might use the Spanish flag for Spanish, the Canadian flag for French, and a globe icon for widely spoken languages like English. This ensures the icons are clear and intuitive, making it easy for users to select their preferred language while exploring travel packages.
Language switcher strategically

The language switcher should be placed where it is easily visible and accessible to users without cluttering the interface. Common placement options include the site’s header, footer, or main navigation menu. Consistency in placement across all pages is crucial so users can find it anywhere on the site.
For example, a Concrete CMS site could position the switcher in the top right corner of the header, ensuring that it remains visible as users scroll through pages. For mobile, integrating it into the hamburger menu maintains accessibility while saving space.
Maintain consistency across pages
It is important to maintain consistency in appearance and functionality. The language switcher should operate the same way on every page, and when users switch languages, they should remain on the same page with content translated into the new language. This improves user workflow and makes navigation more intuitive.
For example, a dropdown language switcher appears consistently across home pages, contact pages, and others. This would allow users to change languages seamlessly without losing their place in the material.
Conclusion
Setting up a language switcher and implementing automatic translation on the Concrete CMS website can provide a seamless multilingual experience for your users. Following the steps outlined in this guide, you can integrate a language switcher and customize it to fit your site’s needs.
Effectively optimizing the language switcher will enhance user experience and engagement. To get started, sign up for a Linguise account, integrate it with your Concrete CMS site, and configure the language selector based on your preferences. This ensures that visitors can easily navigate your platform in their preferred language.

