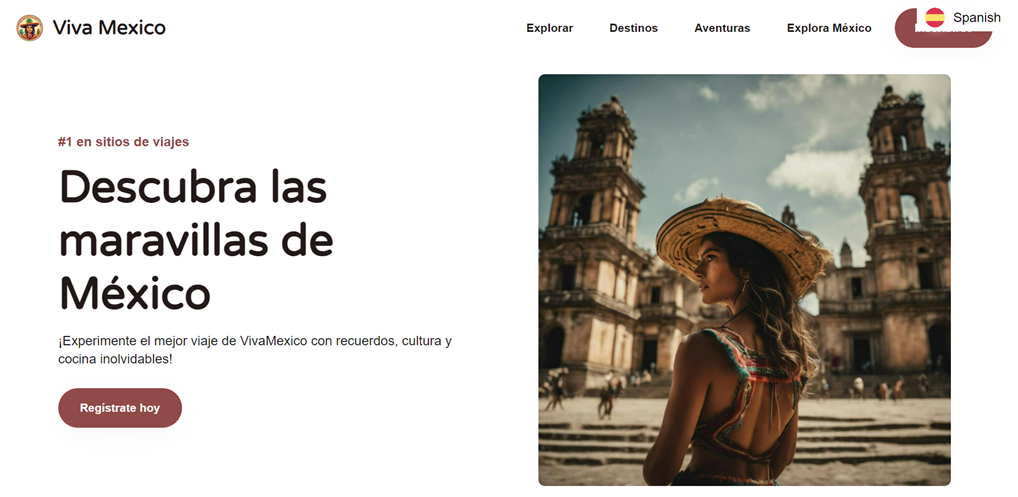
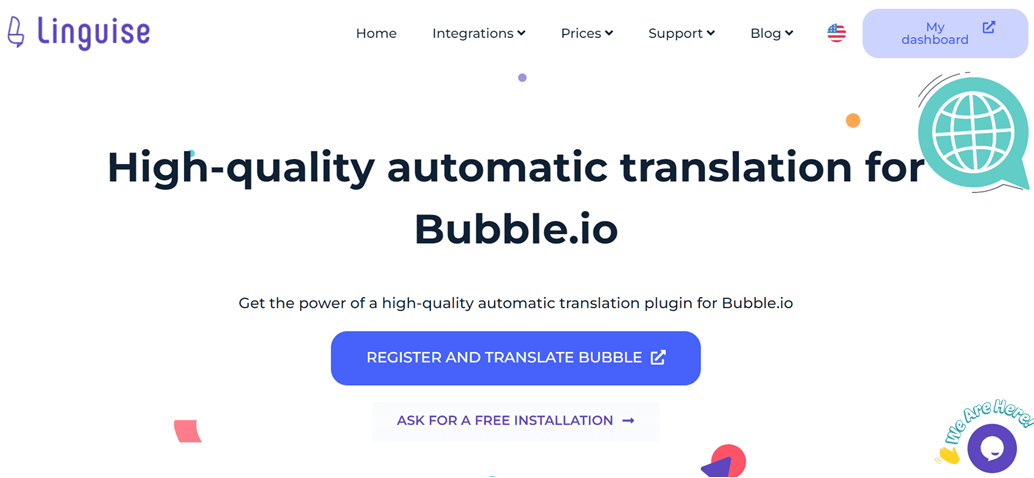
Setting a language switcher on the Bubble.io website can make it easier for users to switch languages. This feature is particularly valuable for applications with a global audience, allowing users to interact with the platform in their preferred language. Bubble.io, a popular no-code development platform, offers built-in localization capabilities that enable developers to create multilingual applications without extensive coding knowledge.
To implement a language switcher in Bubble.io, developers typically start by defining the languages they want to support in the app’s settings. They then create a dropdown or button element that users can interact with to change the language. In this article, we will discuss setting up a language switcher on Bubble.io with one of the automatic translation service websites.
Why is a language switcher important on the Bubble.io website?
Adding a language switcher on a website is not without reason. Here are why you need to set one up on a Bubble website.
- Makes it easier for users in other countries: A language switcher allows international users to view the website in their native language. For example, a Spanish user visiting an online store can switch to Spanish, making it easier to understand product details and complete purchases. CSA Research studies show that 76% of online shoppers prefer buying products when information is available in their language, highlighting the importance of this feature for user comfort and accessibility.
- Optimizing the website in search results of other countries: With a language switcher, your Bubble.io website can rank better in foreign language searches. For instance, a French version of your site is more likely to appear in French Google searches. This improved visibility can significantly increase international traffic.
- Increase sales conversion: Offering content in multiple languages can boost sales. An online course platform allowing users to switch languages can attract a broader audience and increase enrollments. This approach is effective because consumers are more likely to buy from websites that provide information in their native language, directly impacting your conversion rates.
- Improves user engagement and retention: A language switcher can keep users on your site longer. For instance, users interacting in their preferred language on a social networking app tend to stay engaged longer. This increased engagement is significant, as users typically spend twice as much time on sites in their native language than those in a second language, leading to better user retention.
How to setup a language switcher on Bubble.io
Now that we understand the importance of switching languages on multilingual Bubble.io websites, let’s discuss how to implement it. Website translation services usually offer this feature, which can be tailored to the user’s needs.
However, not all translation services offer customizable and user-friendly language switchers. Therefore, choosing an automatic translation service compatible with various frameworks and providing flexible language-switching features is very important.
One automatic translation service that meets these criteria is Linguise. Linguise automatic translation offers a highly customizable and easy-to-use language-switching feature that integrates with popular CMS and web builders like Bubble.io.
Linguise provides seamless integration with the Bubble, allowing developers to easily incorporate language switching into their multilingual applications. By leveraging Linguise’s advanced features and user-friendly interface, you can simplify setting up and maintaining language switchers on your Bubble website.
Here are the steps to install Linguise on a Bubble.io website and set up the language switcher.
Step 1: Register Linguise account
Start by creating a free Linguise account and adding your website domain. You can utilize the 30-day free trial before choosing a subscription plan.
Then, you’ll need to register your domain to authorize the translation. Copy your domain name, including “https://,” and select “other” as the platform.

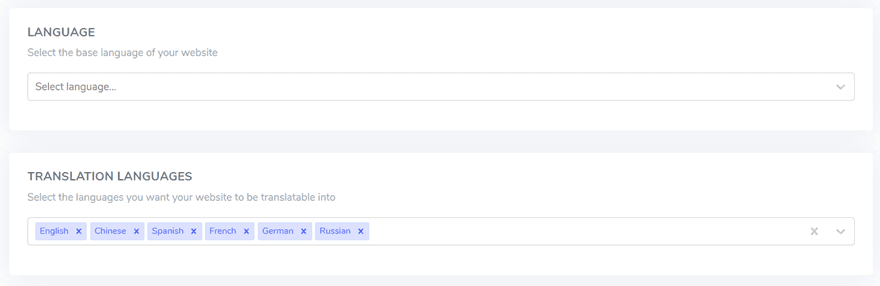
Next, select your source and target languages.
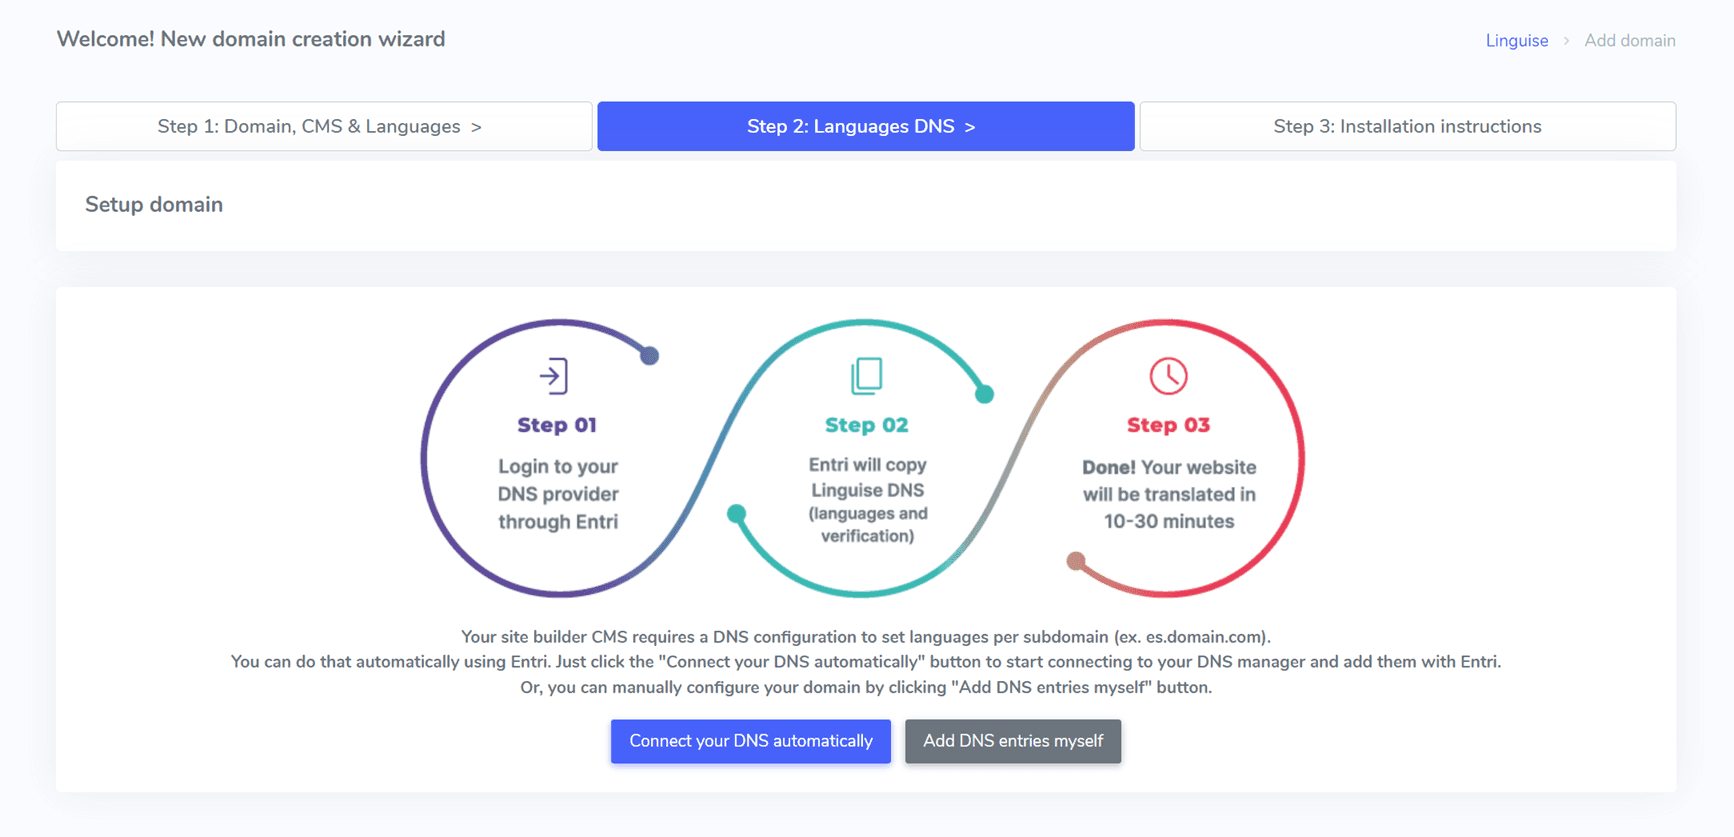
Step 2: Automatically add DNS using Entri
After registering your website on the Linguise dashboard, you will have two installation options.
For automatic DNS record addition, click on “Connect your DNS automatically.” This feature, called Entri, simplifies the installation process by managing the DNS records for you. Alternatively, you can manually copy the DNS records to your domain provider.
Clicking the button prompts Entri to analyze your registered website URL and examine your public DNS records, identifying the necessary provider and DNS records.

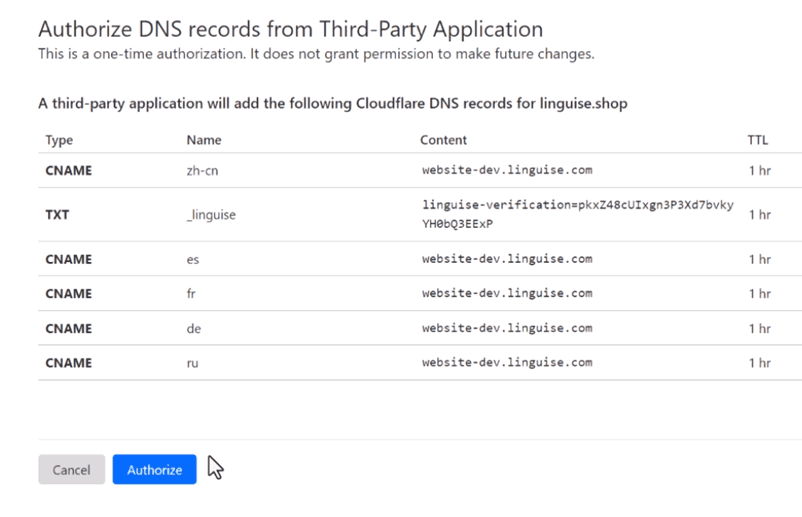
Next, click on “Authorize with [your domain provider]” (e.g., Cloudflare). This action redirects you to your domain provider’s login page, where you can log in and proceed.

Once logged in, Entri will automatically add the appropriate DNS records—one DNS per language and one TXT DNS for the validation key—to your domain.
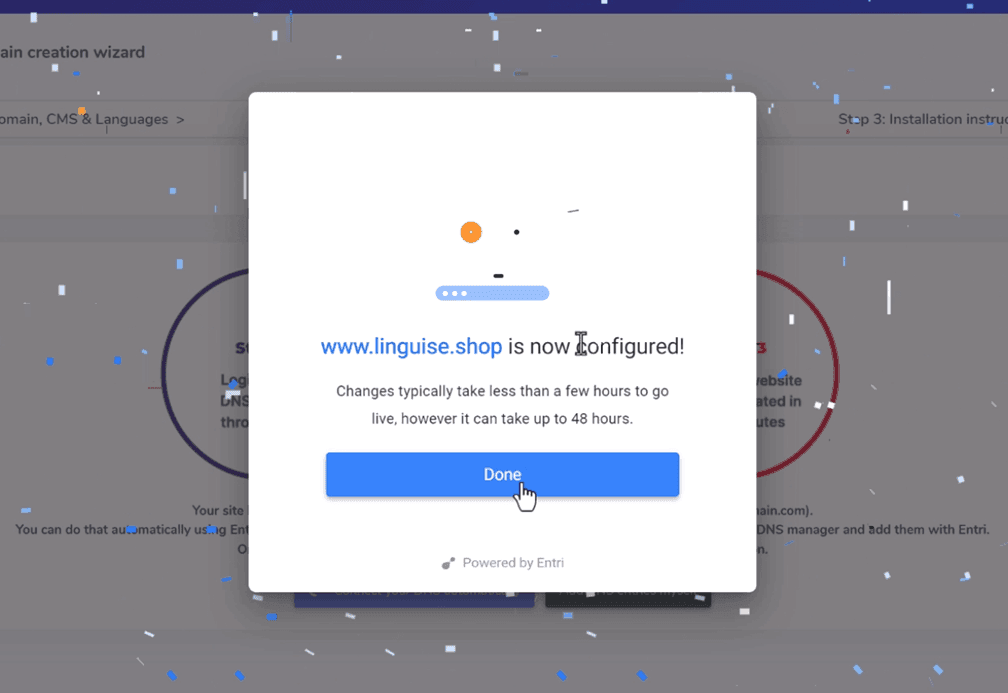
After authorization, Entri will notify you that all DNS settings have been successfully configured. The translation feature should be usable once all DNS entries propagate on your domain, typically taking 20 to 30 minutes.
For manual installation, you can follow the steps provided below.
Step 3: Copy DNS records
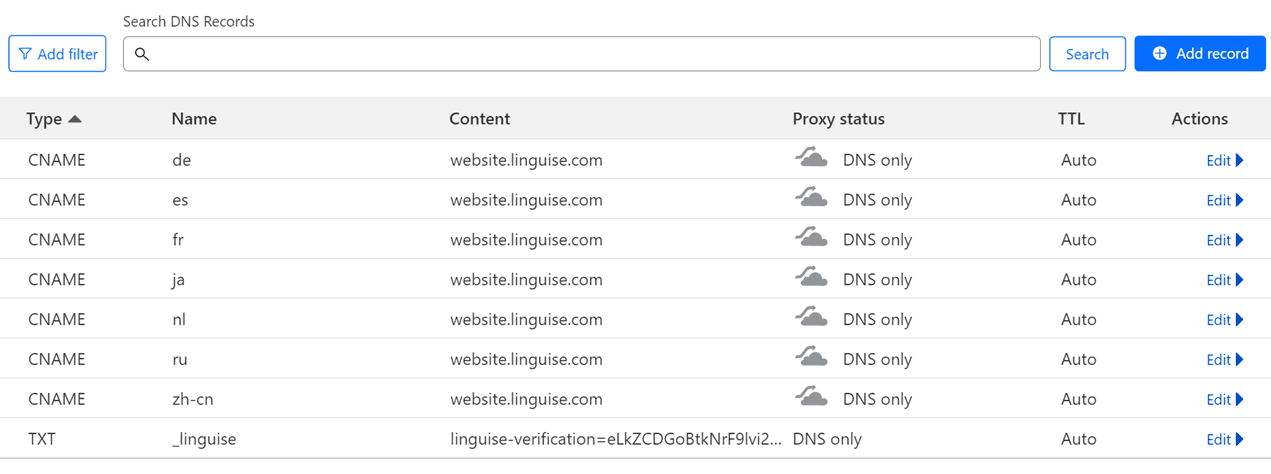
For manual installation, you’ll be redirected to a screen displaying the DNS records needed to set up your multilingual pages, such as fr.domain.com or es.domain.com.
Copy these elements to your Bubble.io DNS configuration.
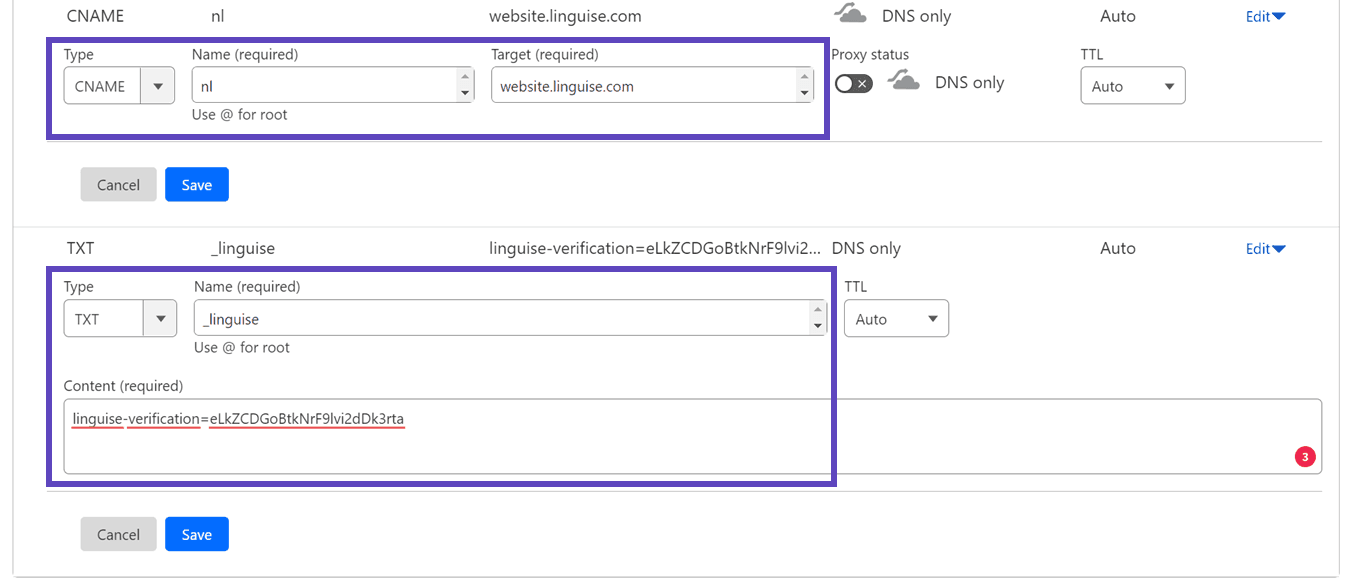
Next, access your domain manager and navigate to the DNS setup area. Follow the instructions to copy:
- One TXT record for domain verification
- One or several CNAME records for the languages
Here are examples for each record type (TXT and CNAME).
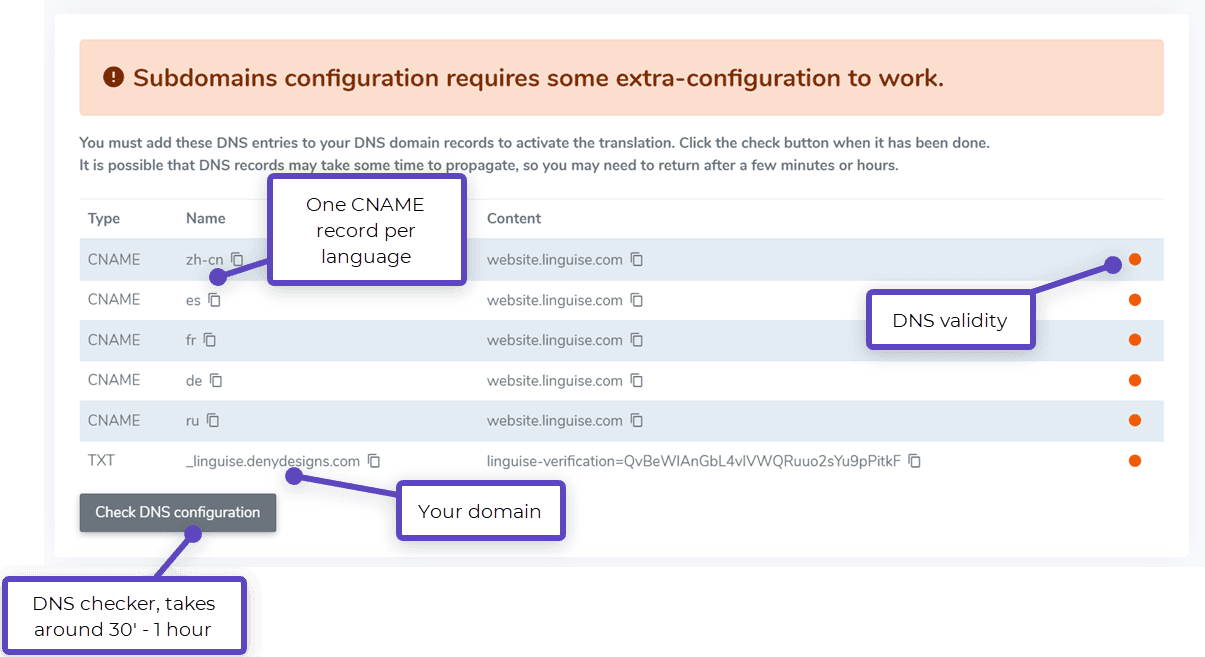
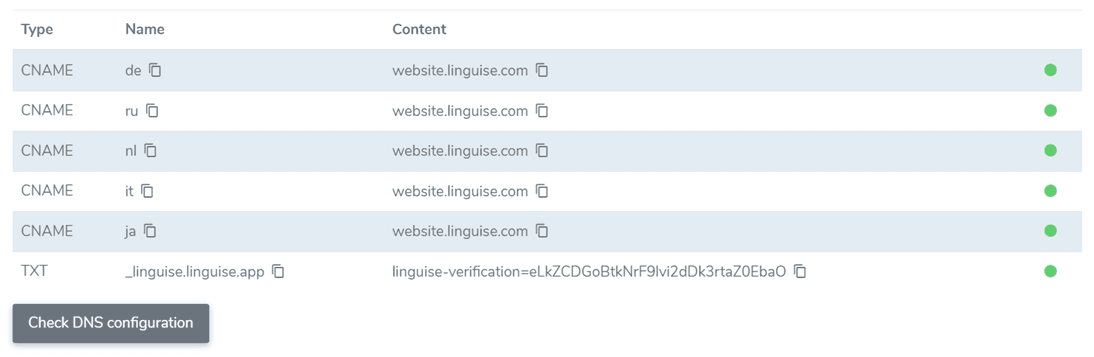
Once you’ve added all your records, your configuration should look like this.
Step 4: Verify DNS
After adding all your records to your domain DNS, click the “Check DNS configuration” button to verify DNS propagation.
DNS validation usually takes about 30 minutes to 1 hour. Once completed, you should see green indicators next to the DNS list in the Linguise dashboard. You’re almost ready to translate your Bubble.io website; all that is left is linking to the language switcher with country flags.
Step 5: Enable and language switcher
The language switcher is a flag popup that allows users to select their preferred language. To implement it, copy the code provided at the end of the domain registration process or within the domain settings to the header of your Bubble.io site pages. The flag language switcher will then automatically appear on your public website.

Next, go to your Bubble website panel. Click ‘Settings’ in the left sidebar menu and select “SEO / metatags.”
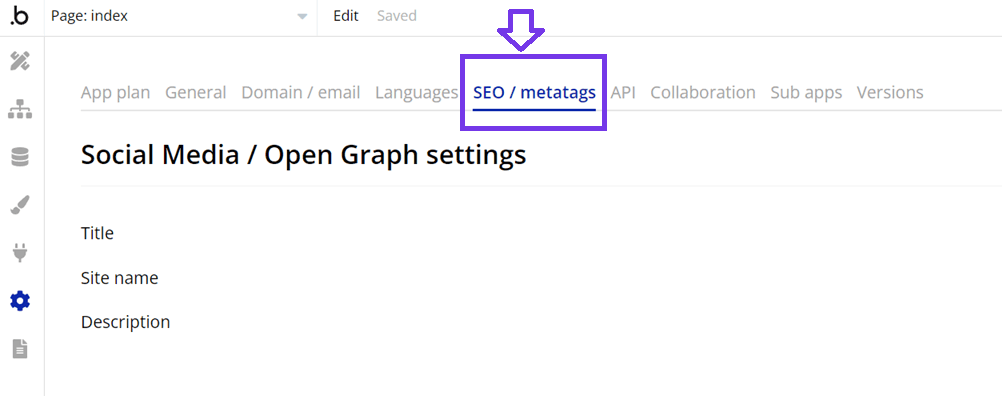
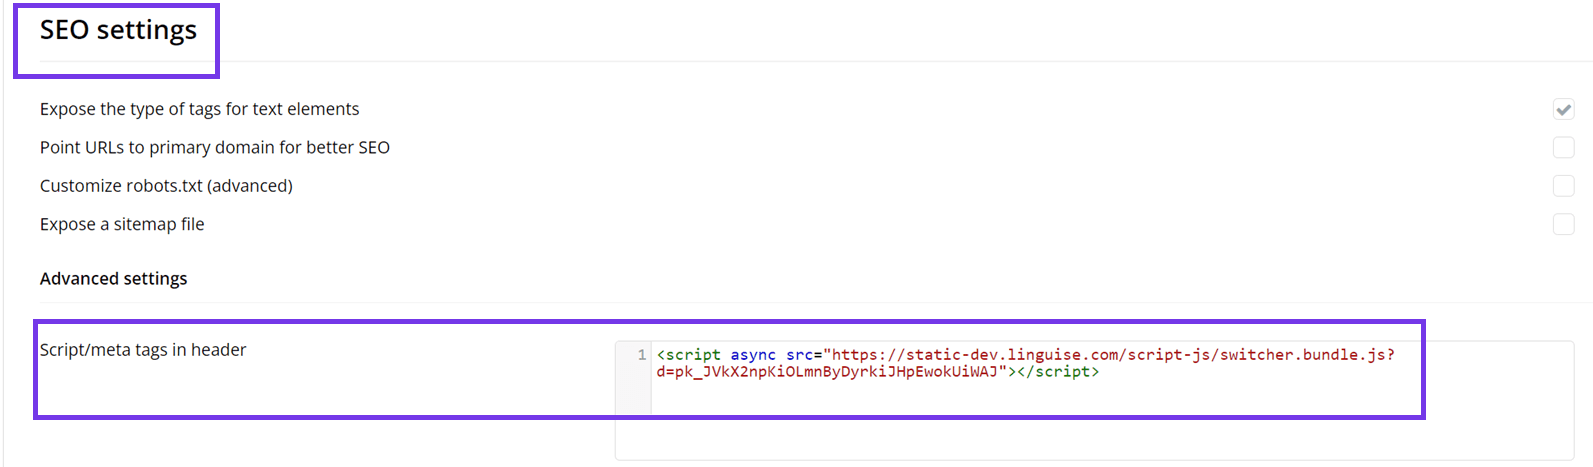
Scroll down to “Script/meta tags in header” under “Advanced Settings.” Paste the Linguise script you copied earlier, then click ‘Save’ and publish your site.
Step 5: Configure main display
To begin setting up the language switcher, navigate to the “Settings” > “Language flags display” section in the Linguise dashboard. On this page, you can adjust several settings
- Flag icon style: Choose from three options: side-by-side display, dropdown menu, or popup.
- Position: Select where the language switcher will appear on your site. Various position options are available; ensure it’s easily accessible to visitors.
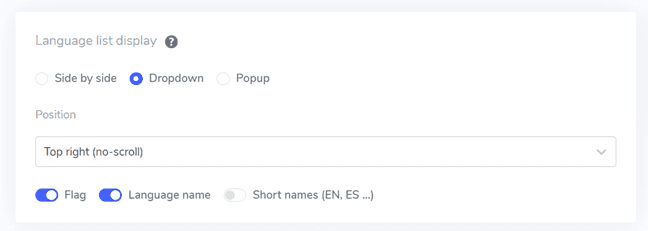
You can combine the display of flags and language names, flags and language abbreviations, or just language names. Using both flags and language names is recommended for easier user recognition.
Step 6: Set the flag's design
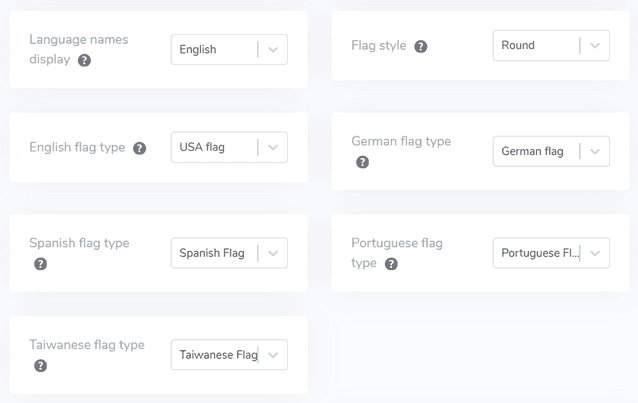
After configuring the main display, further customize the design of the flags that will be shown.
- Display language name: You can choose to show the language name based on either the country name or the language name itself. For example, you could display “French” or “Français.”
- English flag type: This option is useful for languages with multiple variations, such as US or British English (and also applies to Spanish, Taiwanese, German, and Portuguese).
- Flag style: Choose the shape of the flag icon, either round or rectangular.
Step 7: Customize color and size
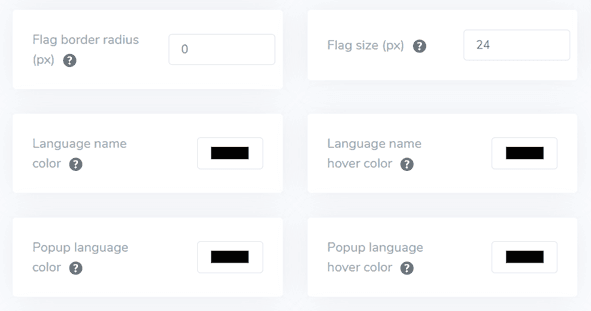
After configuring the flag design, you can further customize the color and size of the flags. Here are the settings you can adjust:
- Flag border radius: Customize the radius in pixels for the rectangular flag style.
- Language name color: Choose the default text color to display the language name.
- Popup language color: Set the color of the language title text in the popup or dropdown area.
- Flag size: Adjust the size of the flag icons.
- Language name hover color: Set the text color that appears when the user hovers over the language name.
- Popup language hover color: Set the text color that appears when the user hovers over the language title in the popup or dropdown area.
Step 8: Setting the flag box shadow
Finally, you can adjust the flag box shadow settings. The first option allows you to apply a shadow effect to each flag icon displayed on your website. The next option controls the shadow effect when users hover their mouse over the language flags.
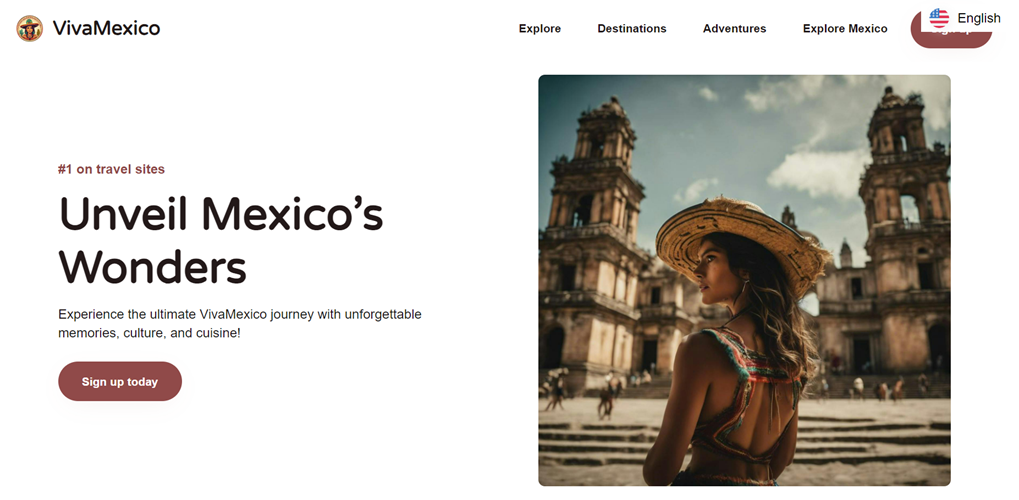
Once you’ve made all the desired adjustments, click the Save button to apply the customization changes. Then, visit your Bubble website to verify the configuration has been successfully applied. This is how the language switcher will appear.
After the setup, you can see how the language switcher functions on your Bubble multilingual website.
Next, you can translate the website into other languages like Spanish.
Best practices for optimizing language switcher on Bubble.io
After successfully setting up the language switcher on a Bubble multilingual website, it’s important to consider tips for optimizing the language switcher for both your site and visitors.
Utilize an easily identifiable language flag logo
When implementing a language switcher on your Bubble.io website, using easily recognizable language flags or icons is crucial. These visual cues help users quickly identify and select their preferred language. For example, a globe icon is universally understood to represent language options. Alternatively, you could use country flags, but be aware that this can sometimes be problematic as languages aren’t always tied to a single country.
Example: Amazon’s website uses a small globe icon next to the currently selected language (e.g., “EN”) in the top navigation bar. This simple yet effective approach allows users to quickly locate the language options regardless of their current language setting.
Incorporate language names alongside flags
While flags can be helpful, they shouldn’t be used alone. Including the name of the language in its native script alongside the flag or icon provides clarity and avoids potential confusion. This is particularly important for languages spoken in multiple countries or regions.
Example: The language switcher on the Airbnb website displays the language name and the country flag. For instance, it shows “English (US)” with the US flag, and “Français” with the French flag. This combination ensures users can accurately identify their preferred language option.
Position the language switcher button thoughtfully
The placement of your language switcher is critical for user accessibility. Common locations include the top right corner of the header, in the footer, or within the main navigation menu. The key is to make it easily discoverable without cluttering the main content area.
Example: On the website tiffany.com, the language switcher is in the bottom right corner of the page, always visible and accessible. This consistent placement ensures users can quickly find and use the language options regardless of where they are on the site.
Design the language switcher to be responsive

Ensure your language switcher works well on all devices, from desktop computers to smartphones. On smaller screens, you might need to adapt the design – for instance, using a dropdown menu instead of a horizontal list of options.
Example: The UNESCO website’s language switcher adapts beautifully across devices. On the desktop, it appears as a horizontal list in the header. On mobile, it transforms into a compact dropdown menu, ensuring usability without compromising the mobile layout.
Ensure the language switcher is consistent across pages
Maintain the same design, functionality, and position of your language switcher across all pages of your Bubble.io website. This consistency helps users navigate your site more efficiently, as they know exactly where to find the language options regardless of their current page.
Example: The website maintains its language switcher consistently in the footer across all pages, from the homepage to product pages and the checkout process. This consistency ensures that users can easily switch languages anytime during their browsing or shopping experience.
Setup a language switcher on the Bubble multilingual website using Linguise!
Now, you already understand how to select the language for the Bubble.io multilingual website. Reading out the language selector can provide various benefits and further lead to optimization based on the previously mentioned points.
Optimizing the language selector effectively can significantly improve the user experience. Sign up for a Linguise account, integrate it with your Bubble.io website, and customize the language selector to improve the user experience.