Multilingual websites are one of the things that are highly prioritized by website owners. Most owners want to have a fully multilingual website because it can reach a wider audience.
But sometimes there are situations where we only need to translate part of the WordPress site. Some parts cannot be translated so that they look pure and their meaning does not change.
For those of you who intend to exclude WordPress content from translation, but are still confused about how, let’s see the explanation below.
Why exclude content from translations?
There are several reasons why you might want to translate content in WordPress, but also want to exclude some parts of it. When it’s a private part of a website or a part where you interact only in one language, like a support ticket system
Not only content can be excluded, even the most detailed parts such as text strings, content blocks, and brand names on a page.
Partially translate WordPress content with Linguise
For those of you who want to partially translate WordPress content, there are various choices of tools that you can use. One such tool is Linguise.
Linguise is an automatic website translation service, Linguise allows you to edit translations in various types of CMS, such as WordPress, Joomla, WooCommerce, and integrated with other CMS.
One of the features of Linguise is translating according to the rules that you have made. Among them, such as translating some WordPress content based on the content and URL of the page.
To be able to use this service, you can try it free for 1 month without needing a credit card. You can find Linguise in the WordPress plugin or register directly on the Linguise site. After registering you will get dashboard facilities to manage domains, multilingualism, translation rules, and many more.
How to exclude content from translation?
How translate some content into Linguise can be done in three ways, the first is using content exclusion. Here’s how to do it.
Step 1: Open the dashboard select the Rules tab
The first step is to open the Linguise dashboard. On the dashboard there are several tab menus, then select the Rules tab as shown below.

After entering the Rules tab, a display of several rules that have been made before appears. Then click the Add new Rule button to create a new rule.

Step 2: Select the Content Exclusion tab
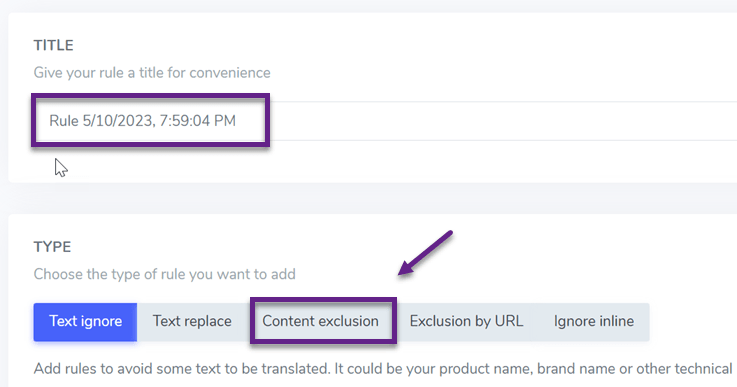
Now you are on the page for creating new rules. In the Title section, you can enter the title rules that will be made or just leave the default. Then in the Type section select Content Exclusion.
Step 3: Complete the CSS Selector, Apply URL, & Apply to Languages
The third step is to complete the following columns. The first column is the CSS Selector, here you can enter the CSS code whose contents will be partially translated.
If you want to enter the code again, then select Add New.

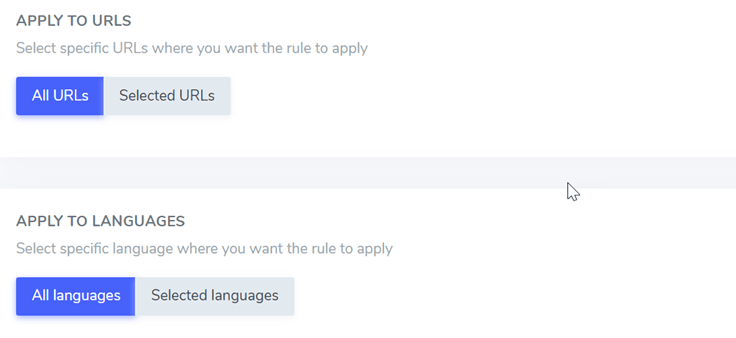
Then you can choose to apply these rules to all URL pages or only selected URLs. Then you can also set what you want to apply to any language.
If all fields are filled in, click Save to save the rules.
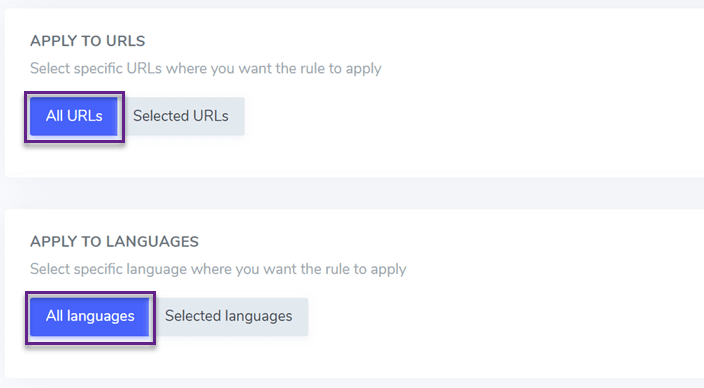
Done, you have successfully translated partially of the WordPress content you want.
How to exclude content from the translation by URL?
In addition to using the Content Exclusion tool, you can also exclude translated content based on URLs. Here’s how to do it.
Step 1: Open the dashboard, select the Rules tab
Just like before, the first step is to open the Linguise dashboard. On the dashboard there are several tab menus, then select the Rules tab as shown below.

After entering the Rules tab, a display of several rules that have been made before appears. Then click Add new Rule to create a new rule.

Step 2: Select the Exclusion by URL tab
After that, select Exclusion by URL, and in the Title section you can enter the name of the rule.

Step 3: Complete the Apply URL, Use Multilingual URL & Apply to Languages
Then the next step you can choose to apply to all URLs or several URLs, like the example below, namely on one URL only.
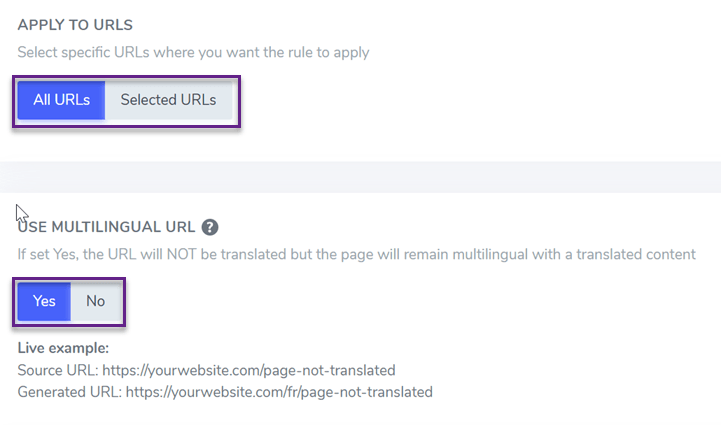
The next column is translating the URL, if you select Yes, the URL will not be translated, but the content within the URL will still be translated according to the visitor’s language.
After that, you can also apply these rules in several languages. If everything is filled in, don’t forget to click Save to save and apply the rules.

How to exclude content from the translation with Text Ignore
Apart from the two methods above, there is still one other way, namely with text ignore. Here’s how to do it.
Step 1: Open the dashboard, select the Rules tab
The first step is to open the Linguise dashboard. On the dashboard there are several tab menus, then select the Rules tab as shown below.

After entering the Rules tab, a display of several rules that have been made before appears. Then click Add new Rule to create a new rule.

Step 2: Select the Text Ignore tab
After that, in the Title column, enter the rule title and in the Type column, select Text Ignore.

Step 3: Complete the Text to Ignore, Apply to URL, HTML Content, Languages and Exclude in URL
Then in the Text to Ignore column, enter the words or sentences that you don’t want to translate. Then you can apply it to all URLs or only selected URLs.
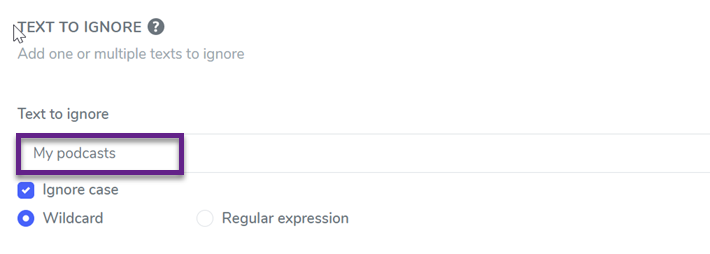
Then apply this rule to all languages or to a specific language, then you can also apply it to all content or to specific CSS code.
Finally, in the Exclude in URLs column, if you select Yes, this rule will also be applied to URL translations. Then click Save.
Now, Partially Translate WordPress Content with Linguise!
Well, now you know how to partially translate WordPress content, right? In Linguise you can translate some content based on Content or URL.
You don’t have to worry if there is content that you don’t want to translate. What are you waiting for, let’s Register Linguise and use it for your site’s automatic translation service.

